FoneDog Screen Recorder
FoneDog Screen Recorder
Special Offer
Special Offer


By Adela D. Louie, Last updated: September 20, 2022
If you have an iPhone and a Mac computer as well, it is a must that you have enough knowledge on how to transfer music from Mac to iPhone, this applies to other files as well. The good news is both of the devices are products of Apple, which makes the task easier to execute and handle.
To make the situation a lot easier to do, we have prepared some of the methods that you can follow to easily transfer music from Mac to iPhone. We are also going to discuss the steps that you have to follow for each of the methods so you can immediately try all of them. With these methods in hand, you can even learn how to transfer data from your iPhone to other iPhone device!
Part #1: What Are The Steps to Transfer Music from Mac to iPhone Using Dropbox?Part #2: What Are The Steps to Transfer Music from Mac to iPhone through The Use of AirdropPart #3: The Greatest Tool to Transfer Your FilesPart #4: To Summarize It All
The methods on how to transfer music from Mac to iPhone also depend on how large your Music library is. In case you do not have a lot, you can use Dropbox, which is one of the cloud-based apps that is commonly used today. The reason why this is applicable to a few music files only is that it will only allow you to store 2 GB of free space per single account. It is also good to use since it will also make a backup in the cloud, aside from moving or transferring your files. Let us check the steps on how you can use Dropbox to transfer music from Mac to iPhone.

The initial thing that you can start doing is to upload your music files to your Dropbox account. The best thing about this method is you can use a lot of methods to transfer your music files from Mac to Dropbox. You can go find the Dropbox icon using the “Finder” and try to drag and drop the files.
You can also try to copy and paste the music files to the folder of Dropbox that you have saved on your Mac computer. To start, you have to download the Dropbox app and install it on your mac computer. In case you do not want to use the app or download it to your Mac computer, you can also go to the website of Dropbox instead.
Once you are on the website, type in your credentials to log in and then start uploading the files by tapping the “Upload” button that you will see from the sidebar of the interface.
Secondly, we can now learn how to download music from Dropbox to iPhone. Once you have made sure that you have successfully uploaded all your music files to Dropbox, open the Dropbox app. And you can now start browsing and selecting the music files that you wanted to be transferred to your iPhone. Tap the three-dot icon that you will see near the audio file that you wanted to transfer.
Another good thing about transferring your files from Mac to iPhone is you can use a feature that is common to Apple devices, the Airdrop. When it comes to Android devices, the equivalent feature is Bluetooth. You can use this feature to transfer your files wirelessly. You just have to remember to turn on the Bluetooth and the Wi-Fi connection on both devices. You also have to remember that the two devices must be near each other to effectively transfer music from Mac to iPhone through the use of Airdrop.
To start, open the Airdrop app using “Finder” or using “Spotlight” on your Mac computer, and then turn it “On”. At the bottom part, you can be able to modify the way that it can be possible for other people for a very smooth transfer and connection. Then get your iPhone near your Mac computer, and then go to “Settings” to enable Airdrop. There is also an option where you can go to the “Control Center” to be able to turn “On” Airdrop. You can also set the visibility of your Airdrop here.
Then, you can now tap “Finder”, and then proceed to where you have stored your music files. It is now time to drag and drop the music files to the Airdrop append then choose iPhone as your target device. This will start the transferring or sending of your music files to your iPhone device.
For the last step, you will be notified with a prompt. You have to tap “Accept” and then you just have to wait until all the files have been successfully sent.
It is really not a joke to have your files transferred from one device to another one. It is actually a lot of work to do, especially if you are about to deal with two types of devices that have different operating systems.
But since we are talking about how to transfer music from Mac to iPhone, things can get easier compared to when you are dealing with two completely different mediums or platforms. So, how are you going to transfer the files, if you have two devices that have different operating systems?
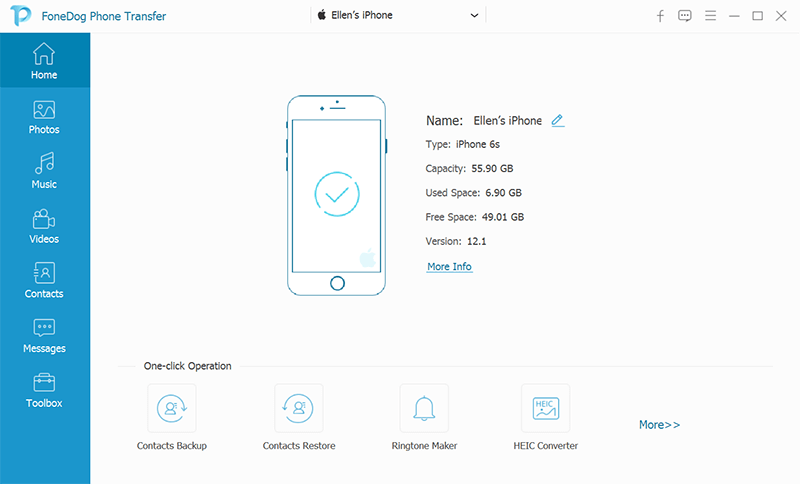
Well, we are going to share with you a tool called the FoneDog Phone Transfer tool, and mind you this one comes in really big packages. This tool can be considered one of the most useful and efficient tools to transfer your files across devices.
Phone Transfer
Transfer files among iOS, Android and Windows PC.
Transfer and backup text messages, contacts, photos, video, music on computer easily.
Fully compatible with the latest iOS and Android.
Free Download

Apart from that, it can even be used to create backup files of the data or information that you wanted to transfer; it is a way that you can be able to secure the safety of the files from being accidentally deleted. And it can not only help you transfer files, but it can also help you convert files to more versatile file formats specifically HEIC files to JPEG or PNG file formats.
And if you think we have mentioned everything, we cannot stop there yet, you can also use the amazing file-transferring tool to create free ringtones that you can use on your devices since it is a free ringtone maker! This tool is ultimately the most efficient, complete, and amazing partner that you can ever have!
And aside from being the most reliable tool when it comes to many things, you can also say that this tool is so easy to use that you will never be confused even though you are just a beginner at using it! Well, as long as you have a guide, nothing will go wrong; let us check out the guide using the FoneDog Phone Transfer tool below.
People Also Read[2022]Learning How to Transfer Photos from Samsung to iPhone3 Practical Ways to Transfer Videos from iPhone to Android!
There can be a lot of reasons why we wanted to learn how to transfer music from Mac to iPhone. Aside from you may have stored a lot of songs on your Mac computer; it is also a way to keep your backup music files. The best thing to do is to learn how you can be able to quickly or manually transfer your files back to your iPhone anytime. Well, it is always a good feeling to share something that can be useful to you, we hope that you have learned a lot of methods and information that would be necessary whenever you wanted to transfer music from Mac to iPhone whenever you need or whenever you want.
Leave a Comment
Comment

Tech Website Writing /Content Optimization
Singing, smiling, surprising every day!
So as a technical writer, it is my duty to gather effective and reliable solutions to answer questions on how to deal with the issues they are having with their devices.
Phone Transfer
Transfer data from iPhone, Android, iOS, and Computer to Anywhere without any loss with FoneDog Phone Transfer. Such as photo, messages, contacts, music, etc.
Free DownloadHot Articles
 /
/
INTERESTINGDULL
/
SIMPLEDIFFICULT
Thank you! Here' re your choices:
Excellent
Rating: 4.7 / 5 (based on 60 ratings)
