FoneDog Screen Recorder
FoneDog Screen Recorder
Special Offer
Special Offer


By Adela D. Louie, Last updated: December 21, 2023
Ever wished you could cherish those heartwarming conversations or hilarious exchanges on FaceTime with your loved ones forever? Look no further! This effectively unveils the essential steps and freely-use video recording tools needed to effortlessly record your FaceTime calls while preserving high-quality audio.
Whether it's for reliving precious memories or keeping a record for professional purposes, we've got you covered. Join us on this journey as we reveal the tricks and techniques to know how to record FaceTime with audio and also fully ensure you never miss a moment during your FaceTime calls. Get ready to master the art of recording your cherished conversations!
Part #1: How to Record FaceTime with Audio on MacOS/iPhone/iPadPart #2: Best App to Record FaceTime Conversation with Audio - FoneDog Screen RecorderConclusion
FaceTime is a video and audio calling application developed by Apple Inc. It's exclusive to Apple devices like iPhones, iPads, and Mac computers, allowing users to make free video and audio calls over the internet. Recording a FaceTime call with audio onto your MacOS, iPhone, or iPad involves a few steps, and it usually requires using a third-party app or screen recording feature on your device. Here a several methods or options you could use on how to record FaceTime with audio:
There are third-party apps available on the App Store that can help you record FaceTime calls with audio. These apps often provide additional features and flexibility for recording. Some popular ones include OBS Studio for Mac users (OBS is versatile and can do screen recording on Windows or Mac) and AceThinker iPhone Screen Recorder for iPhone users.
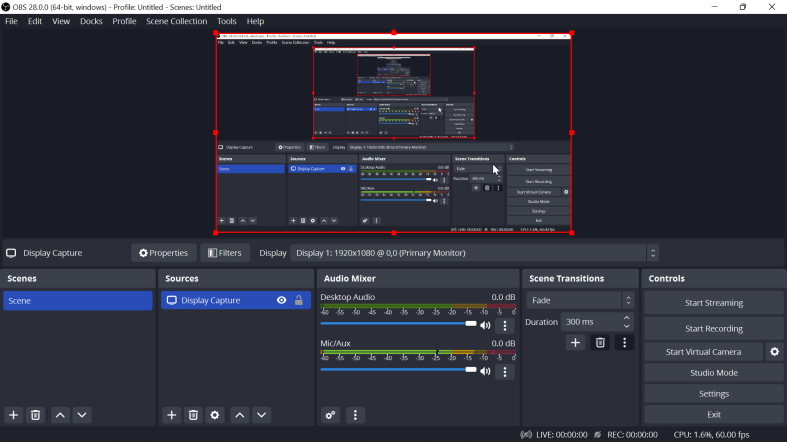
OBS Studio:
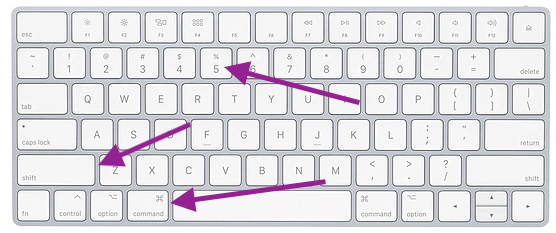
To use OBS Studio to record FaceTime audio on a Mac, you'll need to set up OBS to capture the audio from your FaceTime call. Follow these steps:
AceThinker iPhone Screen Recorder:
AceThinker iPhone Screen Recorder is a software that allows you to mirror and record your iOS device screen on your Mac. To use AceThinker iPhone Screen Recorder to capture FaceTime audio on your Mac, follow these steps:
Important Notes:
FoneDog Screen Recorder stands out as the quintessential tool designed to effortlessly record your FaceTime conversations while preserving pristine audio quality. This powerful software is meticulously crafted to cater specifically to Apple device users, providing a seamless and user-friendly experience for capturing memorable moments, preserving critical discussions, or archiving important exchanges.
![]() Free Download
For Windows
Free Download
For Windows
![]() Free Download
For normal Macs
Free Download
For normal Macs
![]() Free Download
For M1, M2, M3
Free Download
For M1, M2, M3
With FoneDog Screen Recorder, you can expertly document your FaceTime calls, ensuring every detail and nuance is captured in high-definition video paired with exceptional audio clarity. Whether it's for personal keepsakes, professional references, or educational purposes, FoneDog Screen Recorder emerges as the go-to solution, offering unparalleled reliability and ease of use.
To make use of the FoneDog Screen Recorder for screen recording and audio recording, follow these steps on how to record FaceTime with audio:
Screen Recording:
1. To get started, first, download and install FoneDog Screen Recorder on your computer. Make sure it works with your computer's operating system.
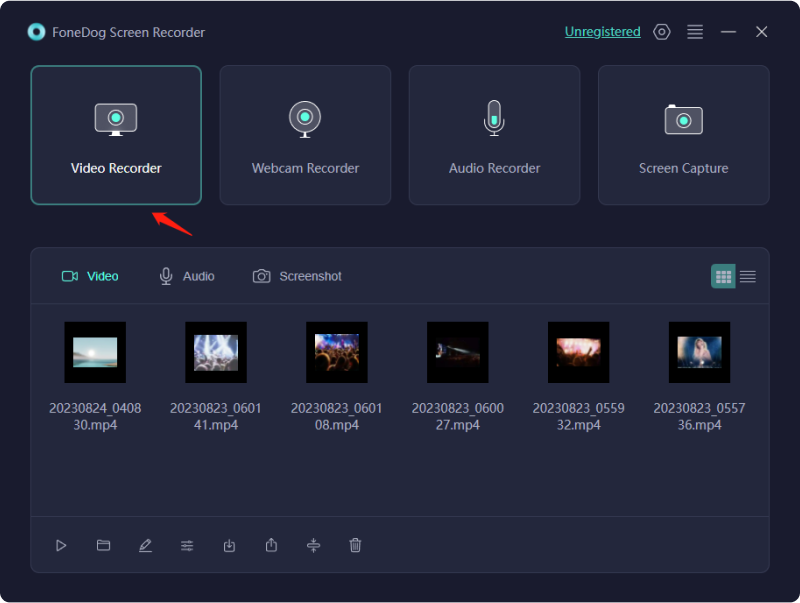
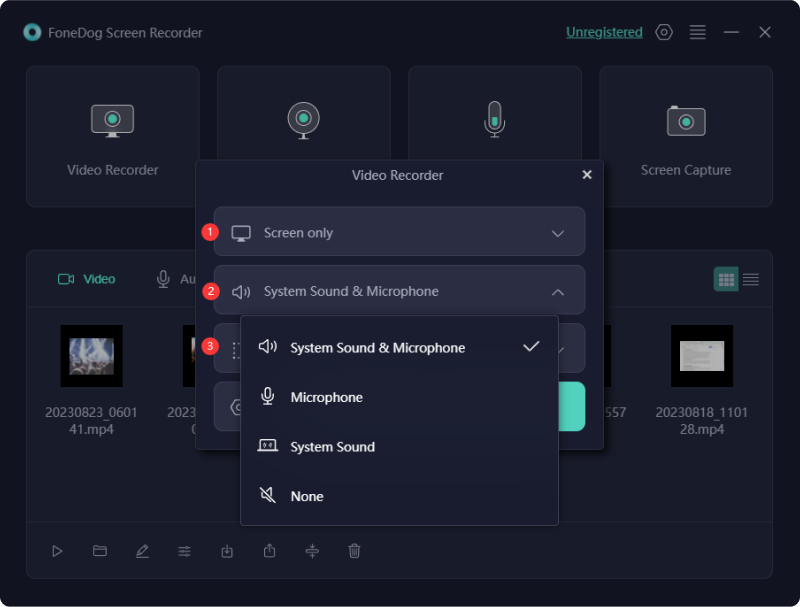
2. Once installed, open the software from your computer's app menu. Choose "Video Recorder" mode from the options displayed.
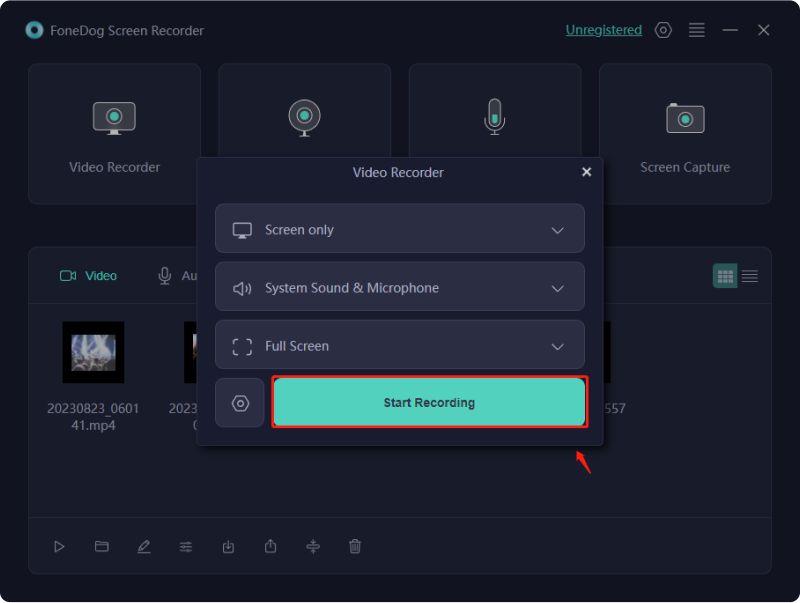
3. Before recording, adjust your settings. Select the screen area you want to capture (like the whole screen or a specific part), and set the recording quality and frame rate.
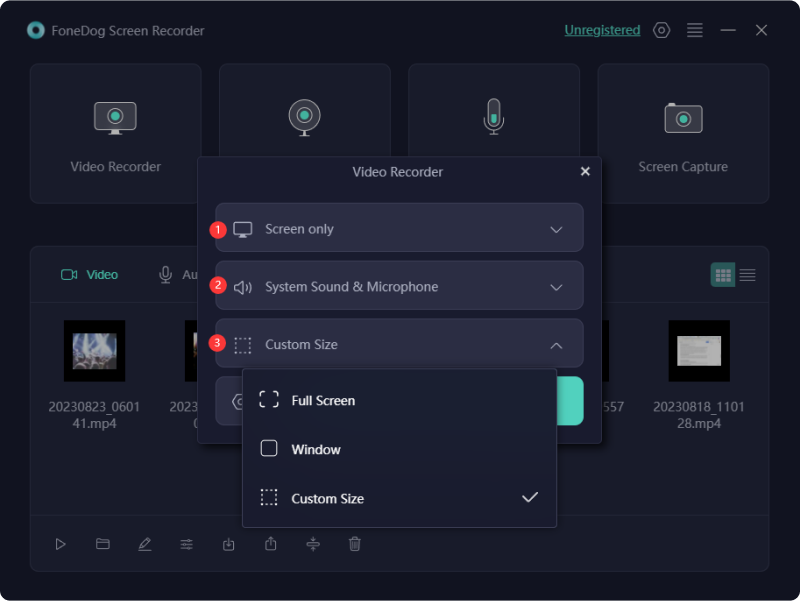
4. In the settings, pick your audio sources for recording, including computer audio and external inputs like a microphone.
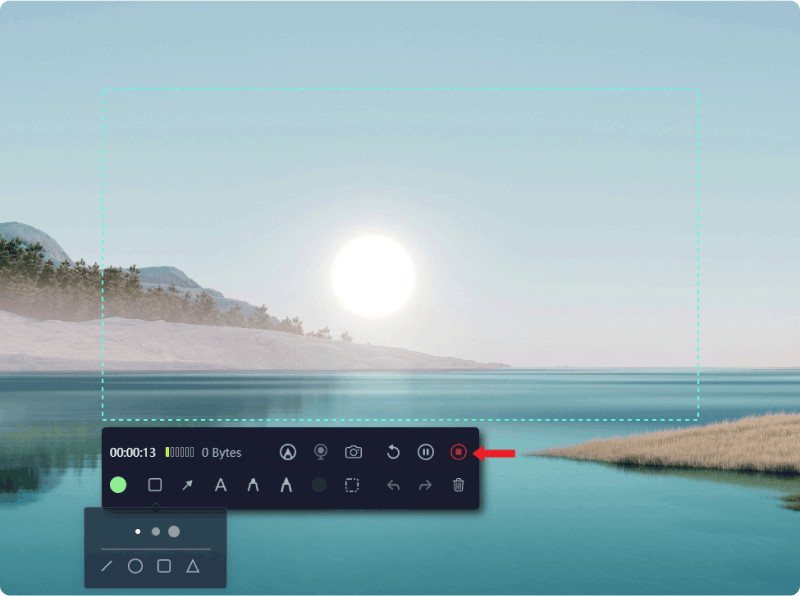
5. When ready, hit the "REC" button to start recording your screen and audio. A countdown timer will appear along with a recording toolbar.
6. Perform the actions you want to record. You can pause or stop the recording using the buttons on the toolbar.
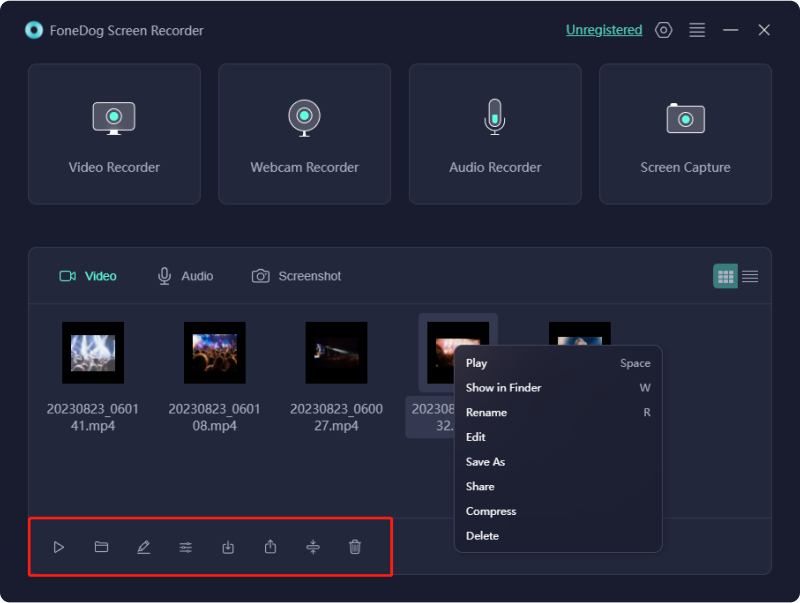
7. After recording, you can preview and edit it within FoneDog Screen Recorder. Trim, add notes or improve the recording quality.
Audio Recording:
1. Start the software as you normally do for screen recording.
2. Find and select the "Audio Recorder" mode among the options provided.
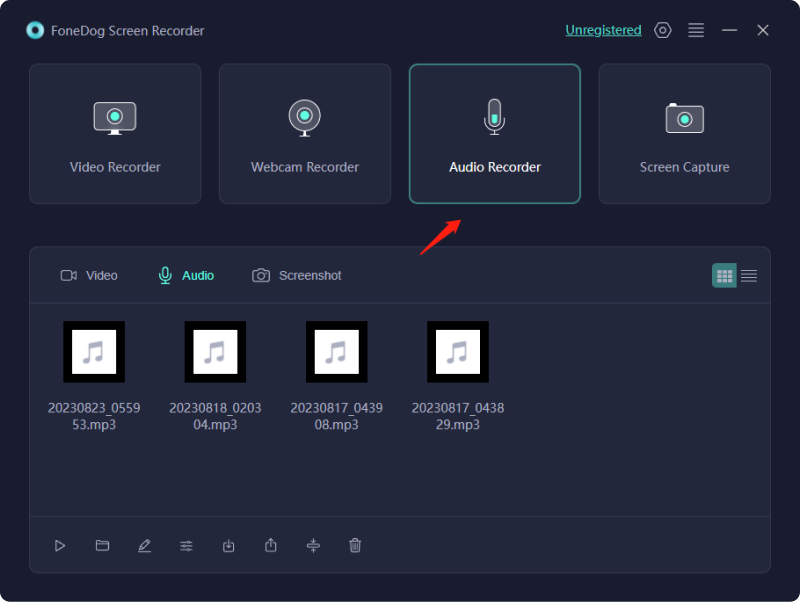
3. Inside the software settings, set your preferred microphone or audio input and choose the recording quality.
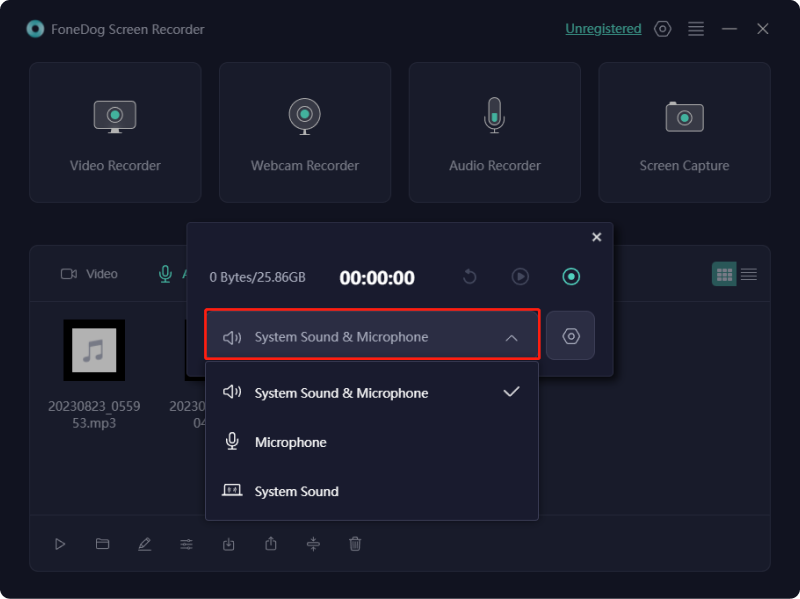
4. When you're set to start recording audio, click the "REC" button. Feel free to speak or engage in any sound-related activities you want to save.

5. Once done, hit the "Stop" button. The software will ask you to save the audio recording.
6. If needed, you can edit or export the audio recording using the software's features.
People Also ReadDetailed Guide: How to Record Zoom Meeting on iPhoneCapturing Conversations: Full Guide to Google Meet Recording
In conclusion, knowing how to record FaceTime with audio enhances the way we preserve memories, capture important conversations, and facilitate professional documentation. By employing reliable methods such as FoneDog Screen Recorder's specialized features, users can seamlessly capture, preserve, and relive cherished moments while ensuring high-quality audio for a more enriching experience in communication and archival purposes. Have a wonderful day ahead!
Leave a Comment
Comment

Tech Website Writing /Content Optimization
Singing, smiling, surprising every day!
So as a technical writer, it is my duty to gather effective and reliable solutions to answer questions on how to deal with the issues they are having with their devices.
Screen Recorder
Powerful screen recording software to capture your screen with webcam and audio.
Hot Articles
 /
/
INTERESTINGDULL
/
SIMPLEDIFFICULT
Thank you! Here' re your choices:
Excellent
Rating: 4.5 / 5 (based on 89 ratings)
