FoneDog Screen Recorder FoneDog Screen Recorder
Special Offer Special Offer
Only Only
$4.49 $4.49
to get a ONE-month license to get a ONE-month license
Sale ends in xx days Sale ends in xx days
Buy Now
sale

4 Ways to Record Screen Windows 10 with Audio

By Adela D. Louie, Last updated: December 29, 2023

Do you want to record your Windows 10 screen in a better way? With crystal-clear sound, you could make interesting tutorials, share your game wins with vivid comments, or record special moments with family and friends. You are about to read the guide on record screen Windows 10 with audio.

This guide will teach you the skills and tricks to bring your screen recordings to life, whether you're a tech enthusiast, content creator, or just looking to document your digital journey, this comprehensive guide will equip you with the skills and techniques to make your screen recordings come alive.

Part #1: Best Windows 10 Screen Recording Tool – FoneDog Screen RecorderPart #2: Other Ways to Record Screen Windows 10 with AudioPart #3: Troubleshooting Common IssuesConclusion

Part #1: Best Windows 10 Screen Recording Tool – FoneDog Screen Recorder

FoneDog Screen Recorder was designed to empower users with an unparalleled recording experience, FoneDog Screen Recorder stands out as the best Windows 10 screen recording tool on the market. With this exceptional software, you can capture your screen and audio with ease, making it the perfect choice for a variety of tasks.

windowsFree DownloadFor WindowsmacFree DownloadFor normal MacsmacFree DownloadFor M1, M2, M3

Follow these steps to utilize the FoneDog Screen Recorder to record screen Windows 10 with audio:

Screen Recording:

1. Begin by downloading and installing the FoneDog Screen Recorder program onto your computer, making sure that it is compatible with your operating system.

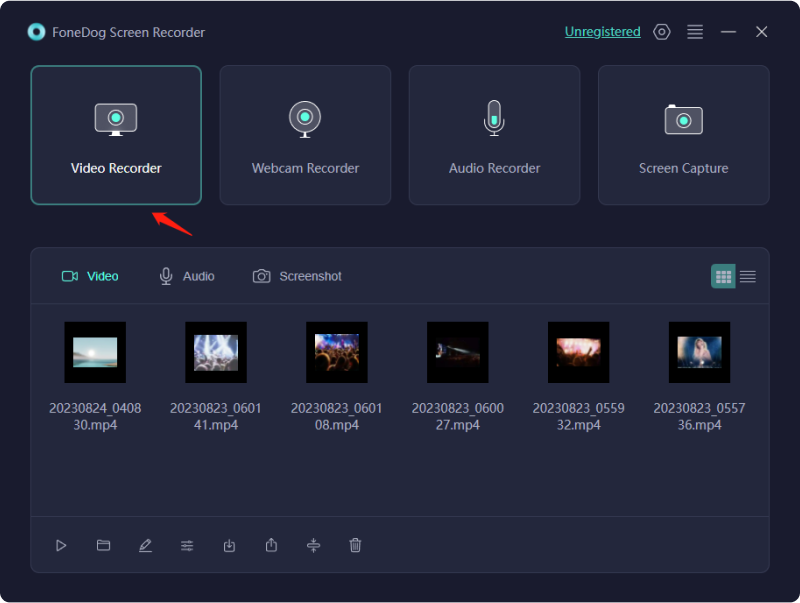
2. When the installation is complete, launch the software from the application menu on your computer. You'll be given many recording choices, one of which should be "Video Recorder".

Record Screen Windows 10 with Audio - FoneDog Screen Recorder: Video Recorder

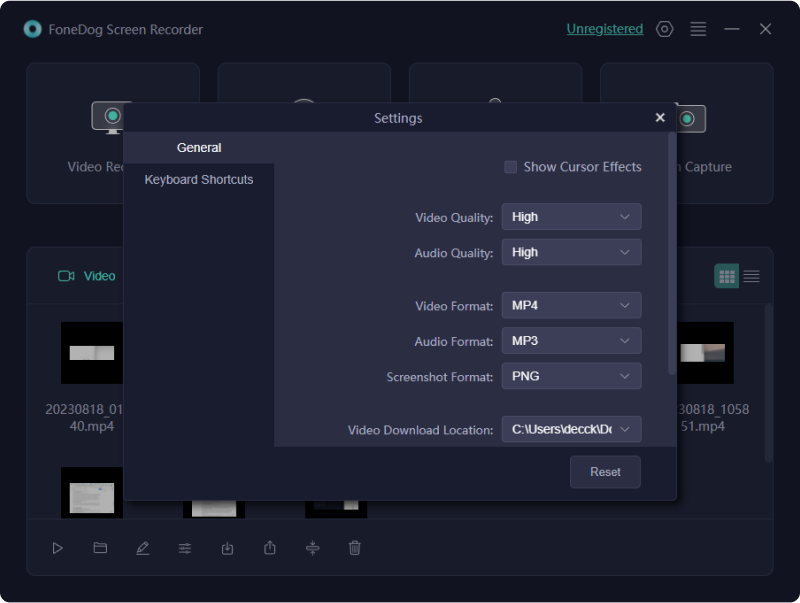
3. Customize your options before you begin recording. This involves selecting the screen area to capture (the full screen, a designated region, or a single application window), establishing recording quality, and configuring frame rate settings.

Record Screen Windows 10 with Audio - FoneDog Screen Recorder: General Settings

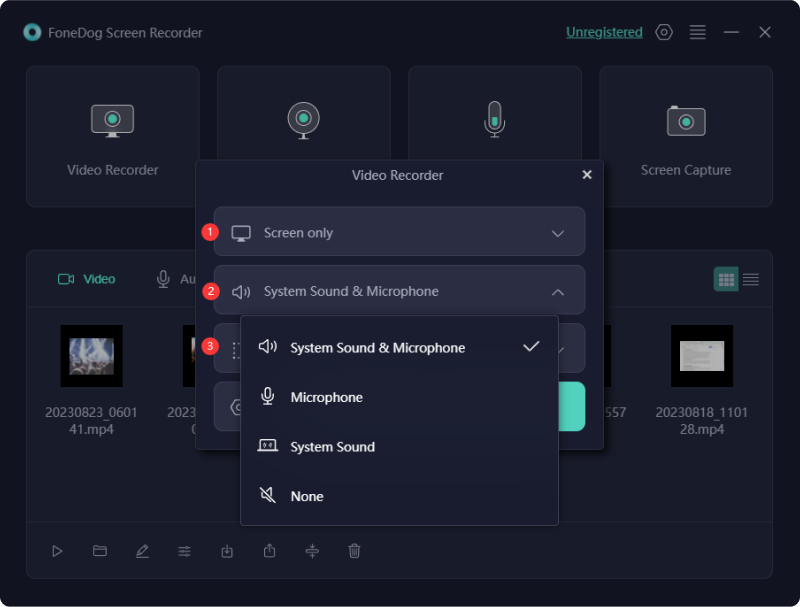
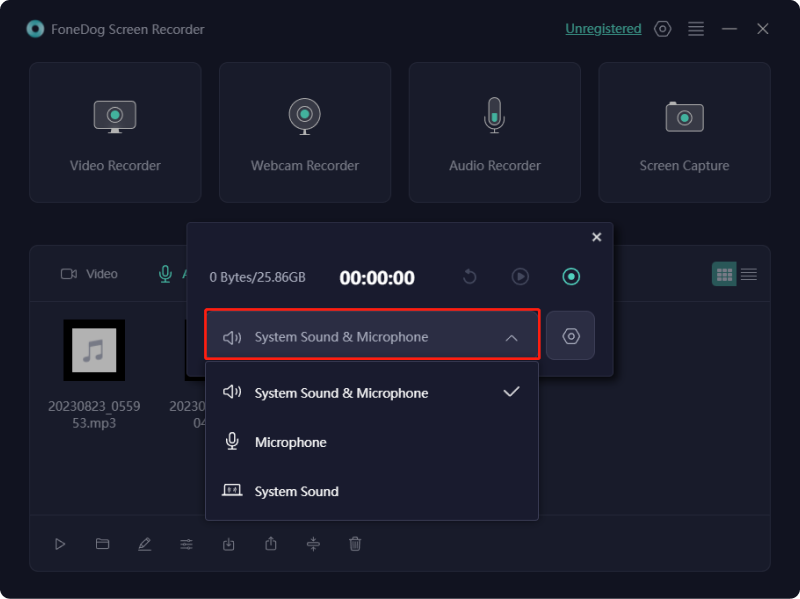
4. Select your chosen audio sources for recording in the software's options menu, allowing you to capture both computer system sounds and external audio inputs, such as an external microphone.

Record Screen Windows 10 with Audio - FoneDog Screen Recorder: Adjust Audio

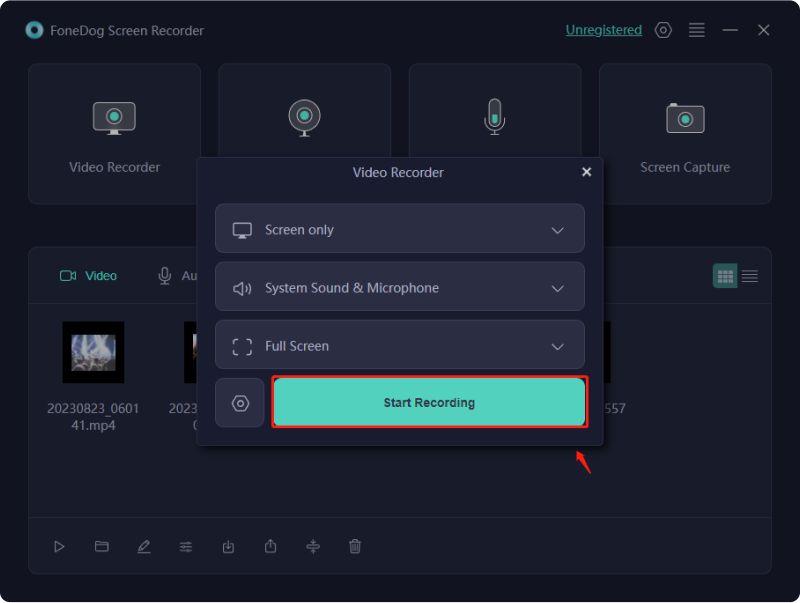
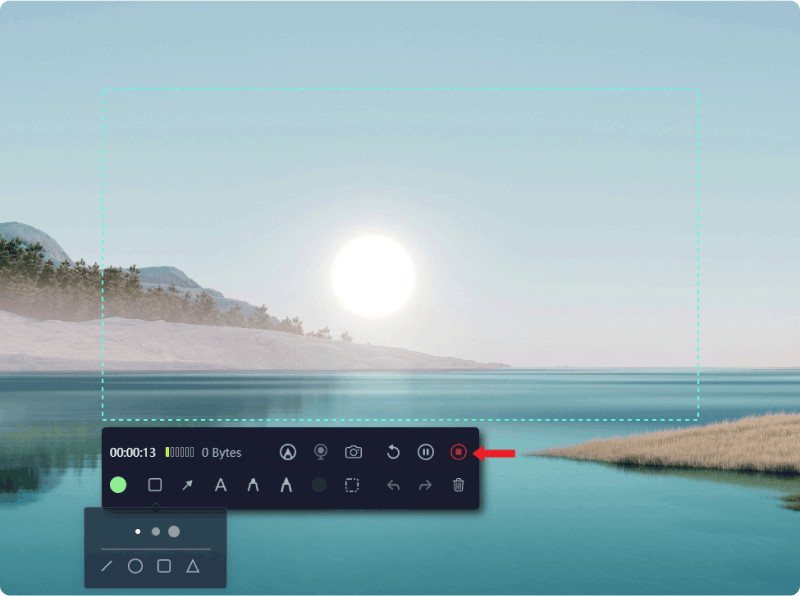
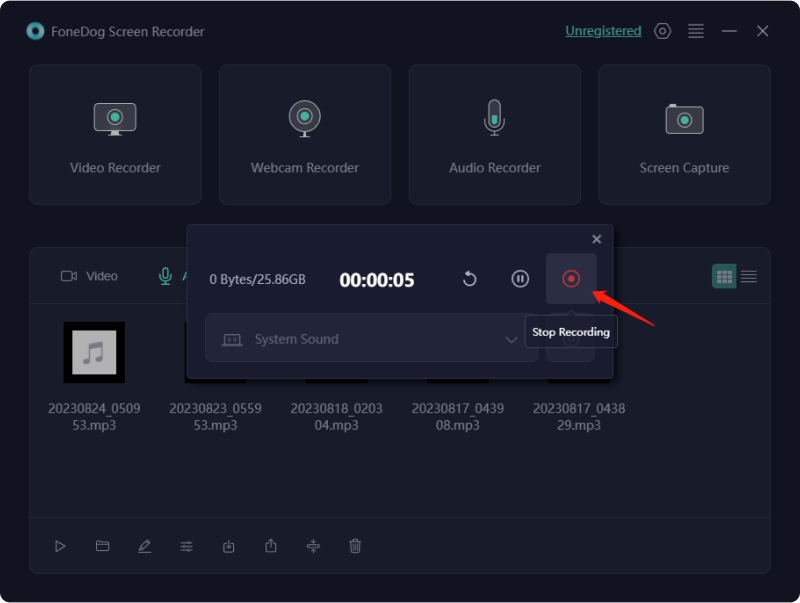
5. When you're ready, click the "REC" button to start recording your screen actions and audio at the same time. A countdown timer will appear on your screen, along with a recording toolbar.

Record Screen Windows 10 with Audio - FoneDog Screen Recorder: REC

6. While the recording is running, carry out the activities or procedures you wish to record. Using the buttons on the toolbar, you may pause or stop the recording at any time.

Record Screen Windows 10 with Audio - FoneDog Screen Recorder: Stop

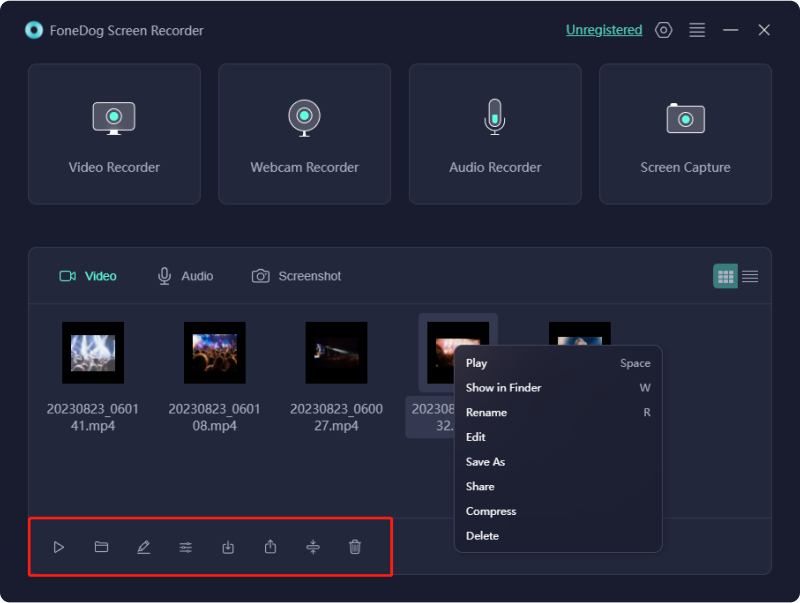
7. Once you're pleased with the finished recording, select "Save" or "Export" to save the video in the format and location of your choice.

Record Screen Windows 10 with Audio - FoneDog Screen Recorder: Save Recording

Audio Recording:

1. Start the program in the same way as you would for screen recording.

2. Investigate the choices and pick "Audio Recorder" mode.

Record Screen Windows 10 with Audio - FoneDog Screen Recorder: Audio Recorder

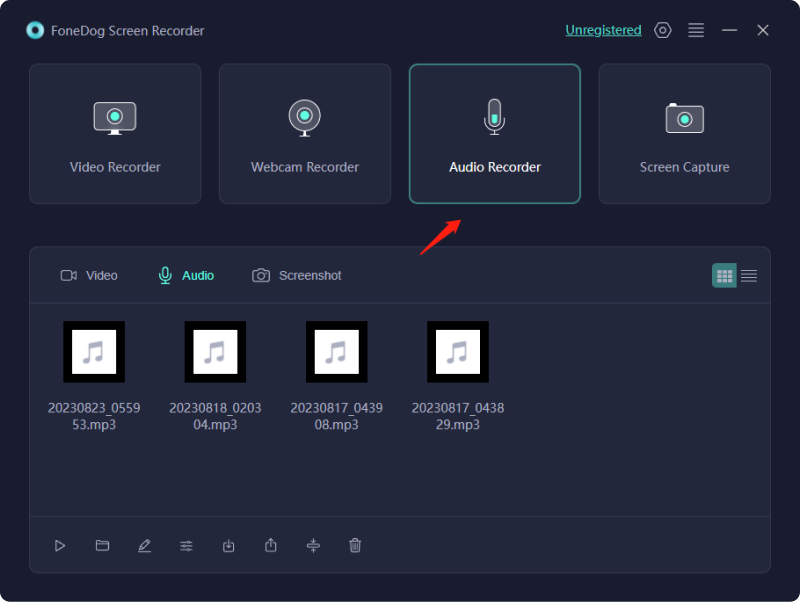
3. Configure your audio input source, often your microphone, and recording quality in the program options.

Record Screen Windows 10 with Audio - FoneDog Screen Recorder: Audio Settings

4. When you're ready to start recording audio, press the "REC" button. Feel free to speak out or participate in any audio-related activity that you want to capture.

Record Screen Windows 10 with Audio - FoneDog Screen Recorder: Start Recording

5. When you're finished recording, press the "Stop" button. You will be prompted to save the audio recording by the program.

Record Screen Windows 10 with Audio - FoneDog Screen Recorder: Pause

6. You may also use the software's editing and exporting features for the audio recording if necessary.

Record Screen Windows 10 with Audio - FoneDog Screen Recorder: Edit Recording

Part #2: Other Ways to Record Screen Windows 10 with Audio

Recording your screen in Windows 10 with audio can be slightly different from recording a screen on a Mac, in terms of tools. Here are three common methods and the steps to comply with each one:

Method #1: Using the Windows 10 Built-in Game Bar (for gaming and apps):

Windows 10 includes a built-in screen recording tool called the Game Bar, which is primarily designed for capturing gameplay but can also be used for other applications.

  1. Open the Game Bar:
    • While in the application or game, you want to record, press Windows + G on your keyboard. This will open the Game Bar overlay.
  2. Start Recording:
    • Click the "Record" button in the Game Bar overlay to start the recording. You can also use Windows + Alt + R to begin recording.
  3. Control Recording:
    • The Game Bar overlay provides options to pause, stop, and mute/unmute the microphone during recording.
  4. Finish and Save:
    • When you're done, press the "Stop" button on the Game Bar overlay to end the recording. The recorded video will be saved in your Videos folder by default.

Record Screen Windows 10 with Audio Using the Windows 10 Built-in Game Bar

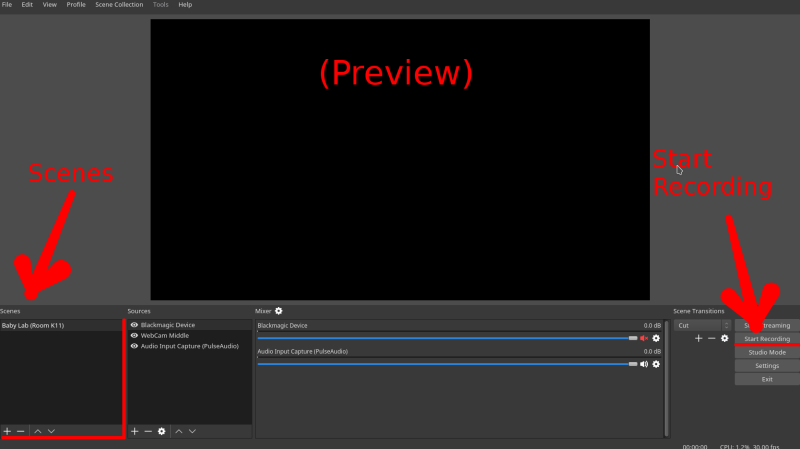
Method #2: Using Third-Party Screen Recording Software (for more features and flexibility):

You can also use third-party screen recording software for more advanced features and options. Here, we'll use OBS Studio as an example to record screen Windows 10 with audio:

  1. Download and Install OBS Studio:
    • Get the software from https://obsproject.com/, which is the OBS Studio page. Put it on your machine that runs Windows 10.
  2. Launch OBS Studio:
    • Open OBS Studio after installation.
  3. Configure Recording Settings:
    • In OBS Studio, go to "Settings" and change how you want to record. Choose the right video settings (quality, frame rate, etc.) and an audio input device (like your microphone).
  4. Start Recording:
    • Click "Start Recording" to begin recording your screen and audio.
  5. Control Recording:
    • OBS Studio provides options to pause, stop, and control your recording settings while capturing your screen and audio.
  6. Finish and Save:
    • Click "Stop Recording" when you're done. You can specify the location to save your recording, and OBS Studio will save it in your chosen format.

Record Screen Windows 10 with Audio Using OBS Studio

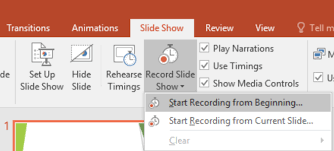
Method #3: Using Built-in PowerPoint Screen Recording (for presentations):

If you're creating a presentation and want to record your screen with audio using PowerPoint, follow these steps:

  1. Open PowerPoint:
  2. Insert Screen Recording:
    • Go to the "Insert" tab and click on "Screen Recording".
  3. Capture Your Screen:
    • Select the area of the screen you want to record, and then click the "Record" button.
  4. Record with Audio:
    • Ensure your microphone is selected as the audio input device. You can enable or disable audio narration during recording.
  5. Control Recording:
    • Use the control bar that appears at the top to pause, stop, or discard the recording.
  6. Finish and Save:
    • Click the "Stop" button to finish the recording. PowerPoint will insert the recording as a video on your slide.

Record Screen Windows 10 with Audio Using PowerPoint

These methods allow you to record your screen in Windows 10 with audio for various purposes, whether it's for recording gameplay, software tutorials, presentations, or others. Choose the method that best suits your needs and follow the steps to start capturing your screen and audio content.

Part #3: Troubleshooting Common Issues

Troubleshooting common issues when record screen Windows 10 with audio can help ensure a smooth and error-free recording process. Here are some common issues you might encounter and their potential solutions:

  1. Audio and Video Out of Sync:
  • Issue: Sometimes, the audio and video in your recording may not be synchronized.
  • Possible Causes: Hardware delays, software glitches, or incorrect settings.
  • Solutions:
    • Adjust the audio/video synchronization settings in your recording software.
    • Use reliable screen recording software that minimizes sync issues.
    • Ensure your computer's audio and video drivers are up to date.
    • Test different recording formats or codecs to see if they resolve the problem.
  1. Low Audio Quality:
  • Issue: Recorded audio may be muffled, too quiet, or contain background noise.
  • Possible Causes: Microphone issues, audio input settings, or ambient noise.
  • Solutions:
    • Invest in a high-quality microphone or headset for clearer audio.
    • Adjust the microphone input level in Windows settings.
    • Record in a quiet environment to minimize background noise.
    • Use audio editing software to enhance audio quality post-recording.
  1. Audio Recording Not Working:
  • Issue: You can't capture audio even though it's selected as the input source.
  • Possible Causes: Audio driver problems, privacy settings, or software conflicts.
  • Solutions:
    • Check and update your audio drivers.
    • Review Windows privacy settings to grant necessary permissions to the recording software.
    • Ensure no other applications are blocking access to the microphone.
  1. File Format and Compatibility Issues:
  • Issue: Your recordings may be incompatible with certain media players or platforms.
  • Possible Causes: Using a less common file format or codec.
  • Solutions:
    • Convert your recording to a more widely accepted format (e.g., MP4).
    • Check the recommended format for the platform where you plan to share your recordings.
  1. Large File Sizes:
  • Issue: Your screen recordings with audio result in excessively large files.
  • Possible Causes: High-quality settings or excessive recording time.
  • Solutions:
    • Adjust the recording quality settings to a more manageable level.
    • Consider shorter recordings or edit and compress large files before sharing.
  1. Software Crashes or Freezes:
  • Issue: Your screen recording software crashes or freezes during recording.
  • Possible Causes: Insufficient system resources or software bugs.
  • Solutions:
    • Ensure your computer meets the system requirements for the recording software.
    • Keep your recording software and system updated to the latest versions.
    • Restart your computer to free up system resources before recording.

By addressing these common issues and applying the suggested solutions, you can troubleshoot problems that may arise when recording your screen in Windows 10 with audio, ensuring a smoother and more reliable recording experience.

People Also ReadFull Guide 2024: How to Record Screen on Windows 11From Basics to Pro: Guide on How to Record Screen Windows 7

Conclusion

In conclusion, record screen Windows 10 with audio is a powerful tool for various purposes. From tutorials to gaming sessions, presentations, and beyond, FoneDog Screen Recorder offers a seamless and versatile solution. So, why wait? Start your journey today and unleash your creativity with the best Windows 10 screen recording tool. Elevate your content and engage your audience like never before with FoneDog Screen Recorder. Have a wonderful day ahead!

Leave a Comment

Comment

Comment ()
author image

Adela D. Louie

Tech Website Writing /Content Optimization

Singing, smiling, surprising every day!

So as a technical writer, it is my duty to gather effective and reliable solutions to answer questions on how to deal with the issues they are having with their devices.

Screen Recorder logo

Screen Recorder

Powerful screen recording software to capture your screen with webcam and audio.

How Do You Like This Article?

Check icon/ Check icon

INTERESTINGDULL

Check icon/ Check icon

SIMPLEDIFFICULT

Thank you! Here' re your choices:

Rate This Article: Excellent

Rating: 4.8 / 5 (based on 98 ratings)

Screen Recorder logo

Screen Recorder

Powerful screen recording software to capture your screen with webcam and audio.

FoneDog uses cookies to ensure you get the best experience on our website. Click here to learn more.