FoneDog Screen Recorder
FoneDog Screen Recorder
Special Offer
Special Offer


By Nathan E. Malpass, Last updated: March 20, 2019
Good afternoon. I am an android user and have been since I first started using a mobile phone. I have been very pleased with the functions of the units I have had and have never really had any unpleasant experiences.
However, quite recently an error has started to appear informing me that my memory SD card was unexpectedly removed, and/or that my memory SD card was prepared. From my understanding of these notifications, what is happening here is that my SD card is getting dislodged and then reconnected within maybe a split second after.
To be honest, it is quite annoying and I am a relatively patient person in the first place. Is there some advice you have for me? Perhaps a series of steps that I can take in order to try to sort out that SD card unexpectedly removed? Any help would be very much appreciated indeed. Thank you very much!
- Mark D.
Part 1: IntroductionPart 2: Some Reasons As to Why Your SD Card Unexpectedly RemovedPart 3: How to Fix it When Your SD Card Unexpectedly Removed [5 Fixes]Part 4: Tips and Tricks To Use and Care For Your Memory CardsPart 5: Conclusion
The problem of an android phones SD Card suddenly being removed has puzzled users for years. There are numerous accounts of why this has happened.
Some of the reasons behind the problem of SD card unexpectedly removed include having dropped your phone, sometimes the problem started when they downloaded a certain file to the sd card, other accounts have claimed that the problem started simply when they updated to the new Android version.
Although naturally, it has also happened that this error has come so unexpectedly that nothing changed except for the fact that the sd card unexpectedly removed suddenly.
This article is here to help you. If you continue reading below, we are going to discuss some of the reasons why this might be happening to your android mobile phone or tablet.
We will also try to help you solve the problem by going through a series of commands that you can do in order to try to get your sd card working normally again. We hope that this helps and we wish you the best of luck!

There could be any number of reasons as to what is happening on your android mobile phone or tablet that is causing the situation of SD card unexpectedly removed. However, there are a couple of reasons that seem to be more prominent than other reasons and we have listed them below.
We hope that this helps you understand what is happening to your device and will therefore also help you solve the problem or even better, keep it from happening again.
Here they are!
By damaging your phone, or banging it, even without any physical indication of trouble, it could have happened that you have loosened the connection of your device with your SD Card.
If this is the case, you will need to have your SD Card fixed and this is not something that all Android users are knowledgeable of and may need to bring their SD Cards into a professional.
It is true, there are mobile phones and tablets that are built a certain way and are only capable of handling SD Cards of a certain specification.
Once you use an SD Card that is beyond the specifications that your phone can handle, then you are creating an incompatibility between the two units and therefore making it impossible for them to read each other as needed.
Having said that, it is important for Android users to always check for what SD Cards your device can use in order to ensure that you have no compatibility issues.
Reason #4: The SD Card is broken. Yes, sad to say, but SD Cards do break and perhaps that is the issue you are facing here. There is no one way to break an SD Card, sometimes they simply break over time and really need to be replaced by something new.
It isn’t your fault and there is nothing you can really do about it at this point. But you can be sure to back up your files in order to not have any trouble if and when this ever happens to you.
Considering that the situation of SD card unexpectedly removed from your Android device has happened to a number of users, there have also been a number of statements from people stating that they were able to fix the problem on their own by following a few simple steps.
In this next section, we invite you to try out our suggestions. If the first option does not work, try the next one. Then repeat as needed until you find your solution.
And remember, these are the common solutions to most problems, it does not mean that by doing these, we are guaranteeing that you will no longer have the error of your SD Card unexpectedly removed from your android mobile phone or tablet.
The first thing that you should do in case you encounter the problem of your SD card unexpectedly removed from your android mobile phone or tablet is to remove the SD card from its slot and then restart your phone.
It may also help to remove the battery if in case your phone is the type of unit that allows you to do that. Once you have completed that and your phone has restarted, go to your settings and then to your storage to make sure that the SD card has indeed been read removed by your device.
After completing this, turn your phone off once again, put the SD card back into its place, and finally turn your phone on again. At this point, note whether you are still receiving the error that your SD card unexpectedly removed.
There are a good number of Android mobile phone models that offer you the option to unmount your SD card. The option to begin this is found in your settings and the entire process is relatively simple, particularly if you follow these simple steps.
Step #1: Click on your settings, followed by Storage, then click on the Unmount external storage option.
Step #2: Manually remove the SD card from your android mobile phone or tablet.
Step #3: Turn your phone off. Once it has completely turned off, put the SD card back into its slot.
Step #4: Set up your SD card.
People Also ReadHow to Fix SD Card Got Corrupted on My Android Phone?Samsung SD Card Recovery Guide: Recover Data from Samsung SD Card
In the end, this might be all you have needed to do in the first place. By doing this, you are finding out whether your SD card is corrupted and needs to be replaced, and maybe even discarded. Although there are users who have been able to use their SD cards again after formatting it with a computer.
It may also be the case that if you continue experiencing the same issue even after formatting your SD card, that you might want to format SD card once again only this time from your phone as opposed to your computer. It has helped users in the past and it may help you.
To format SD card with your computer here is how to do it.
Step #1: Backup the data on your card. We have said this time and time again, format SD card will lead to losing all of your data. Photos, videos, SMS messages, music, other audio files, and everything else that is found on your SD card.
Step #2: Using an SD card reader, hook up your memory SD card to your computer.
Step #3: Go to My Computer (if using Windows) and locate the external drive that represents your SD card.
Step #4: Right click on the word or icon that represents your SD card and click on the word Format.
Step #5: You should also unclick the words quick format in order to allow yourself to handle the entire process of the regular formatting with fat32.
Step #6: Depending on the amount of data that you have saved on your SD card, this process may take up to a full hour. So don’t be surprised if you are notified of its duration.
Step #7: Once your SD card has successfully been formatted, put it back into its slot on your phone then go to settings. From there click on the storage button and format SD card again, this time from your android mobile phone or tablet and no longer from your computer.
Step #8: Once completed, move your data back into your SD card.
Clearing your cache is always a good idea, especially when dealing with an issue that you cannot quite figure out.
Users have come forward on many occasions claiming that their issues had been resolved immediately after they had cleared their cache. It is also a relatively easy command to complete and will not take up too much of your time. Here’s how to do it.
First, you need to turn your phone off.
Second, press and hold the volume up button while also pressing the home button and also holding down the power keys. This is the command in order to set your android mobile phone into recovery mode.
Third, Press down on the volume keys until you are able to select the “wipe cache partition” selection.
Fourth, hold down the power key in order to confirm your selection.
Fifth, select in order to reboot your system as well as to reboot your android phone.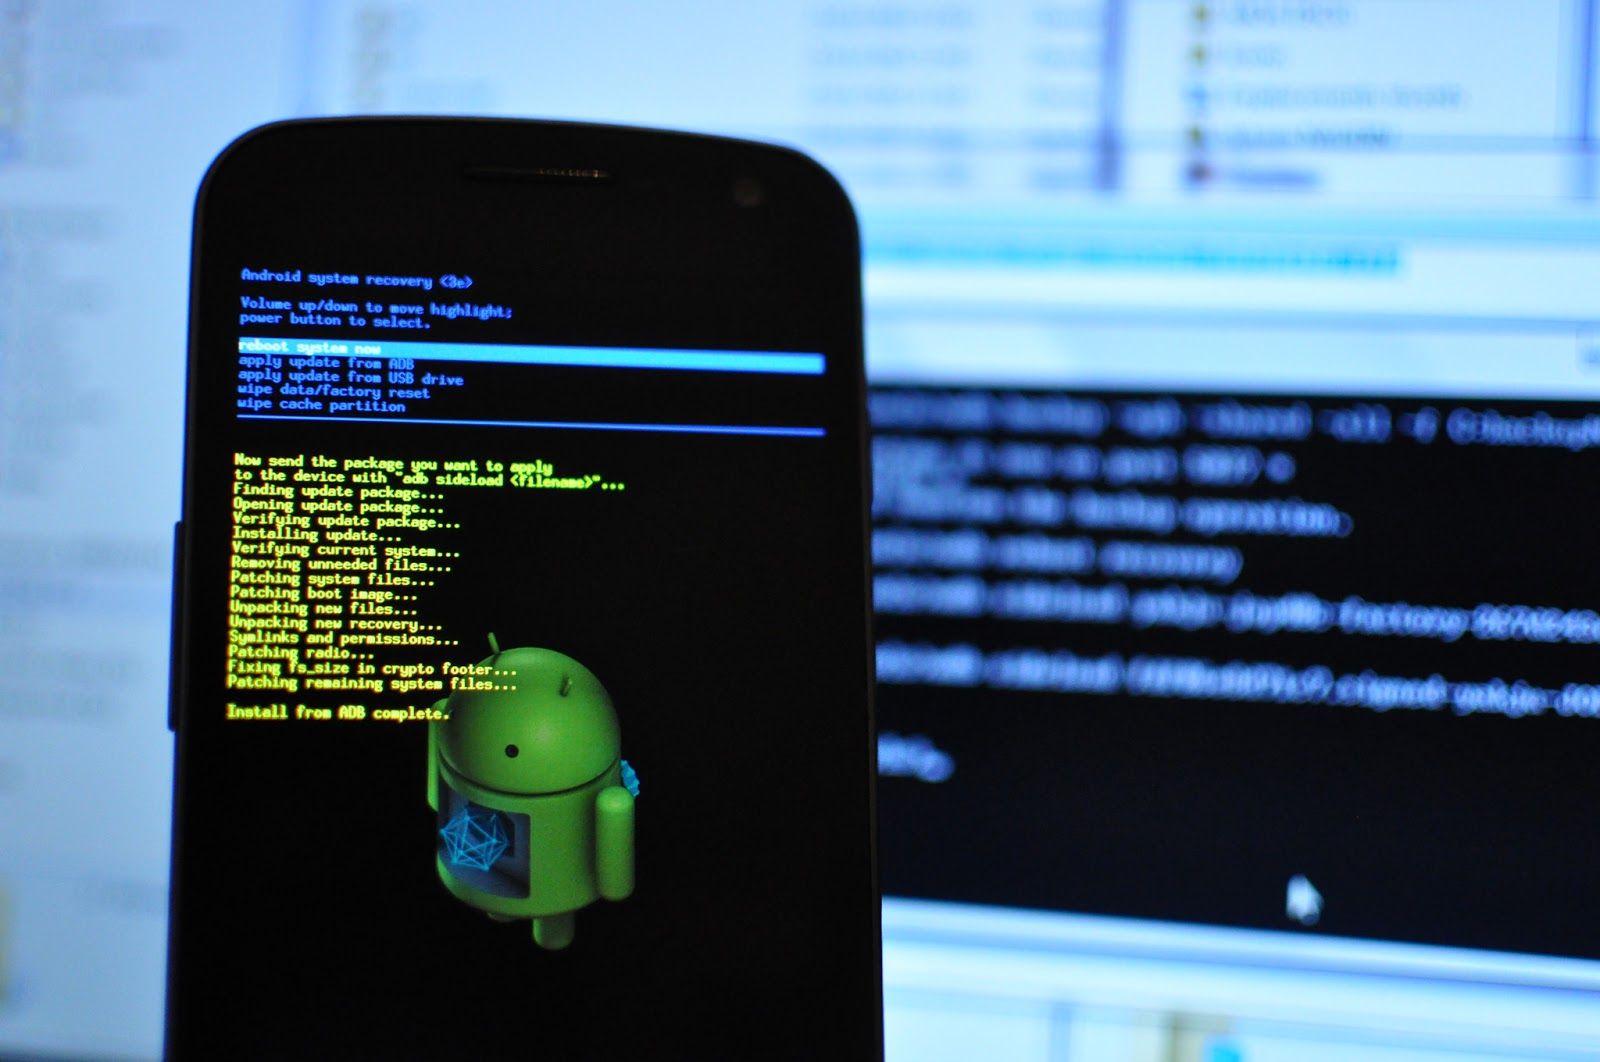
There have been cases when users have had to resort to conducting a factory reset on their Android mobile phones and tablets. This really is not your first option as there is much more work that would need to take place in order to complete this process but if all else fails, then this is certainly not a bad option.
However, please do note that before you do this, that you would need to back up everything you want to save as doing so will cause everything that you had saved to be gone forever.
SD cards are quite resilient and can last years but they are not unbreakable. Taking care of them seems like something beyond us considering that they are placed and kept inside of a chamber where they are read and used all the time by our devices, but the surprising thing is that there are certain tips and tricks that we can practice in order to help us care for these little memory cards.
In this section, we would like to introduce you to a few tricks that can be practiced in order to show proper use and care of your SD cards, and hopefully, extend its life in order to provide us with more love and care for all that these little cards do for us.
Tip #1: If and when something goes terribly wrong, stop using your SD card
In the unfortunate circumstance that disaster strikes and has deleted photos and videos on your mobile phone, or you see a notification that tells you that there has been an error in the card, the best thing that you can do at that point is to stop using it.
The reason for this is because there are high possibilities that the data on your SD card can still be restored, through the help of data recovery services available online, but if you continue using your SD card, chances are you will overwrite your other photos and videos.
Tip #2: Delete the photos and other data on your computer, not those in your camera
Did you know that you could lengthen the life of your SD card by deleting the photos in your card using your computer as opposed to deleting them from your android mobile phone?
Yes, that’s right! When you delete your photos from your computer counts as one erase cycle as opposed to deleting them one by one on your device. What works even better is if you format SD card every time you are ready to wipe your card clean before starting over.
Tip #3: Only remove your SD card while you are connected to your computer
Once you have safely completed transferring your images from your mobile phone to your computer, it would be best to follow the prescribed procedure in order to eject your SD card prior to removing it from the card reader.
If you are using OS X, right click on the drive that is assigned to your card then click Eject. However, if you are using Windows, click on the “safely remove hardware” option in order to remove the card from the card reader.
Tip #4: Try as best as you can to not completely use up your SD cards
One user has stated that he once had problems with his SD card claiming that he took his to a store to ask for advice since he started having problems with it. The store clerk asked him if he often filled his card to the brim with images and videos.
His answer was yes and he was told that cards often times started having problems after having practiced the use of SD cards in this manner.
Tip #5: Reformat your SD cards every so often
By formatting your SD cards every so often, you wipe the SD card clean of all data, photos, videos as well as file names used during that time. By doing so, you are lengthening the lifespan of your SD card.
Just be sure that you only do this once you have completely backed up the data within your SD cards so as to not lose everything found in them.
Tip #6: Only format SD card while it is inside of the camera that you use it with
By formatting your SD card while it is in the camera that you use it with, you are setting it up and structuring it for the device that you are using it on. By using another device in order to format SD card, you may find an issue here and there that otherwise cannot be resolved.
But again, make sure that you have backed up your files and data before doing so otherwise, you will certainly lose all the information that you have saved on your SD card.
Tip #7: Be sure to turn off your device prior to removing your SD card
This is a rather old tip but a very useful one as it avoids the possibility of giving your cards what is known as a “voltage shock”.
Considering that this is an old tip, manufacturers have since made vast improvements in order to keep this from happening but users may opt to stay on the safe side rather than be sorry later on. Having noted this, you can also read the manual of your device to check what it recommends the best.
Tip #8: Replace the batteries of your devices before they run completely dry
It is always wise to not let the batteries of your divide run completely dry prior to changing them for fresh batteries. By doing so, you also eliminate the possibility of your batteries running out while your SD card is saving an image. If your batteries run out while you are writing an image, you may also cause further errors.
Tip #9: It is best not to turn off your camera immediately after taking a photo
This tip is particularly useful for photographers that shoot bursts or shoot in continuous shooting mode as doing so uses plenty images and the camera needs some time to write or save all of that data into your SD card.
By failing to do so, users may find that images could be lost as the camera was shut down while the SD card was still buffering. However, it may be useful to note that more advanced and modern cameras are able to continue buffering even after a camera has been turned off if it is in the middle of a process.
Tip #10: A Simple common sense
This tip may seem unimportant or perhaps even a given but in case it is not, it is vital to mention on this list. Keep your SD cards clean and dry. Avoid putting them under extreme heat or freezing cold. A definite no would be to bend or put holes in them.
Avoid dropping your SD cards as well. And finally, SD cards are sold in plastic casings, use them when they are not inside of your cameras as this extra layer of protection can help you store your cards safely and can avoid accidentally damaging them.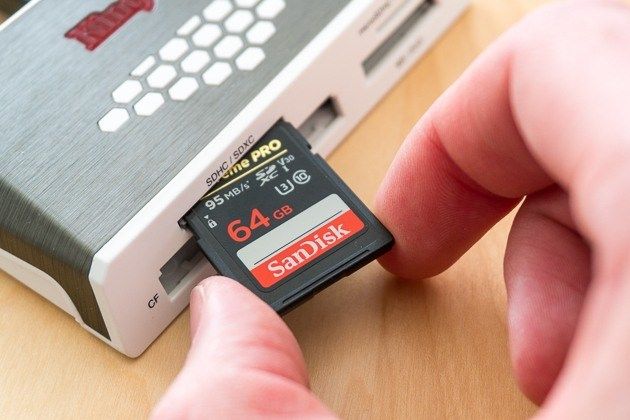
SD cards are generally quite simple storage units of information. We use them for all sorts of needs with photos and videos being their primary purpose. They do so much for us as we are now able to take thousands of photos thanks to them, as opposed to the older days of film photography.
Having said that, we must, in turn, do our part to take care of them. Though they may fail us on occasion, there are still simple solutions that we can practice in order to solve the issues that we sometimes have with them.
Leave a Comment
Comment

iPhone/Android Devices’ Maintenance Expert
Staying home, listening to music, writing tech articles
Many people asked me to repair their mobile phones so I have a lot of experience in mobile phone repair, and I know a lot about Android or Apple phones.
Android Toolkit
Recover deleted files from your Android phone and tablet.
Free Download Free DownloadHot Articles
 /
/
INTERESTINGDULL
/
SIMPLEDIFFICULT
Thank you! Here' re your choices:
Excellent
Rating: 4.6 / 5 (based on 105 ratings)
