FoneDog Screen Recorder
FoneDog Screen Recorder
Special Offer
Special Offer


By Adela D. Louie, Last updated: August 16, 2021
“I want to know what is the best way to backup iMessage?”
As we all know, iMessage is a built-in feature of Apple for its instant messaging services. Using the iMessage, you can send photos, texts, videos, and audios to another iOS device such as an iPhone, iPad, or even to your Mac. All you need to do to use this feature is to have an internet connection and you will be able to use this for free.
And with that, since iMessage is also one way of conversing to other people, then it is also not impossible for you to lose your important iMessage from your iOS device. This can happen because of several reasons such as an update to the new iOS version, jailbreaking your iPhone device, accidental deletion, and even when you damaged your iPhone device.
This is the reason why a regular habit of backing up data on your iOS device is a good call. You may never know what will happen, right? And speaking of backing up, we are going to show you in this article on how to backup iMessage in three different ways.
Part 1: How to Backup iMessage Using iOS Data Backup & RestorePart 2: How to Backup iMessage Using iCloudPart 3: How to Backup iMessage Using iTunesPart 4: Conclusion
The first method that we are going to show you on how to backup iMessage is considered to be the best way for you to backup your data from any of your iOS devices such as your iPhone, iPad, or even from your iPod device. This tool is no other than the FoneDog iOS Data Backup and Restore.
The FoneDog iOS Data Backup and Restore will be able to help you in backing up your iMessage. Not only that but it can also backup other data on your iOS device such as your photos, contacts, call history, videos, and so much more. It can also help you restore the backup file that you made, such as text messages, photos and so on.
Here is how to backup your iMessage using the FoneDog iOS Data Backup and Restore.
Step 1: Get the Software and Install on PC or Mac
First is that you have to download the FoneDog iOS Toolkit from the FoneDog website. And once done, simply install it on your Mac or Windows computer.
After the successful installation, go ahead and launch the FoneDog iOS Toolkit on your computer. And then plug in your iOS device to your computer using your USB cable and wait for the software to detect your device.
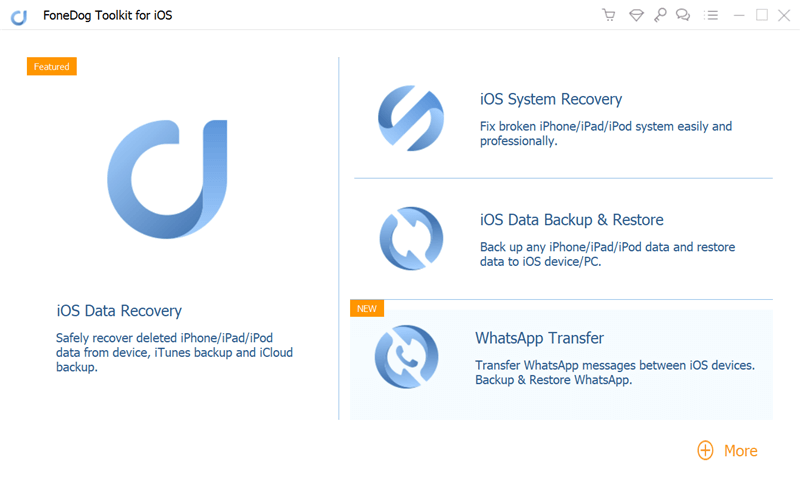
Once that it was able to detect your iOS device, go ahead and select on the iOS Data Backup and Restore option from the main page. And on the next page, simply select on the iOS Data Backup.

Then, the FoneDog iOS Data Backup and Restore will then ask you on how you want to backup your data. You have two backup modes you can choose from. The first one is the Standard Backup, and the second one is the Encrypted Backup wherein you can add a passcode to your backup file. And after you have chosen on the backup mode, go ahead and hit on the Start button.
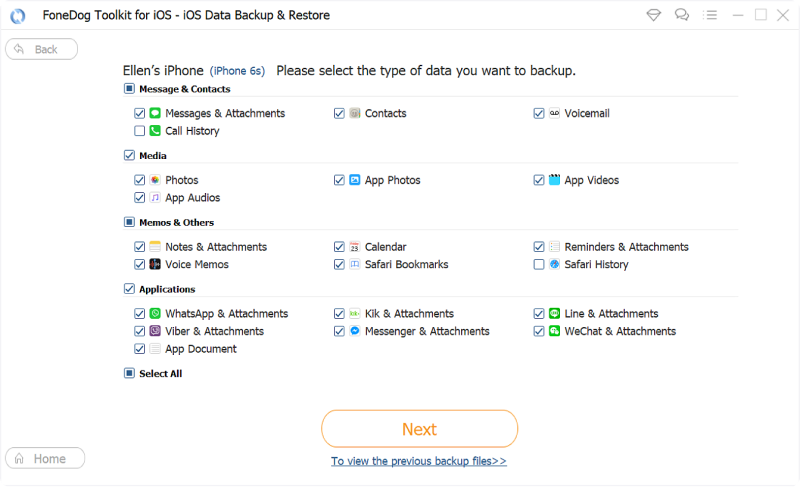
And then, the FoneDog iOS Data Backup and Restore will then show you a list of data types that it supports to backup. From that list, you can simply choose on Messages and Attachments for you to get into your iMessage. After choosing that, go ahead and hit on the Next button.
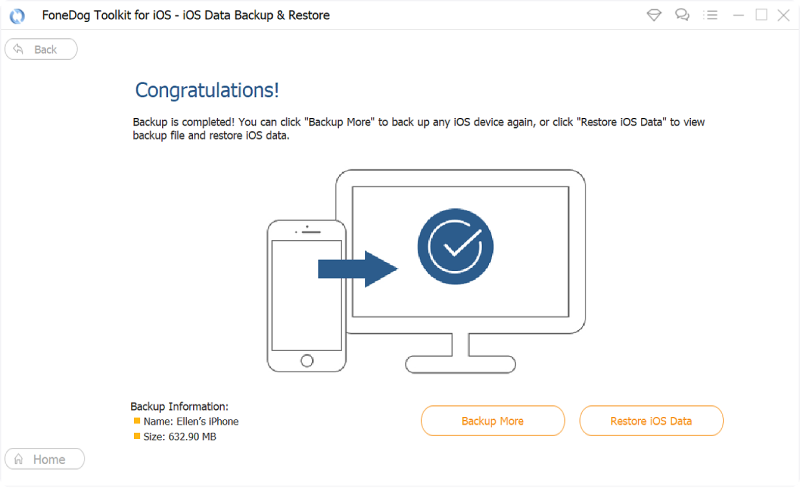
Then, after clicking on the Next button, the FoneDog iOS Data Backup and Restore will then start on backing up all of the iMessage that you have on your iOS device. Once that the backing up process is complete, it will then show you details of your backup file such as the name and the size of it.
And that is how easy you can backup iMessage. And in case that something happens to your device, you can also have them restored still using the FoneDog iOS Data Backup and Restore. And as a bonus tip, here is how you can restore your iMessage using the same program.
Step 1: Open the FoneDog Toolkit and then connect your iOS device to your computer using your USB cable.
Step 2: After that, go ahead and choose iOS Data Backup and Restore and then click on iOS Data Restore from the options shown on your screen.
Step 3: After that, the program will then show you all of the backup files that are available to restore. From there, all you need to do is to choose the most recent one basing on the time and date it was backed up and then click on the View Now button.
Step 4: And once that you clicked on the View Now button, the program will then scan your backup file. And once that it is done scanning your file, you can then choose to click on the Restore to Device or Restore to PC button located at the lower-right corner of your screen. This will then start to restore your backup file depending on the selected location you want to restore them.
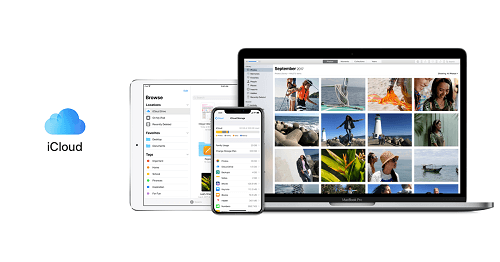
iCloud also comes in handy as it also offers you to have a convenient way for you to backup iMessages. And for you to know on how to do this using iCloud, here are the steps you need to follow.
Step 1: Go ahead and have your iOS device connected to a Wi-Fi connection.
Step 2: And once that your device is connected to the Wi-Fi, go ahead and launch the Settings app. And then tap (your name) and then choose on iCloud. However, if you are using an iOS 10.2 or earlier version, then all you need to do is to go to your Settings and then tap on iCloud.
Step 3: After that, go ahead and select on iCloud Backup. But if you are using iOS 10.2 or earlier, go ahead and tap on Backup first and see to it that the iCloud Backup is turned on.
Step 4: And then, go ahead and choose Backup Now. Here, you have to make sure that your device is connected to a Wi-Fi network until such time that the process is all done.
2.2 How to Sync iMessage to iCloud for iOS 11.4
The iOS 11.4 version of iOS devices can allow you to store all of your messages in your iCloud. Apple was able to have this resolved and that they were able to have a syncing feature between other Apple devices.
So with that, those iOS devices that are in the iOS 11.4 version can turn on the Messages in iCloud option for them to have their iMessage or even text messages and that they can see them even if they use a different iOS device.
So for you to do this trick, here is a quick tutorial that you can follow.
Step 1: Update your iOS device to the iOS 11.4 version. You can do this by going to your Settings and tapping on General. From there, simply tap on Update Software and then follow the instructions that you can see on your screen.
Step 2: Turn on your two-factor authentication. And for you to do this, just go ahead and hit on your username located at the top of your Settings page. From there, simply tap on Password and Security and then tap on Turn On Two-Factor Authentication option.
Step 3: Afterwards, go ahead and turn on the Messages on your iCloud. So from the Settings, go ahead and choose on your Apple ID and then choose iCloud. And from there, go ahead and turn on Messages.

Once that you are done with the whole process, all of the messages that you have on that device, including you iMessage, will then be saved on your iCloud storage and not on your phone memory.
iTunes is one of the default program of Apple that you can use for you to backup data as well. So this means that you can backup your iMessage using iTunes as well. And to know how you can do this, here is a quick step by step method that you can follow.
Step 1: Go ahead and update your iTunes program to the latest version available on your computer.
Step 2: Once that you are done with the update, go ahead and launch the iTunes program on your computer and then connect your iOS device to your PC as well using your USB cable.
Step 3: And then, once that the iTunes program was able to detect your iOS device, go ahead and click on the iPhone icon located at the top of your iTunes window.
Step 4: After that, go ahead and hit on the Backup Now button which can be located under the Manually Backup and Restore option.
People Also ReadHow to Fix iMessage Not Syncing on Mac [2021 update]How to Transfer iMessages to New iPhone? [2021 Updated]
Backing up your data is one great way for you to be able to save them from anything that might happen to your device. Same goes with your iMessage. And with that, you can choose any of the three options on how to backup iMessage but as what is recommended by many users, you can opt to use the FoneDog iOS Data Backup and Restore for a safe, easy, and quick way to back up any data that you want.
Leave a Comment
Comment

Tech Website Writing /Content Optimization
Singing, smiling, surprising every day!
So as a technical writer, it is my duty to gather effective and reliable solutions to answer questions on how to deal with the issues they are having with their devices.
Hot Articles
 /
/
INTERESTINGDULL
/
SIMPLEDIFFICULT
Thank you! Here' re your choices:
Excellent
Rating: 0 / 5 (based on 0 ratings)
