FoneDog Screen Recorder
FoneDog Screen Recorder
Special Offer
Special Offer


By Vernon Roderick, Last updated: May 15, 2026
Your Windows system isn’t booting up. What’s worse, it won’t fix itself like how it did every time you encounter such a problem. You might think that you’re already out of options, but there are more recovery methods than you think.
One such method is the use of a USB recovery drive. With this, you won’t have to worry about issues like this anymore. After all, you can easily make use of it anytime, anywhere, as long as you have prepared it beforehand.
And for that exact reason, we are going to delve deeper into the USB recovery drive and what you can do with this powerful method. But before that, it might do you better to have one more method at your disposal.
Part 1. The Best Software to Do The USB Recovery DrivePart 2. What is a USB Recovery Drive?Part 3. Preparing the USB Recovery DrivePart 4. Using the USB Recovery DrivePart 5. Additional OptionsPart 6. Similar Method as USB Recovery Drive - System Repair DiscFinal Words
There are tons of people who’d kill to have a recovery method that will take them no more than a couple of minutes. Thus, the development of data recovery tools arose. And because of that, we’d like to introduce FoneDog Data Recovery.
Like any other tool, FoneDog Data Recovery is capable of recovering different types of files such as images, videos, documents, and more. However, there are also perks to choosing this tool over the others.
For one, it supports both Mac and Windows, making it compatible with most users. It also supports recovery from hard drives, SD cards, and most importantly, flash drives. this makes it a plausible option for a USB recovery drive. Either way, here’s how you can use this software.
Data Recovery
Recover deleted image, document, audio and more files.
Get deleted data back from computer (including Recycle Bin) and hard drives.
Recover loss data caused by disk accident, operation system crushes and other reasons.
Free Download
Free Download

Download and install the software from the official website of FoneDog. Once that’s done, open the tool and the first thing you should see is an interface with the option for file types as well as the storage drive. Select the file types you want to recover, although we suggest just selecting Check all file types. As for location, simply select the flash drive where the files you want to recover are located.
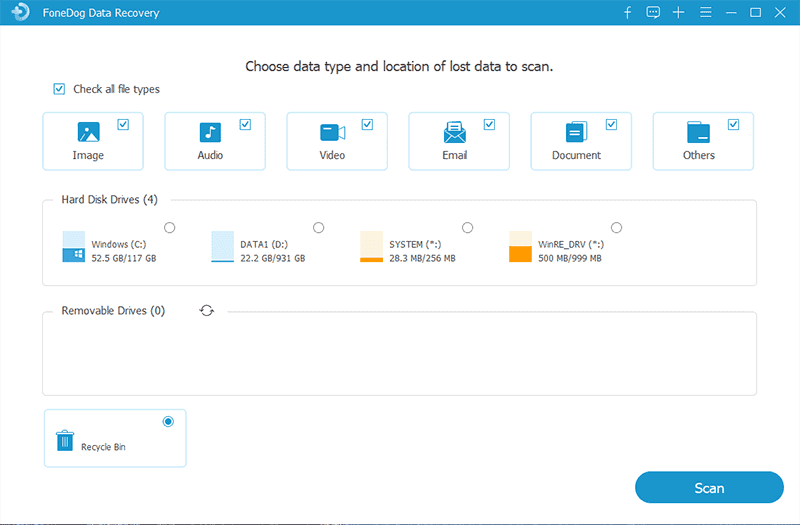
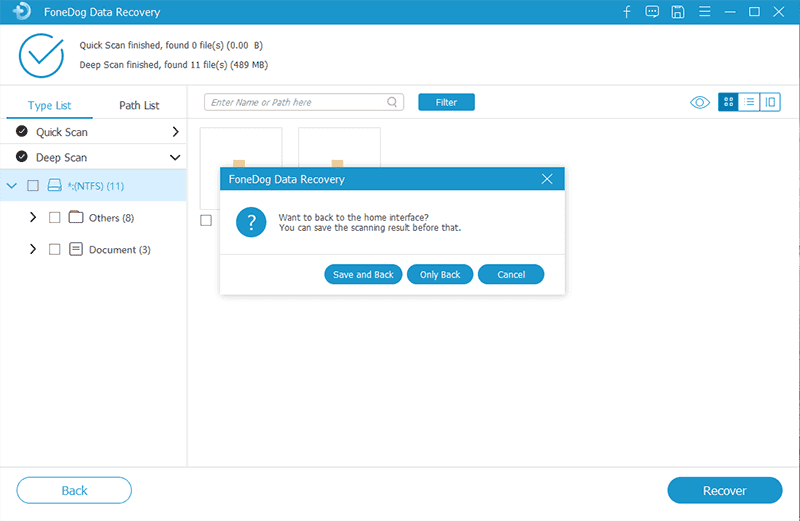
Once the configuration is finished, click on the Scan button. The software should then start scanning for files. The Quick Scan will be initiated by default so it should be quick normally. You may also select Deep Scan once the initial scanning is done to make the scan longer while becoming more accurate.
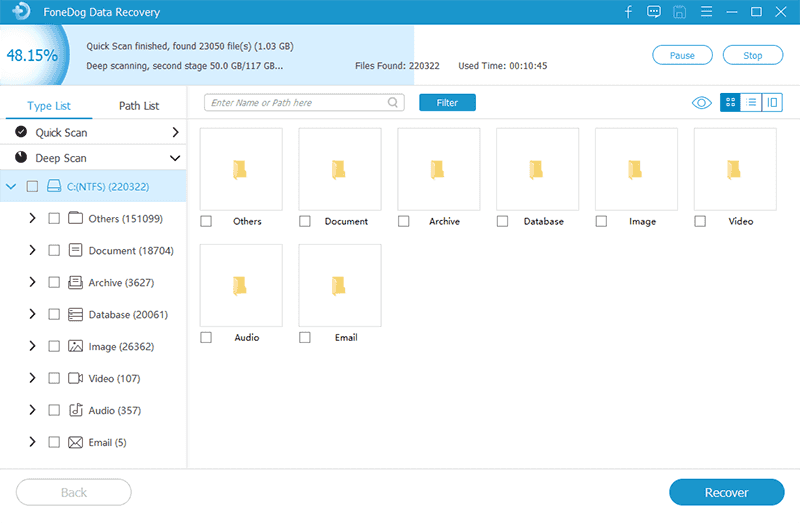
Regardless of the type of scanning you choose, at the end of the scanning process, you will definitely see a list of files. These are items that are recoverable from the selected drive. You simply have to select the items that you want to recover by clicking on their corresponding boxes. After selecting the files, click on the Recover button.
That sums up everything you need to know about the FoneDog Data Recovery software. All you have to worry about now is if it would be successful. Fortunately, the chance is fair, but in case the USB recovery drive didn’t work, we have yet another option for you.
Creating a USB recovery drive is simply the method for recovering the Windows by creating a duplicate of the whole system into a USB drive. This would mean that it would take time to create all those files, so that’s one downside and also one reason we provided a recommendation first.
Although there is a downside, we believe that there is more than one advantage to using such a method. For one, it’s a built-in feature in Windows so you can easily trust this method. Plus, you won’t have to purchase any product as long as you have a USB drive to spare.
Overall, using a USB recovery drive is a very plausible option and you won’t lose anything by using it except for the time and effort of learning how to use it. With that matter settled, let’s head to how you can actually prepare and use it.
As a quick reminder, you have to remember that since you’ll technically be copying the whole system into the USB recovery drive, you will need to make sure that the drive actually has the capability of storing it. This would mean that it should be a drive with large storage.
In addition, the drive that you will use will have its data deleted completely. For that reason, we suggest using an empty USB flash drive. You don’t have to worry about it getting corrupted as well since we’ll be using a legit method. Nonetheless, here’s how you can do this:
If this option is greyed out, then that only means that your Windows doesn’t support the creation of a USB recovery drive. Fortunately, we have another method for you, but we’ll discuss that later. For now, let’s head to the next step.
At this point, you now have a ready-to-use USB recovery drive. Now all you have to do is to learn the steps on how you can actually use it.
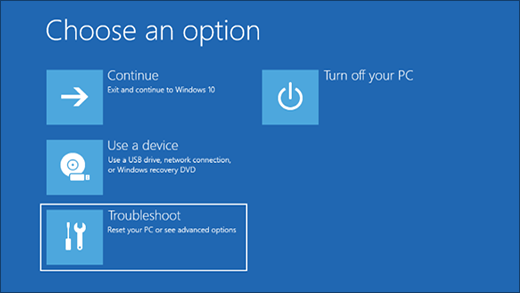
Fast forward into the future, and you now have a damaged Windows operating system. Now, what do you do? Fortunately, you’ve created a USB recovery drive before it happened. With that said, here are the steps you need to follow to use this method:
At this point, you are now able to do the things you weren’t able to do before your Windows operating system failed you. there shouldn’t be any problem at this point, except if you weren’t able to create a USB recovery drive. In such a case, you don’t have to worry since you have more options than you think.
Although we chose to Recover from a drive earlier, there are actually more options that can be used on your Windows operating system. We only chose the one that seems to be the best way to use a USB recovery drive. Nevertheless, here are the other options you may have:
These five options should be able to serve as additional options for recovery. However, none of these seems to work similarly with a USB recovery drive. Coincidentally, we have just the method for you that you might be able to use easily.
A similar method to using a USB recovery drive is by using a System Repair Disc instead. Of course, there are differences between the two. But if you already know how to manage the USB recovery drive, this should be a piece of cake for you.
As you may have already realized, the difference between the two is the fact that you will be using a DVD or CD instead of a USB drive. So without further ado, here’s how you can use this method to your advantage:
This will take a while depending on the size of your operating system. Either way, you should already acquire a ready-to-use recovery disc after this. Now let’s head to how you can use it:
At this point, you’ve already restored your Windows the way you want. With this, you already have multiple options for recovery besides the USB recovery drive. This should be enough for you to have no worries with handling your operating system.
People Also Read3 Ways on How to Recover Formatted USB Flash Drive for FreeHow Do You Recover Deleted Files from a USB Flash Drive
A lot of problems arise as we use our computers. It’s only natural to think of a way to not go to the trouble of solving these issues with typical solutions. Thus, we’ve introduced to you the creation of a USB recovery drive.
This is a method used by professionals to solve even the most severe problems. However, that doesn’t mean that you can solve all of them with this method. With that reasoning, you have to make sure you take care of your computer and not wait until the problem occurs.
Leave a Comment
Comment

Technical Expertise for PC/Website Optimization
One of my passion is to develop software of my own
I write articles to share knowledge about IT technology and some experience in developing my own software, and developing my own software is one of my passions for work.
Data Recovery
FoneDog Data Recovery recovers the deleted photos, videos, audios, emails, and more from your Windows, Mac, hard drive, memory card, flash drive, etc.
Free Download Free DownloadHot Articles
 /
/
INTERESTINGDULL
/
SIMPLEDIFFICULT
Thank you! Here' re your choices:
Excellent
Rating: 4.8 / 5 (based on 92 ratings)
