FoneDog Screen Recorder
FoneDog Screen Recorder
Special Offer
Special Offer


By Vernon Roderick, Last updated: July 14, 2020
Taking notes is a basic part of one’s life especially if they often use their smartphones for just about everything. However, while smartphones are great and all, you shouldn’t always rely on them, and that is why we have computers.
It may be a bit difficult to transfer notes from iPhone to computer, but it is definitely possible. However, we will require the help of apps and utility tools. Now let’s start with our very first recommendation to import your notes from iPhone to computer.
#1 Transfer Notes from iPhone to Computer using Specialized Tool#2 Transfer Notes from iPhone to Computer through iCloud#3 Transfer Notes from iPhone to Computer through iTunes#4 Transfer Notes from iPhone to Computer via EmailConclusion
Although Notes are technically bit-sized pieces of data, in truth, they are really very difficult to import and export, and there are many reasons for that.
This is mainly because most third-party file transfer tools that are available usually don’t support files regarding Notes. Fortunately, there are still some tools out there that have this capability, and one of them is FoneDog iOS Data Backup & Restore.
iOS Data Backup and Restore
One click to backup the whole iOS device to your computer.
Allow to preview and restore any item from the backup to a device.
Export what you want from the backup to your computer.
No data loss on devices during the restore.
iPhone Restore Won't Overwrite Your Data
Free Download
Free Download

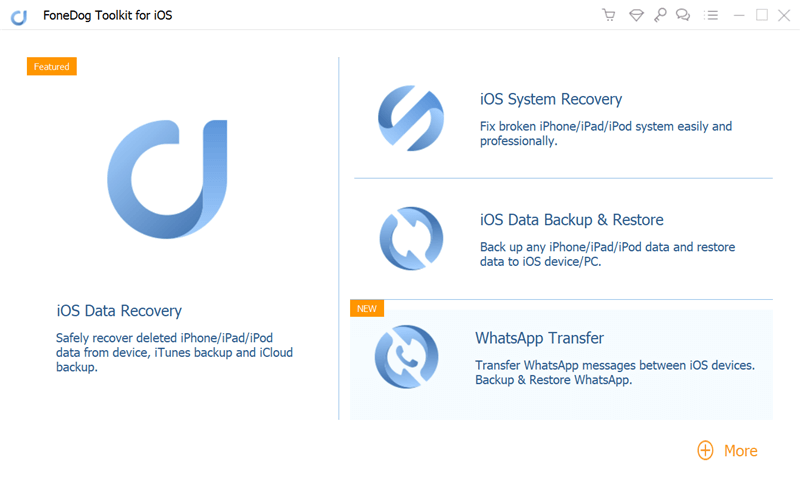
FoneDog Phone Transfer is a software that was designed by the FoneDog group. It is capable of creating a backup file. The software may also restore the contents of that backup file. In other words, you can transfer notes from iPhone to computerif you are able to create a backup containing the notes files. Follow these steps if you’d like to use this tool.
Using a USB cable, connect your iPhone to your computer. make sure FoneDog iOS Toolkit is open before you do this. Choose iOS Data Backup from the selection. Select what type of backup you’d like to create. The only difference between Standard and Encrypted is that Encrypted requires a password to open. Once you select a type, click on Start.
The next window will show you different types of data. Make sure Notes is checked in this list. Once you have ensured that it is indeed there, click on Next. The software will now start creating a backup that consists of the file types that you have selected, so Notes should be included.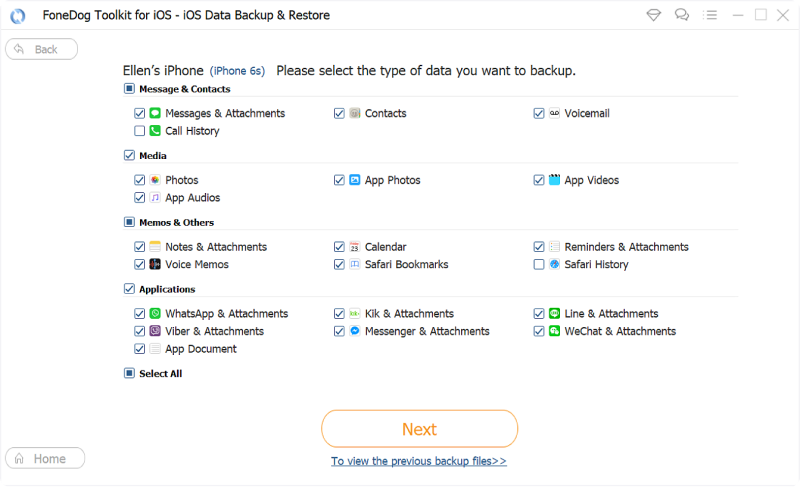
Now that we have a backup file, this time, select iOS Data Restore from the software. The iPhone should still be connected to the computer. You will then get a list of local backups, from which you should see and choose the one that we have recently created. You can determine the backup by checking the Latest Backup Data entry. Once you select the right backup, click on View Now.

The software will start scanning the selected backup files. Since it mainly consists of Notes files, you should see the said files on the left side of the window. Once the scanning is complete, click on the Restore to PC option at the bottom-right corner of the screen. This will finalize the restore process, though it may take a while.

At this point, your notes should be pouring into your computer from the iPhone. You no longer have to do anything. While there is some technical stuff you have to remember, the process is fairly simple, which is why I recommended it in the first place. Now if you’re not fond of using third-party software, then I guess the next method would be better.
For more information, please view the user guide here.
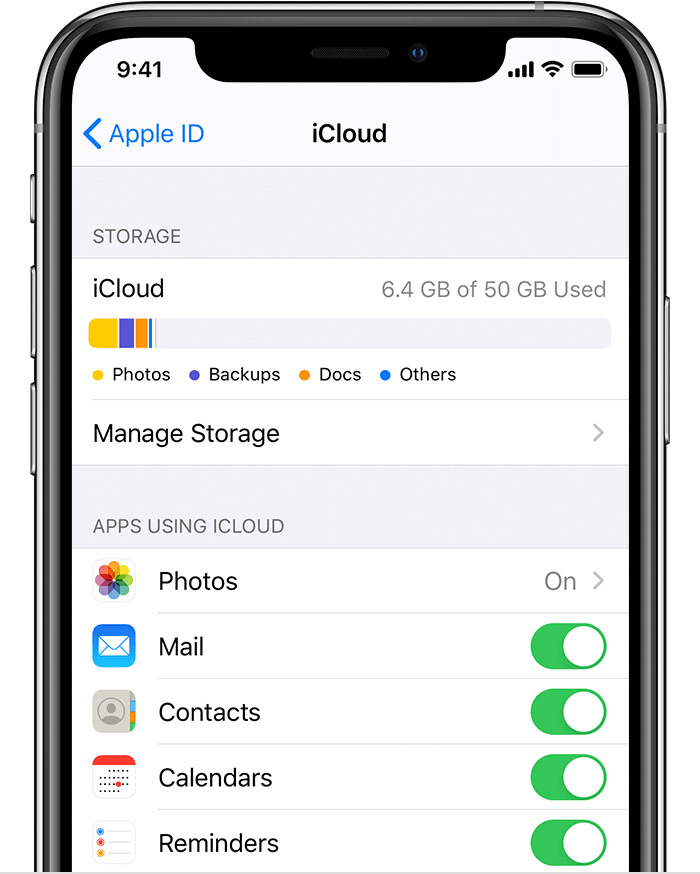
As great as using a third-party tool is, there are actually built-in apps that are as capable as those tools. One such tool happens to be iCloud, a cloud storage service offered by Apple Inc. It has a limit of 5 GB storage space, though there shouldn’t be an issue as it is completely free.
iCloud allows users to store their files within the storage. By doing so, users will be able to access those files from another device, as long as there are using the same Apple ID. The main advantage of this method is that once you set it up, any new notes that are created would automatically be sent to your computer.
Thus, there would be no need to transfer notes from iPhone to computerthe second time, as long as you set it up correctly. As such, follow these steps carefully so as to avoid making any regrettable mistakes.
 Now, remember that once you complete the setup, you will be able to visit the iCloud.com website regularly and still see the notes from your iPhone. Thus, technically speaking, it is still a way to transfer notes from iPhone to computer, though not completely.
The only disadvantage of this is the fact that you will need an internet connection to use iCloud. For that reason, our next entry would be a method that doesn’t require the internet.
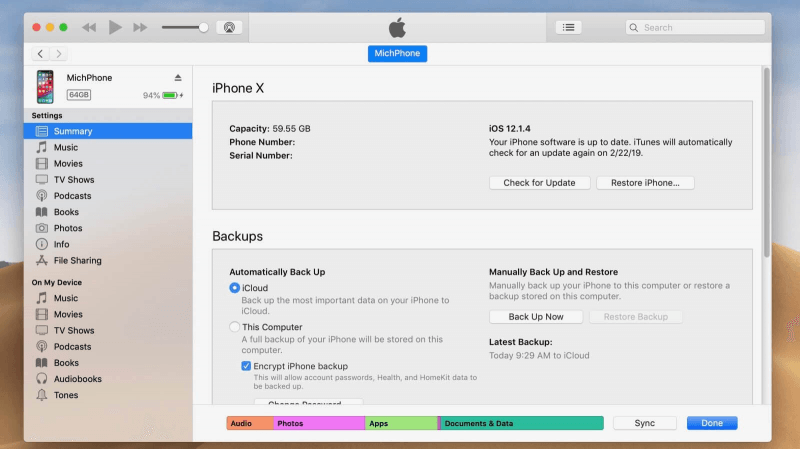
Since we tried using iCloud in our previous section, this time we will be using what can be considered its close relative, iTunes.
Just like iCloud, iTunes is a product by Apple Inc. However, this time, iTunes is a multimedia player instead of cloud storage, just as the name implies. Although that’s the case, iTunes can actually be used as a file management app.
As a file management app, it is capable of tasks such as transferring files, copying files, storing files, and many more. It can be said that it is an all-in-one tool. Follow these steps if you’re ready to use iTunes to transfer notes from iPhone to computer:
This will create a copy of your note on your iTunes app. Now all you have to do is make sure that those notes are transferred to your computer:
With this, you should be able to transfer notes from iPhone to computerwithout any internet connection. On the other hand, you will need a USB cable to make this work. Now that you know how to share a file through iTunes, I would also like to introduce a similar method.
There are actually many methods to share files on the iPhone, including your notes, as you may have seen when using the previous method. It’s not only iTunes, but you may also use email sharing.
You can think of this method as an alternative for iCloud since they both use an internet connection. The only difference is that with this method, you will need to regularly transfer notes from iPhone to computer, instead of just setting it up once, like iCloud. Either way, here are the steps that you’d need to follow:
With this, you will be able to easily transfer notes from iPhone to the computer, though you will need to do it repeatedly if you want to transfer notes from time to time. So, it has some disadvantages, though it is still a great method.
iOS Data Backup and Restore
One click to backup the whole iOS device to your computer.
Allow to preview and restore any item from the backup to a device.
Export what you want from the backup to your computer.
No data loss on devices during the restore.
iPhone Restore Won't Overwrite Your Data
Free Download
Free Download
These are the four ways to transfer notes from iPhone to computer. You may choose which is the best option for you. However, remember that when you make a mistake when transferring files, you may encounter data loss.
As such, make sure you are always careful and follow the steps as it is. It may take a while or just seem to be difficult to understand, but the whole process is worth it. Hopefully, this helped you in fulfilling your goal of seeing your notes even through your computer.
Leave a Comment
Comment

Technical Expertise for PC/Website Optimization
One of my passion is to develop software of my own
I write articles to share knowledge about IT technology and some experience in developing my own software, and developing my own software is one of my passions for work.
iOS Data Backup & Restore
Back up your data to PC and selectively restore iOS data from backups.
Free Download Free DownloadHot Articles
 /
/
INTERESTINGDULL
/
SIMPLEDIFFICULT
Thank you! Here' re your choices:
Excellent
Rating: 4.6 / 5 (based on 102 ratings)
