FoneDog Screen Recorder
FoneDog Screen Recorder
Special Offer
Special Offer


By Vernon Roderick, Last updated: February 3, 2020
Normally, your iTunes is filled with ringtones and more and more of them are added as time goes by. However, that’s not always the case, you’ll have to do it yourself when the time comes. And this is especially true if you want to add custom ringtones.
Fortunately, there are different methods on how to add ringtone to iTunes, but it won’t be easy learning them. After all, there have been countless updates on iTunes that may deter its capability of adding ringtones freely. Either way, let’s proceed to our first option.
Method #1: How to Add Ringtone to iTunes via Phone TransferMethod #2: How to Add Ringtone to iTunes Using ComputerMethod #3: How to Add Custom Ringtone to iTunesMethod #4: How to Add Ringtone to iTunes Using AppFinal Words
To add a ringtone on iTunes, you will have to either download that ringtone and locate it using iTunes or transfer the ringtone from another source. Learning how to add ringtone to iTunes using specialized software involves the latter.
For this, we recommend FoneDog Phone Transfer. It is a software that allows you to transfer files from one place to another. This means that every ringtone you have on one of your device can be transferred to your iTunes easily. Here’s how you can use FoneDog Phone Transfer on how to add ringtone to iTunes:
First off, download the setup file of FoneDog Phone Transfer. We suggest getting it from the official website to avoid any piracy issues and malware problems. Next, install the software.
Phone Transfer
Transfer files among iOS, Android and Windows PC.
Transfer and backup text messages, contacts, photos, video, music on computer easily.
Fully compatible with iOS 13 and Android 9.0.
Free Download

Once you’ve successfully downloaded and installed the software, open it on your computer. Then, connect your mobile device to the desktop using a cable. The software will automatically detect your device and it will show some information about the device on the software’s interface, including its specifications.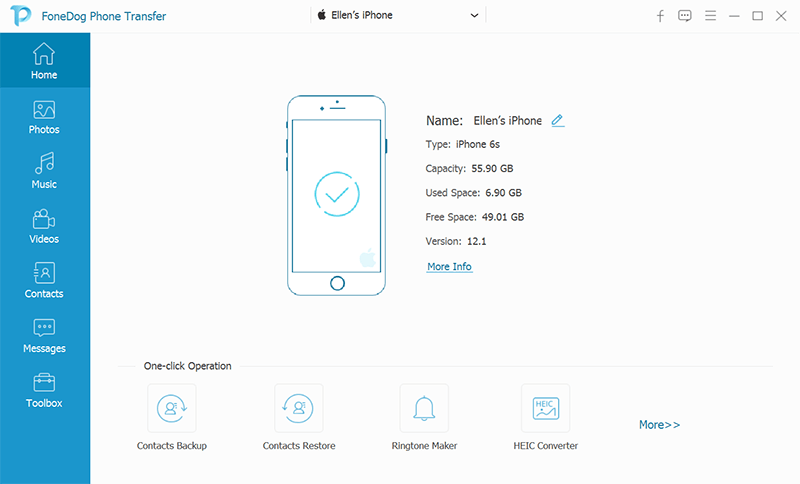
On the main interface, you will see that on the left side of the window are different data types. This includes Photos, Music, Videos, and more. Since we are dealing with ringtones, we will have to select Music. This will then show you different directories to the right of the data types.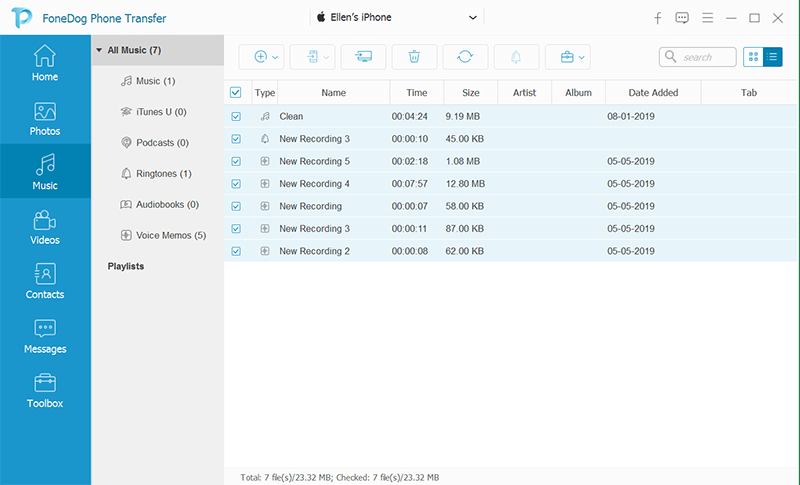
Using the directories, navigate to where the ringtone that you want to add to iTunes is located. Once you select the right folder, you will see a list of items on the right side. To select an item, click on their corresponding boxes. Once the selection is done, click the Export to PC which should be found at the top of the software.
With that said, you now know how to add ringtone to iTunes using a specialized software. Now how can you do it without relying on a third-party tool?
If your goal is to learn how to add ringtone to iTunes and not custom ringtones, then it would be much simpler. All you need is your computer and the iTunes app of course. It is fairly simple, but you have to make sure you don’t get lost in these steps:
With this, you are all set. All you have to do is to do this for every ringtone that you want to add on iTunes. This will usually work on most of the ringtones that you want to add, except if what you want are custom ringtones.
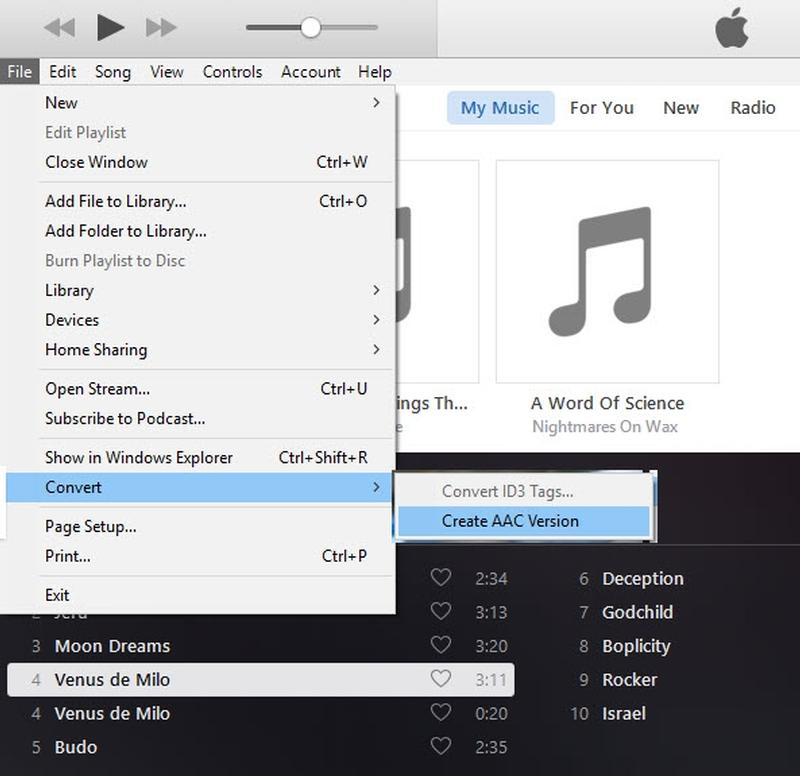
If you want to learn how to add ringtone to iTunes, it would be very easy, but it would be a different story if it involves custom ringtones. For this, you will have to follow a different set of instructions. Here are the steps you’ll need to take:
That’s everything you need to know about learning how to add ringtone to iTunes using customized songs. Since we’re talking about custom ringtones, of course, the steps would be more complicated and difficult to do. Regardless, this should be enough to help you along your way. Now we head to our last entry.
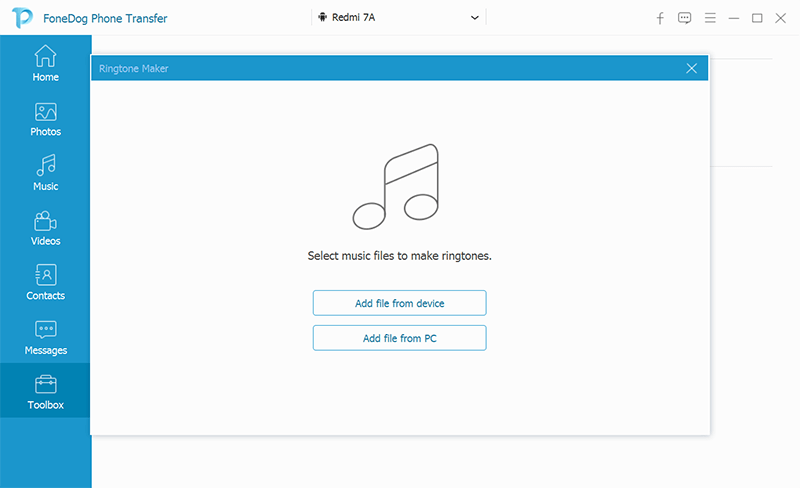
We mentioned before that FoneDog Phone Transfer has a Ringtone Maker feature. While it’s pretty rare for a transfer software to have such a feature, there are lots of tools out there that specialize in creating customized ringtones.
Surprisingly, most of them can be used for free by people on the internet. Some examples of ringtone maker apps are the following:
These are only the ones that we recommend. If you find that these five are not suited for you, you may also find ringtone maker apps yourself. However, we only advise you not to get apps from unauthorized sources since it may have malware. Regardless, this ends the four methods on how to add ringtone to iTunes.
Phone Transfer
Transfer files among iOS, Android and Windows PC.
Transfer and backup text messages, contacts, photos, video, music on computer easily.
Fully compatible with iOS 13 and Android 9.0.
Free Download
There are tons of ways for you to add aesthetics to your phone. One of those ways is to add a ringtone that you like. However, most of the time, the ringtone that you like will most likely be non-existent from your system.
For that reason, we need to know how to add ringtone to iTunes by using our own song of choice. Fortunately, you can do this in four methods, all of which we’ve discussed in this article. Hopefully, this helped you with what you aim to accomplish.
Leave a Comment
Comment

Technical Expertise for PC/Website Optimization
One of my passion is to develop software of my own
I write articles to share knowledge about IT technology and some experience in developing my own software, and developing my own software is one of my passions for work.
Phone Transfer
Transfer data from iPhone, Android, iOS, and Computer to Anywhere without any loss with FoneDog Phone Transfer. Such as photo, messages, contacts, music, etc.
Free DownloadHot Articles
 /
/
INTERESTINGDULL
/
SIMPLEDIFFICULT
Thank you! Here' re your choices:
Excellent
Rating: 4.7 / 5 (based on 59 ratings)
