FoneDog Screen Recorder
FoneDog Screen Recorder
Special Offer
Special Offer


By Gina Barrow, Last updated: December 2, 2019
Connecting your Android phone to the computer does a lot of things. Most of the time we use the USB connection for data transfer but it’s also being used in many ways such as in troubleshooting.
Today we will focus more on the data transfer side. USB connection helps you copy files like your photos, music, audios, videos, and documents from your mobile phone to the computer or vice versa.
It’s the basic form of transfer in Android! We still got plenty of options on how to transfer files from Android to PC using USB cable and this is what we will show you in the next parts, read along!
Part 1. In Phone Transfer How to Transfer Files from Android to PC Using A USB CablePart 2. In Windows File Explorer How to Transfer Files from Android to PC using USB CablePart 3. In Google Drive How to Transfer Files from Android to PC without USB CablePart 4. Summary
If your main goal is data transfer that can give you more features and benefits, I highly recommend a program called, FoneDog Phone Transfer.
This software allows you to perform data transfer between Smartphones and across multiple platforms. Yup! It is not just limited to a specific device.
In fact, it supports file transfer in between:
The files that you can transfer are also flexible such as your contacts, messages, videos, photos, music, and so much more.
What makes FoneDog Phone Transfer stand out is the one-click operation feature that moves your files from a device to PC. It saves your files in one place so it will be easier for you to export them any time you are ready!
Unlike the conventional USB File Explorer transfer where you have to manually do the transfer, using FoneDog Phone Transfer saves you time and effort.
Here is a detailed guide on how to transfer files from Android to PC using a USB cable:
The first thing you need is to get this program running on your computer by installing it first. After successful installation, launch the program and connect the Android phone using a USB cable. The program will automatically recognize your phone and will display your information including all the files saved inside.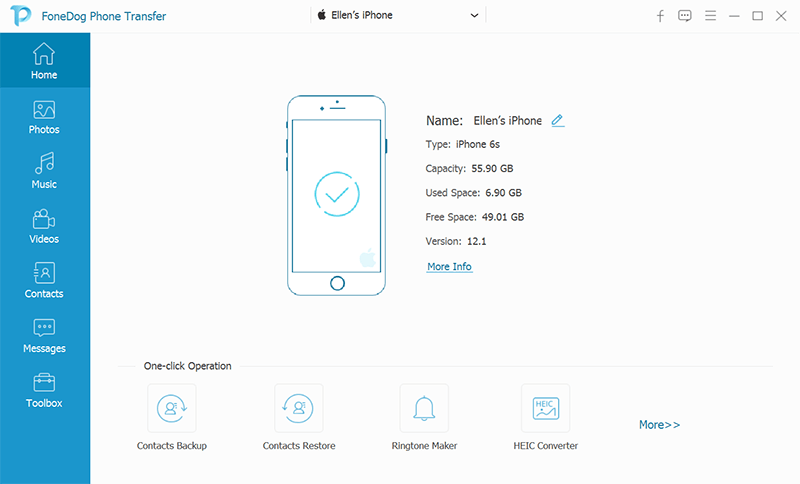
Once you have connected your Android phone, you can choose which files to files to your PC. From the left toolbar, you will see the different file categories like your Photos, Music, Videos, Contacts, Messages, and more.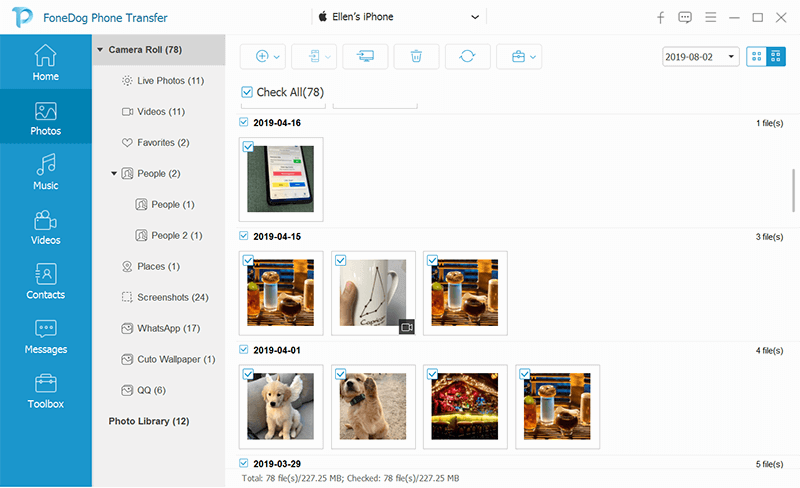
After you have selected the desired category, you will then see all the saved contents inside wherein you can see detailed information about each item. Select the file/s you wish to move from your phone to the computer.
Now that you have marked all the files you need, just click the icon Export to PC and wait for the transfer process.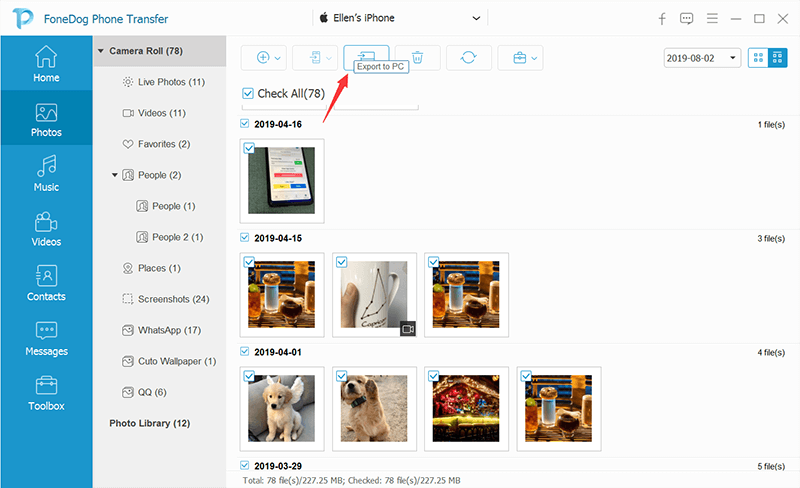
With FoneDog Phone Transfer, you don’t have to find all the files from your Android phone since everything will be displayed according to its category and file type. Well, apart from the transfer feature, you also get to customize your own ringtone right inside this software!
This next method that we will show you is the most basic form of Android data transfer in a Windows computer. Using the File Explorer and a USB cable, you can copy and paste any types of files from your Smartphone.
To refresh your memory, here’s how the process goes:
This third method is a bonus one wherein you will learn how to transfer files in between your Android and PC without the need to use a USB cable. Android data transfer can be done wirelessly and the easiest option to use is Google Drive.
Google Drive is available in most Android devices so you can take advantage of its features. You can get 15GB of free storage of different file types such as Audio, Documents, Videos, and Images.
To learn more on how to make use of your Google Drive using your Android phone, follow this:
To view the files on your PC:
Android phones are basically pretty easy to manage just like what we have discovered in this article. We learned how to transfer files from Android to PC using a USB cable.
In fact, there are many ways to do it but we recommended a program called FoneDog Phone Transfer to help you manage your files. It also offers a more organized environment where in your files is safe and can be exported to any device and platforms at any time.
Of course, we also featured the traditional data transfer option by using your USB cable and the Windows File Explorer!
Leave a Comment
Comment

Technical/Creative Writer
Kitchen, my safe space; black, my favorite color
Was a Technical Specialist for a while, troubleshooting Smartphone and Software-related issues until a writing stint caught my attention.
Phone Transfer
Transfer data from iPhone, Android, iOS, and Computer to Anywhere without any loss with FoneDog Phone Transfer. Such as photo, messages, contacts, music, etc.
Free DownloadHot Articles
 /
/
INTERESTINGDULL
/
SIMPLEDIFFICULT
Thank you! Here' re your choices:
Excellent
Rating: 4.7 / 5 (based on 63 ratings)
