FoneDog Screen Recorder
FoneDog Screen Recorder
Special Offer
Special Offer


By Vernon Roderick, Last updated: January 21, 2021
Due to the size of iPad in comparison to iPhone or iPod, it’s the best Apple device if we’re talking about showing off your favorite photos. However, that doesn’t mean that the fun of taking and displaying pictures won’t end.
Although the storage space of iPad is comparable to other devices, you will eventually run out of space if you keep taking pictures.
This article will guide you on how you can save space by learning to transfer iPad photos to iPad. Let’s start with what I consider to be the most ideal method right now.
1. How to Easily Transfer iPad Photos to iPad2. Transfer iPad Photos to iPad via AirDrop3. Transfer iPad Photos to iPad via Photo Stream4. Transfer iPad Photos to iPad through iTunes5. Transfer iPad Photos to iPad with iCloud Photo LibraryConclusion
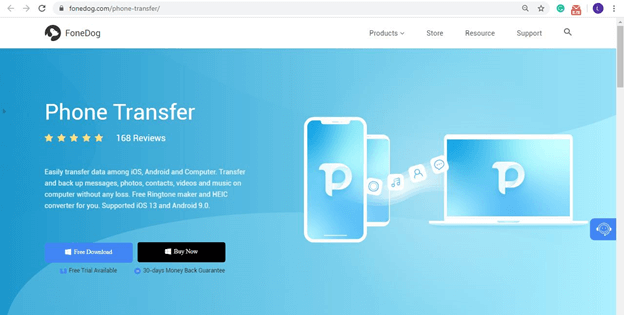
Experts can easily list out a couple of ways to transfer iPad photos to iPad, but among all of them, one of the most effective and easiest would be to use a specialized tool, and that’s where FoneDog Phone Transfer comes in.
FoneDog Phone Transfer is a tool designed to help users transfer files from one device to another. That said, it can transfer pictures from or to iOS, Android, and Windows PC, and on top of that, it supports the latest versions of these corresponding devices.
Follow the steps below if you want to transfer iPad photos to iPad:
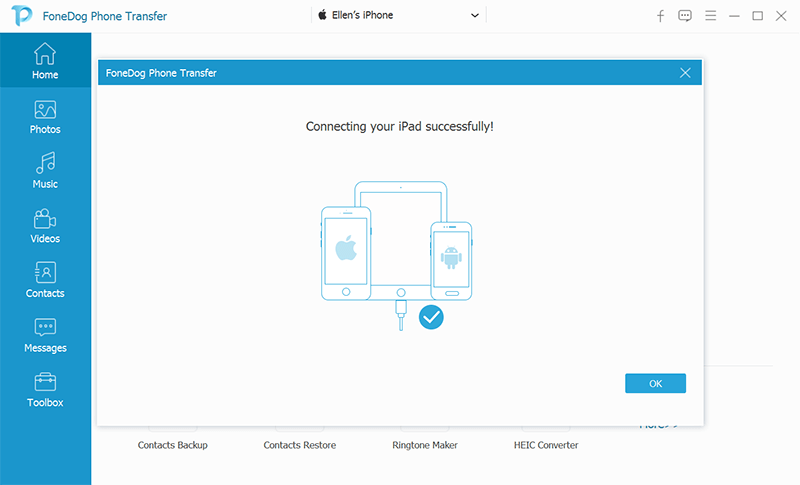
Connect the iPad where the photo will come from into the computer. Do the same for the iPad where the photo will be transferred to. Make sure FoneDog Phone Transfer is already open. On the main page of the software, click the dropdown menu at the top and select the source device.
On the left side of the window, there will be a list of file types. Simply select Photos to scan the source device for files belonging to this file type. You may need to wait for a bit to get the search results.
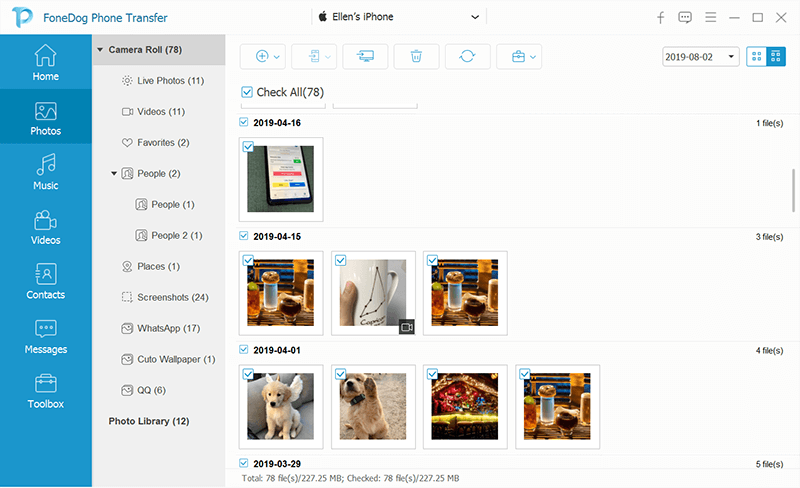
Now you should get a list of files on the right side of the window. These are files contained within the source device. Simply select the photos that you want to transfer. Once you’re done with selections, click on the button as shown below and select the destination device.
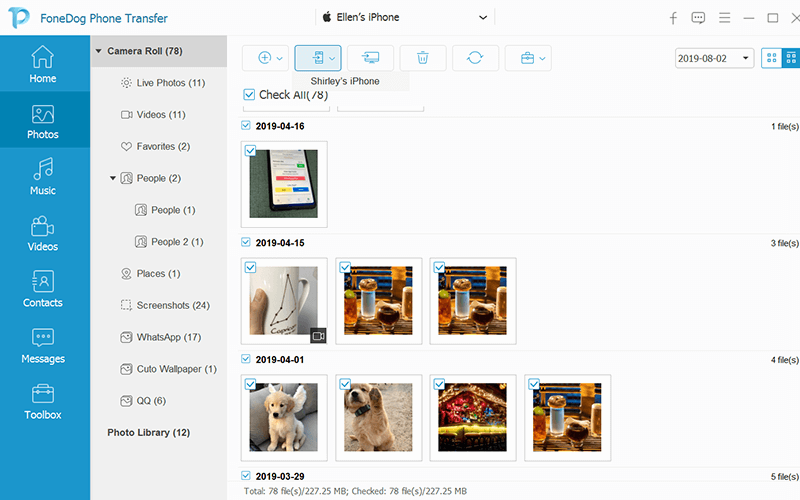
That’s how you can transfer iPad photos to iPad using this software. Unfortunately, this is not available on Mac.
If you are a Mac user, you can instead use another method in the next sections.
Since you will need to transfer iPad photos to iPad, two USB cables will be needed for wired transfer, but what if there’s a method that can transfer wirelessly?
AirDrop is a feature present in most Apple devices that allows users to share their files with other Apple users. Simply put, you can share your photos from one iPad to another with AirDrop.
Before you use AirDrop, however, you have to keep these things in your mind:
Once you have ensured that these are taken into account, you are now ready to transfer iPad photos to iPad. Below are the steps to do this:
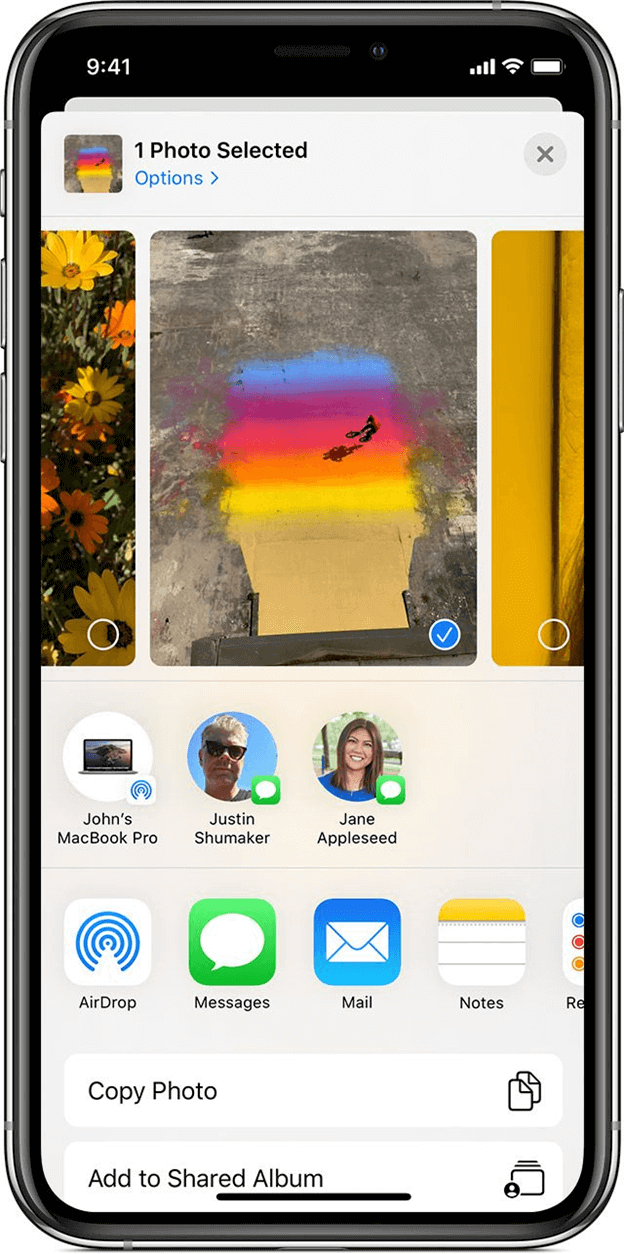
This takes relatively longer than most methods for photo transfer. Still, it’s fairly easy to transfer iPad photos to iPad via AirDrop so overall; it’s a nice option to consider.
Although using AirDrop is easy, the first step is to locate the photos. But what if you don’t exactly know where all your photos are located, but you still want to transfer them?
Photo Stream is a built-in app on Mac and an app that can be installed on Windows. Basically, it allows users to manage photos and one of its features is it can scan your device for photos, whether you know their exact location or not.
Below are the steps to enable Photo Stream:
This will activate Photo Stream so that any photo uploaded to the Photo Stream, regardless of how it was uploaded, will be available on both devices.
Now here’s how you can transfer iPad photos to iPad via Mac/Windows:

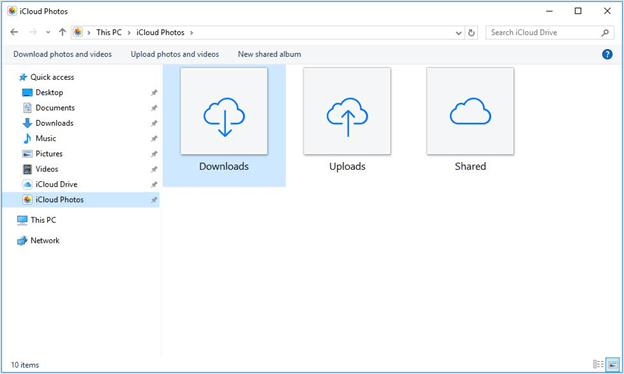
Once this is done, all you have to do is open the destination iPad and go to your Albums. You will see that all the photos you copied to Mac or Windows will also appear on the other iPad’s Photo Stream album.
That’s how you can transfer iPad photos to iPad. Remember, however, that Photo Stream can only store photos for 30 days at max.
If you’ve been an Apple user for quite some time, you must have heard of iTunes already.
iTunes is a file management app available to Apple devices, though it can also be installed on Windows. Basically, it helps you manage your files, and that includes photos.
As experts have already proven, it is possible to transfer iPad photos to iPad using iTunes. Simply follow these steps:
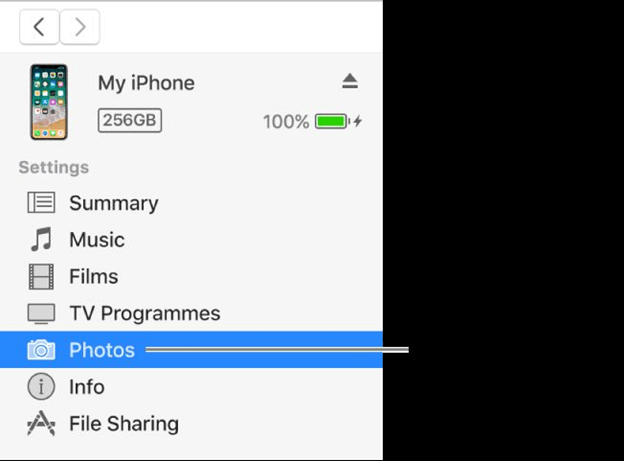
This will sync the two iPads together. Although you can plug the two iPads at once, it may cause some issues so it’s better to do the steps separately.
Our last method mostly involves iCloud Photo Library. Actually, this shouldn’t be the first since experts use this the most, but since I know that there are more effective methods, I’ve done the opposite.
iCloud Photo Library is a section on your iPad’s settings that was specifically made if you want to transfer iPad photos to iPad.
Without further ado, here’s what you need to do:
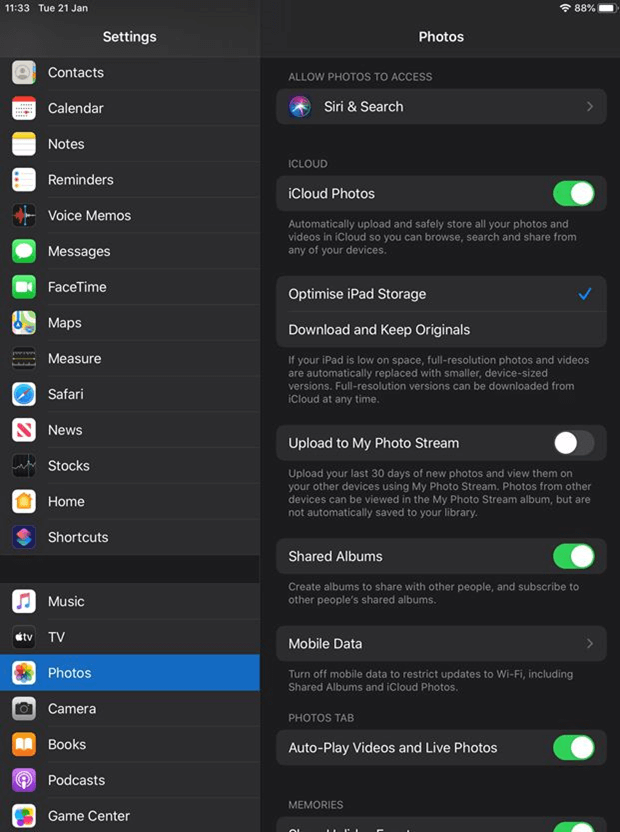
As you can see, it’s very easy to transfer iPad photos to iPad with iCloud Photo Library. Unfortunately, there are many cases where it failed. Still, it’s a great option that’s worth considering.
You don’t have to be an expert to save some storage space on your iPad. You can even do it simply by deleting some files. However, that’s a bit of a risky move, so your best bet would be to transfer iPad photos to iPad instead.
With this guide, you should be able to accomplish that very easily. However, that doesn’t mean you can get reckless when using your storage. Make sure to still be careful when handling your iPad, because not everything is predictable.
Leave a Comment
Comment

Technical Expertise for PC/Website Optimization
One of my passion is to develop software of my own
I write articles to share knowledge about IT technology and some experience in developing my own software, and developing my own software is one of my passions for work.
Phone Transfer
Transfer data from iPhone, Android, iOS, and Computer to Anywhere without any loss with FoneDog Phone Transfer. Such as photo, messages, contacts, music, etc.
Free DownloadHot Articles
 /
/
INTERESTINGDULL
/
SIMPLEDIFFICULT
Thank you! Here' re your choices:
Excellent
Rating: 4.6 / 5 (based on 89 ratings)
