By Nathan E. Malpass, Last updated: October 2, 2023
Upgrading to a new Samsung device is an exciting step forward. Whether you're getting the latest flagship model or simply switching to a different Samsung device, one of the most crucial aspects is transferring your data seamlessly.
The thought of transferring data from Samsung to Samsung, such as contacts, photos, apps, and settings, might sound daunting, but with the right techniques, it can be a hassle-free process.
This article is your ultimate guide to mastering the art of transferring data from one Samsung device to another. We'll walk you through various methods and tools that Samsung offers to ensure your transition is smooth and worry-free. Say goodbye to the days of manually re-entering contacts or losing cherished memories during device switches.
Let's dive into the world of effortless data migration and make the most out of your new Samsung experience.
Part #1: Methods for Transferring Data from Samsung to SamsungPart #2: The Best Method for Transferring Data from Samsung to Samsung: FoneDog Phone TransferConclusion
Part #1: Methods for Transferring Data from Samsung to Samsung
Method #1: Using Bluetooth
When it comes to transferring data between two Samsung devices, using Bluetooth is one of the most straightforward methods. Bluetooth technology allows for wireless communication between devices, making it a convenient choice for transferring smaller amounts of data such as contacts and photos.
Here's how you can use Bluetooth for transferring data from Samsung to Samsung:
- Prepare Both Devices: Ensure that Bluetooth is enabled on both your source and target Samsung devices. You can usually find the Bluetooth option in the settings menu or in the quick settings panel.
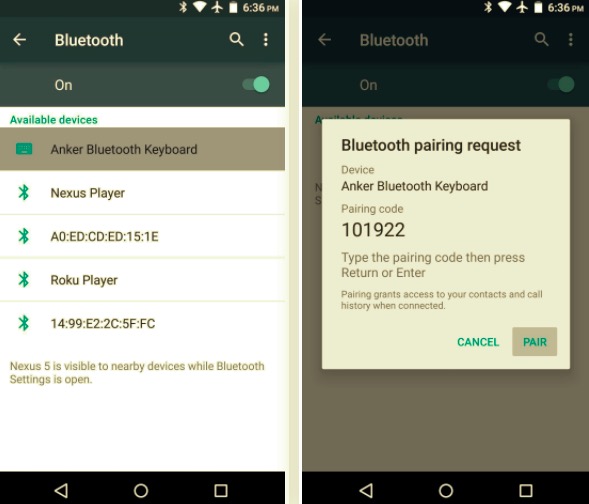
- Pair the Devices: On the source device, go to the Bluetooth settings and select “Pair a new device”. Your target device should appear in the list of available devices. Tap on the target device to initiate the pairing process.
- Accept the Pairing Request: The target device will display a pairing request along with a passcode. Confirm the pairing request on the source device, and ensure that the passcodes match on both devices.
- Select the Data to Transfer: Once the devices are paired, you can start selecting the data you want to transfer. Depending on the devices and software versions, you might be able to transfer contacts, photos, videos, and other files.
- Initiate the Transfer: With the data selected, initiate the transfer process. The devices will establish a Bluetooth connection and begin transferring the chosen data. Keep in mind that Bluetooth transfers might take some time, especially for larger files.
- Complete the Transfer: Once the transfer is complete, you’ll receive a notification on both devices. You can then check the respective apps or locations where the data was transferred to ensure everything has been successfully moved.
Method #2: Using Email
Transferring data between Samsung devices doesn't always require fancy apps or complicated processes. Sometimes, a simple and familiar method like using email can get the job done efficiently. If you're looking to transfer a few files, documents, or even contacts, using email can be a convenient option.
Here's how you can use email to transfer data from one Samsung device to another:
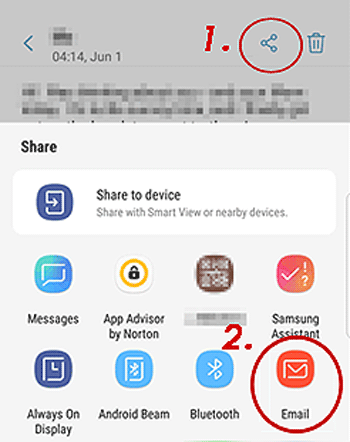
- Compose an Email: On your source Samsung device, open your preferred email app and compose a new email.
- Attach Files: Depending on the data you want to transfer, you can attach files, documents, photos, or even contacts to the email. Most email apps allow you to attach various types of files.
- Enter Recipient: In the recipient field, enter the email address associated with your target Samsung device. This could be your own email address or the recipient’s email if you’re transferring data to someone else’s device.
- Send Email: Once you’ve attached the necessary files and entered the recipient’s email address, hit the “Send” button to dispatch the email.
- Access on Target Device: Open the email on your target Samsung device. Download any attached files or documents by tapping on them. For contacts, you might need to export them from the email to your device’s contacts app.
- Organize Data: After downloading files or documents, make sure to organize them in the appropriate folders or apps on your target device.
Using email to transfer data between Samsung devices is a versatile choice, especially when you want to send a few files or share essential documents quickly. However, keep in mind that larger transfers might face limitations due to email attachment size restrictions.
Method #3: Using Google Drive
When it comes to seamless data transfer between Samsung devices, cloud storage services like Google Drive provide an efficient and flexible solution. Google Drive allows you to store and share files, photos, and documents across devices, making it a convenient option for transferring data between your Samsung devices.
Here's how you can use Google Drive for transferring data from Samsung to Samsung:
- Upload to Google Drive: On your source Samsung device, open the Google Drive app or access it through a web browser. Upload the files, photos, or documents you want to transfer to your Google Drive account.
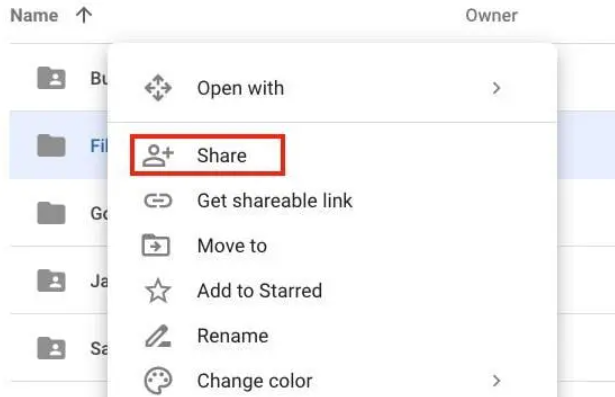
- Share Files: After uploading, select the files you want to transfer and click the “Share” option. Enter the email address associated with your target Samsung device. You can also create a shareable link if preferred.
- Access on Target Device: On your target Samsung device, open the email you received or access the shared link. Click the link to open the shared files in Google Drive.
- Download Files: From Google Drive, you can download the shared files directly to your target device. Depending on the file type, you might be able to open it in the appropriate app on your device.
- Organize Data: Once downloaded, organize the transferred data into the appropriate folders or apps on your target device.
Using Google Drive for data transfer offers flexibility and accessibility, making it an excellent choice for sharing files, documents, and photos between your Samsung devices. It's especially advantageous when dealing with larger files or when you want to collaborate with others on shared documents. As technology advances, let's explore more modern methods for data transfer in the next section.
Method #4: Using Messaging Apps
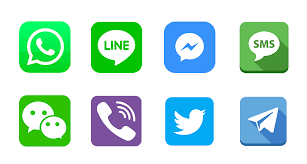
In the era of instant messaging, leveraging messaging apps for data transfer between Samsung devices has become a popular and efficient choice. Apps like WhatsApp, Telegram, and other messaging platforms offer the capability to share various types of files, making it convenient to transfer data seamlessly.
Here's how you can use messaging apps for data transfer:
- Choose a Messaging App: Select a messaging app that you and the recipient both have installed on your Samsung devices. Apps like WhatsApp, Telegram, and Signal are popular choices.
- Open Chat Conversation: Start a chat conversation with the recipient on the messaging app.
- Attach Files: Within the chat, find the option to attach files, documents, photos, or videos. This option is usually represented by a paperclip icon or a “+” symbol.
- Select Files: Choose the files you want to transfer from your device’s storage. Most messaging apps allow you to select multiple files to send in a single message.
- Send Files: Once you’ve selected the files, hit the “Send” button. The files will be uploaded to the messaging app’s servers and shared with the recipient.
- Download on Target Device: On the target Samsung device, open the chat conversation where the files were shared. Download and save the files to your device’s storage.
- Organize Data: After downloading, organize the transferred files in appropriate folders or apps on the target device.
Using messaging apps for data transfer provides a quick and interactive way to share files, media, and documents with friends, family, or colleagues. It's particularly useful for instant sharing and collaboration, making it a practical option for both personal and professional use.
However, for more comprehensive data transfers and larger files, let's explore the Smart Switch app in the next section.
Method #5: Using Samsung Smart Switch
When it comes to transferring data from one Samsung device to another, Samsung Smart Switch stands out as the go-to solution. This official application developed by Samsung is designed specifically for seamless data migration between Samsung devices. Whether you're upgrading to a new device or switching to a different model, Smart Switch makes the process effortless.
Here's how you can use the Samsung Smart Switch for transferring data from Samsung to Samsung:
- Install Smart Switch: On both your source and target Samsung devices, download and install the Samsung Smart Switch app from the Google Play Store (for Android) or the App Store (for iOS).
- Connect Devices: Open Smart Switch on both devices. You can choose to connect the devices using a USB cable, a USB On-the-Go (OTG) adapter, or wirelessly if both devices are connected to the same Wi-Fi network.
- Select Transfer Method: Choose the transfer method that suits your needs:
- Wireless: If both devices are connected to the same Wi-Fi network, you can choose the wireless transfer option.
- Cable: If you’re using a USB cable or OTG adapter, follow the on-screen prompts to establish a connection between the devices.
- Choose Data to Transfer: Select the types of data you want to transfer. This can include contacts, messages, photos, videos, apps, and more.
- Initiate Transfer: Once you’ve selected the data, initiate the transfer process. Smart Switch will begin copying the selected data from the source device to the target device.
- Complete the Transfer: Depending on the amount of data, the transfer process might take some time (If the files are too big, your Samsung Smart Switch might get stuck). Once the transfer is complete, you’ll receive a notification on both devices.
- Verify Data: After the transfer, verify that all your data, contacts, and apps have been successfully transferred to the new device.
Using the Samsung Smart Switch is the ultimate solution for transferring data seamlessly between Samsung devices. It ensures that your new device retains all the valuable data, settings, and apps from your old device, giving you a smooth transition without the hassle of manual data entry.
Whether you're upgrading to the latest Samsung flagship or switching to a different model, Smart Switch is the tool you can rely on.
Part #2: The Best Method for Transferring Data from Samsung to Samsung: FoneDog Phone Transfer
When it comes to data transfer between Samsung devices, various methods offer convenience and flexibility. However, if you're looking for a comprehensive and reliable solution, FoneDog Phone Transfer stands out as a top choice.
Phone Transfer
Transfer files among iOS, Android and Windows PC.
Transfer and backup text messages, contacts, photos, video, music on computer easily.
Fully compatible with the latest iOS and Android.
Free Download

This iPhone 15-supported software is specifically designed to simplify the process of transferring data from one Samsung device to another. Let's delve into why FoneDog Phone Transfer is considered one of the best methods for transferring data from Samsung to Samsung.
Why Choose FoneDog Phone Transfer:
- Cross-Platform Compatibility: FoneDog Phone Transfer is compatible not only with Samsung devices but also with a wide range of smartphones from different manufacturers, including LG, Xiaomi, Huawei, and so on. making it a versatile choice for data transfer.
- All-in-One Solution: The software supports the transfer of various types of data, including contacts, messages, photos, videos, music, call logs, apps, and more. This comprehensive approach ensures that no valuable data is left behind during the transfer.
- User-Friendly Interface: FoneDog Phone Transfer boasts an intuitive and user-friendly interface, making it easy for users of all levels of technical expertise to navigate the software and perform data transfers seamlessly.
- High Efficiency: With FoneDog Phone Transfer, you can transfer data between devices quickly and efficiently. This is especially useful when dealing with a large volume of data, ensuring minimal downtime during the transition.
- Data Privacy: FoneDog Phone Transfer takes data privacy seriously. Your personal information and sensitive data are handled securely during the transfer process, providing you with peace of mind.
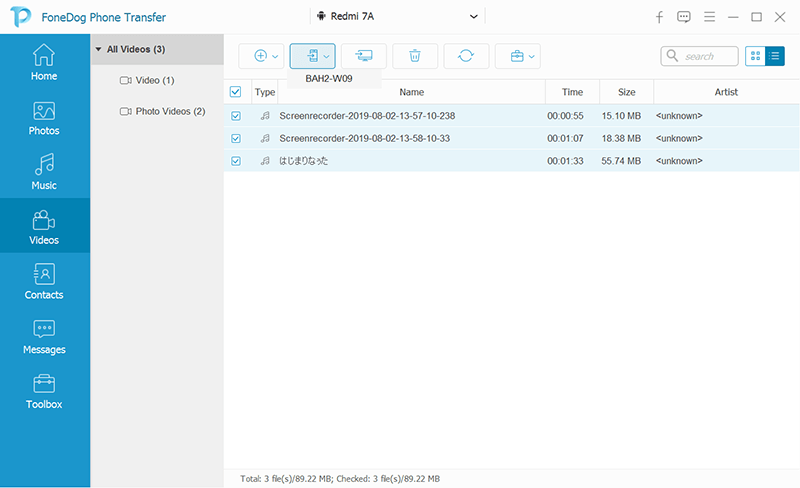
How to Use FoneDog Phone Transfer:
- Download and Install: Start by downloading and installing FoneDog Phone Transfer on your computer. Both Windows and Mac versions are available.
- Launch the Software: Launch the software and connect both your source and target Samsung devices to your computer using USB cables.
- Select Transfer Mode: Choose the “Phone to Phone Transfer” mode from the main interface of the software.
- Source and Target Devices: Ensure that the source device (your old Samsung device) is listed as the “Source” and the target device (your new Samsung device) is listed as the “Destination”. You can use the “Flip” button to swap their positions if needed.
- Select Data to Transfer: Select the types of data you want to transfer, such as contacts, photos, messages, and more. You can also choose to transfer apps if supported.
- Initiate Transfer: Once you’ve selected the data, click the “Start Transfer” button to begin the transfer process. The software will start copying the chosen data from the source device to the target device.
- Complete Transfer: After the transfer is complete, you’ll receive a notification confirming the successful transfer of data. You can now disconnect the devices from the computer.
People Also ReadA Guide On How To Transfer Data From Android To iPhoneA Complete Guide On How To Transfer Data From Pixel To Pixel The Easy Way
Conclusion
While various methods offer data transfer solutions for Samsung devices, FoneDog Phone Transfer stands out as an efficient, comprehensive, and user-friendly option. Whether you're upgrading to a new Samsung device or switching to a different brand, FoneDog Phone Transfer ensures that your data is seamlessly migrated from one Android to another.
With its cross-platform compatibility and robust features, FoneDog Phone Transfer emerges as the best method for transferring data from Samsung to Samsung and beyond.


 /
/
