FoneDog Screen Recorder
FoneDog Screen Recorder
Special Offer
Special Offer


By Adela D. Louie, Last updated: January 15, 2024
Ever wondered how to effortlessly capture pristine audio or create captivating voiceovers? Look no further. Our guide dives deep into the art of recording audio on Windows 10, designed to empower both novices and tech-savvy users alike.
Whether you're a budding podcaster, a musician, or simply someone keen on preserving memories through audio, this beginner’s walkthrough will navigate you through the tools, settings, and expert steps on how to record audio Windows 10. Get ready to elevate your audio game as we unravel the secrets behind seamless audio recording on your Windows 10 system.
Part #1: Best Way to Record Audio on Windows 10 – FoneDog Screen RecorderPart #2: Various Methods on How to Record Audio Windows 10Conclusion
FoneDog Screen Recorder stands out as a premier solution for audio recording on Windows 10, offering a seamless and user-friendly experience. This versatile tool provides an efficient means to capture audio from various sources, ensuring high-quality recordings for diverse needs.
![]() Free Download
For Windows
Free Download
For Windows
![]() Free Download
For normal Macs
Free Download
For normal Macs
![]() Free Download
For M1, M2, M3
Free Download
For M1, M2, M3
Here are the steps to utilize this computer-based audio recorder to record audio Windows 10:
1. Access the official FoneDog website and download the Screen Recorder application. Follow the installation instructions to set it up on your Windows 10 system.
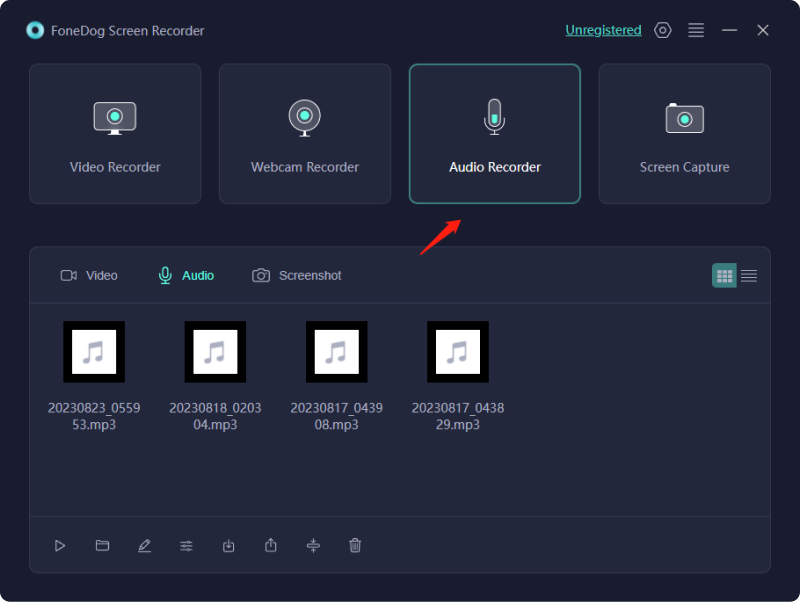
2. Open the application after installation. You'll find an intuitive interface with multiple recording options. Choose the "Audio Recorder" mode from the available recording modes within the application.
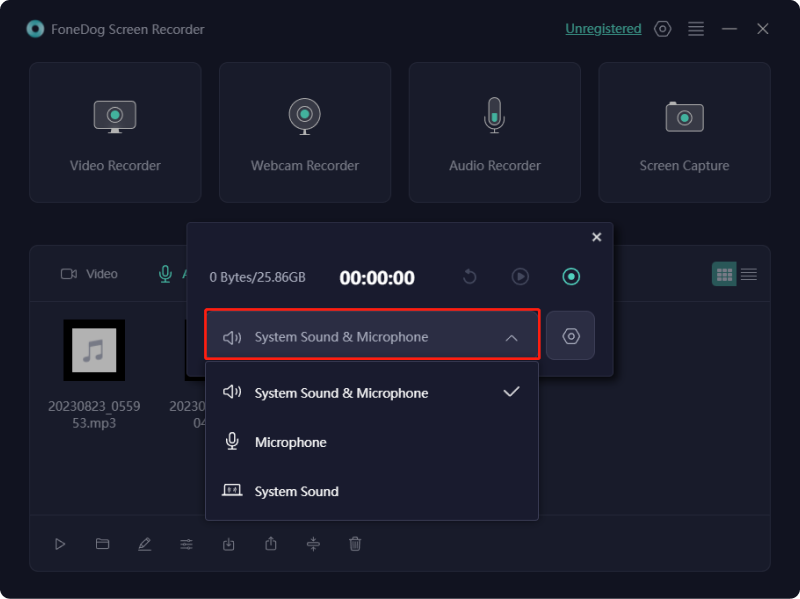
3. Before recording, adjust the audio settings according to your preferences. You can select the input source, adjust volume levels, and choose the desired audio format.
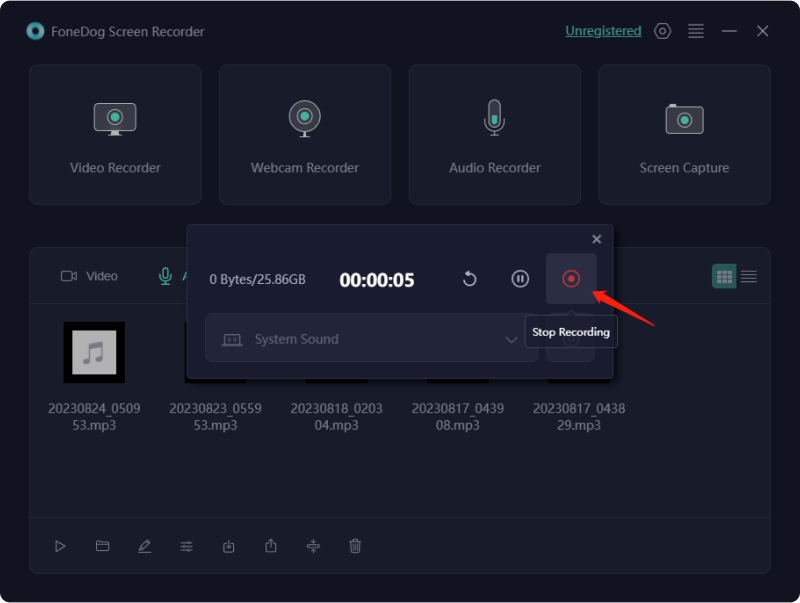
4. Click the "Record" button to initiate the audio recording process. FoneDog Screen Recorder will start capturing audio from the selected source.

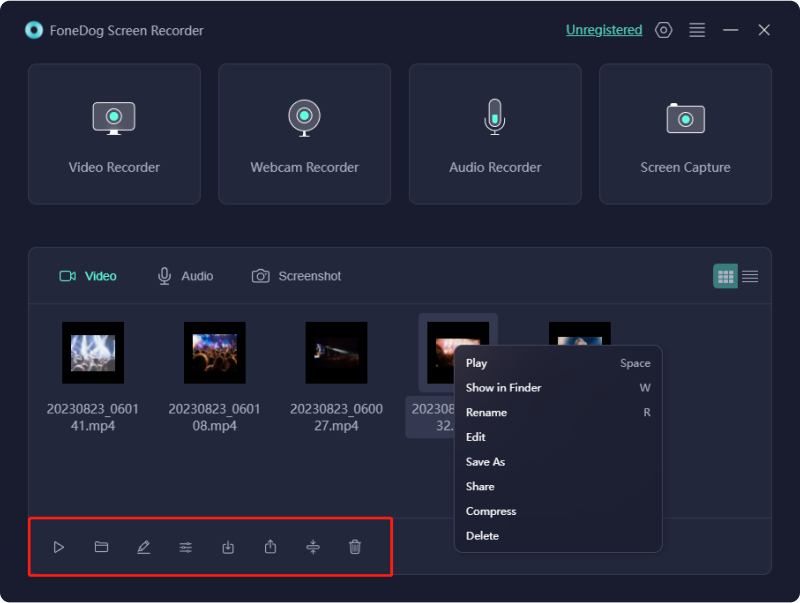
5. Once you've captured the desired audio, click the "Stop" button to conclude the recording. FoneDog Screen Recorder will prompt you to specify a saving location and file format for your recorded audio. FoneDog Screen Recorder allows for post-recording playback. You can review the recorded audio and perform basic edits if necessary, such as trimming or adjusting sections of the audio.
6. Save the recorded audio file to your preferred location on your Windows 10 system. From there, you can easily share it with others or use it for your intended purposes.
FoneDog Screen Recorder simplifies the audio recording process on Windows 10, offering a comprehensive suite of features and an intuitive interface to capture audio with utmost ease and quality.
Numerous occasions may arise prompting the necessity to capture internal audio on your Windows 10 PC as part of your routine. Instances might include recording lectures, discussions, interviews, or extracting audio from websites. Not all audio recording software offers identical functionalities; therefore, we've spotlighted options that cater to both fundamental and sophisticated requirements.
Whether simplicity is your preference or if you seek extensive control over inputs and modifications, both options suffice. Moreover, both selections are completely free for use, ensuring accessibility without any cost. Here are the methods on how to record audio Windows 10:
The Windows 10 package comes equipped with the complimentary Windows Voice Recorder application. In case it's not readily available, accessing it manually from the Microsoft App Store is an option. This application offers swift and efficient recording capabilities for lectures, also discussions, interviews, and more.
What distinguishes this audio capture tool is its innate presence on your Windows device, eliminating the necessity for separate downloads or installations, thus conserving considerable time. This instructional handbook demonstrates a simple method to capture computer audio on Windows 10. Just adhere to the subsequent steps:
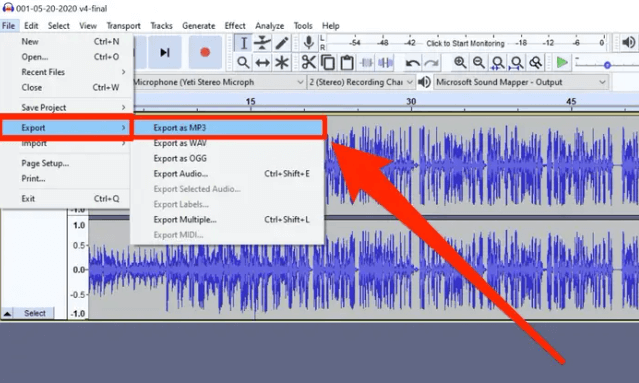
Audacity, a no-cost, user-friendly, and multi-track audio editing and capturing tool, was crafted by a team of volunteers. It enables live audio capturing via a microphone or mixer as well as fully digitizes recordings from diverse media sources. Following the recording, modifying your audio is made effortless with functions such as cutting, copying, pasting as well as deletion.
Of utmost significance, it supports exporting recordings in various file formats, allowing the simultaneous creation of multiple files. This versatility proves invaluable when sharing recordings across different platforms requiring diverse formats. To initiate sound recording within Windows 10, adhere to these steps:
Microsoft's in-built application, the Xbox Game Bar, seamlessly integrates with Windows 10 and Windows 11 systems. Initially tailored for gaming enthusiasts aiming to capture gameplay, this versatile tool extends its utility to record any on-screen activity effortlessly. To initiate this process:

All screen captures are automatically stored as MP4 files in your laptop's Captures folder within the Videos section indeed simplifying access as well as the management.
The Stream application stands among the plethora of tools now encompassed within the Microsoft 365 package, residing alongside traditional Windows essentials like PowerPoint, Word, and Excel.
Its primary aim is to streamline the video creation process across Microsoft devices, serving as an effective tool for capturing screen recordings fully tailored for the Microsoft 365 user. Here's a guide on how to capture your Windows 10 screen using the Stream app:
People Also Read5 Best iPhone Audio Recorders in 2024Best And Recommended Online Voice Recorder [2024 GUIDE]
In summary, FoneDog Screen Recorder is a top-notch tool to record audio Windows 10, offering intuitive features for seamless captures. From selecting sources to fine-tuning settings, it simplifies the process. We indeed encourage readers to dive in, experiment with various sources, and unleash their creativity through audio recording on Windows 10. Happy recording!
Leave a Comment
Comment

Tech Website Writing /Content Optimization
Singing, smiling, surprising every day!
So as a technical writer, it is my duty to gather effective and reliable solutions to answer questions on how to deal with the issues they are having with their devices.
Screen Recorder
Powerful screen recording software to capture your screen with webcam and audio.
Hot Articles
 /
/
INTERESTINGDULL
/
SIMPLEDIFFICULT
Thank you! Here' re your choices:
Excellent
Rating: 4.8 / 5 (based on 64 ratings)
