FoneDog Screen Recorder
FoneDog Screen Recorder
Special Offer
Special Offer


By Adela D. Louie, Last updated: January 6, 2024
Ever wished your slides could deliver not just visuals but also your voice, enthusiasm, and explanations? Get ready to revolutionize your Google Slides game as we unveil the steps on how to record audio on Google Slides. This article is your passport to creating captivating presentations that resonate beyond words and images.
This step-by-step guide will empower you to effortlessly integrate your voice, narrations, and sound effects into your slides. Unleash the potential of audio to engage, educate, and elevate your audience's experience. Say goodbye to monotone slideshows and hello to dynamic, impactful presentations that leave a lasting impression. Let's dive in and bring your slides to life!
Part #1: Best Tool to Use in Recording Audio on Google SlidesPart #2: Runner-up Recording Tools to Use for How to Record Audio on Google SlidesConclusion
FoneDog Screen Recorder stands as the premier tool for audio recording when it comes to elevating your Google Slides presentations. This sophisticated software transcends conventional recording tools with its comprehensive functionality, offering a seamless blend of efficiency and user-friendly features.
![]() Free Download
For Windows
Free Download
For Windows
![]() Free Download
For normal Macs
Free Download
For normal Macs
![]() Free Download
For M1, M2, M3
Free Download
For M1, M2, M3
Specifically designed to capture not just visual content but also high-quality audio, FoneDog Screen Recorder provides an exceptional platform to enhance your slideshows. Its intuitive interface and versatile options enable users to effortlessly record, edit, and integrate crystal-clear audio directly into Google Slides.
With FoneDog Screen Recorder, you'll unlock a world of possibilities to amplify the impact of your presentations with professional-grade audio recordings.
Here’s how to record audio on Google Slides using this free screen recorder with no watermark:
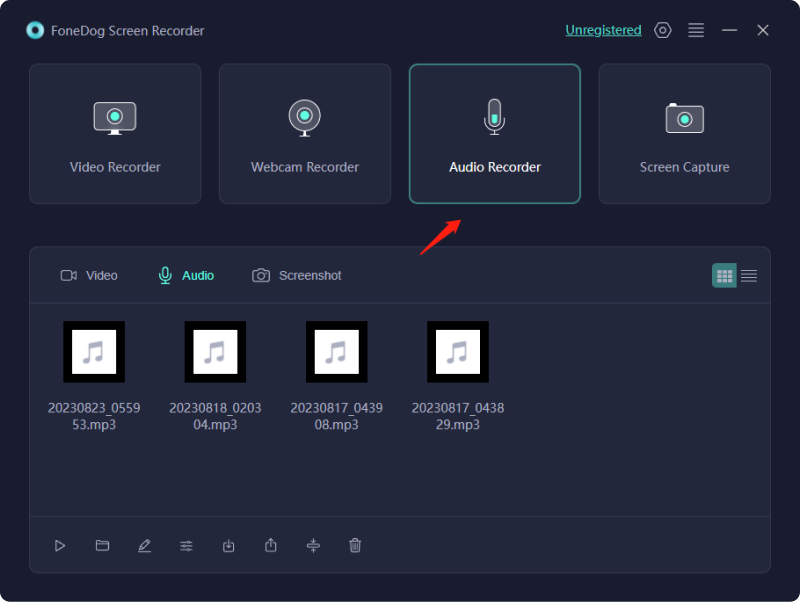
FoneDog Screen Recorder boasts a specialized "Audio Recorder" feature designed explicitly for capturing sound. Below are the steps to follow before completing the screen recording process mentioned above:
1. Initiate the software as you would for screen recording.
2. Locate and opt for the "Audio Recorder" mode among the available options.
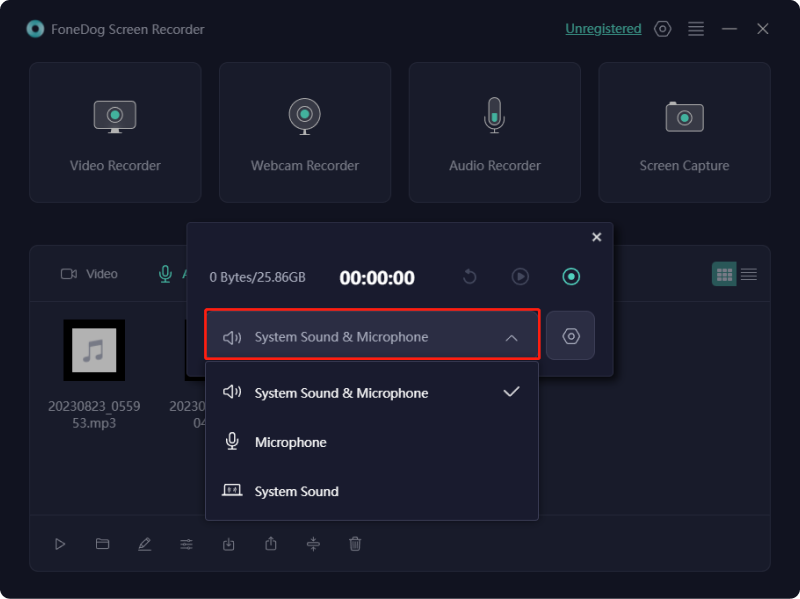
3. In the software settings, configure your preferred microphone or audio input and specify the desired recording quality.
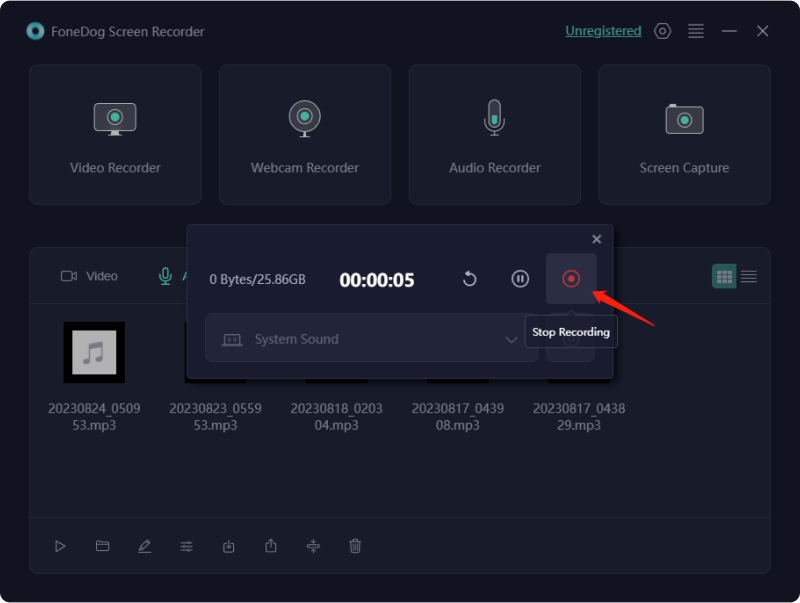
4. When prepared to commence audio recording, press the "REC" button. Feel free to speak or engage in any sound-related activities you wish to preserve.

5. Upon completion, click the "Stop" button. The software will prompt you to save the audio recording.
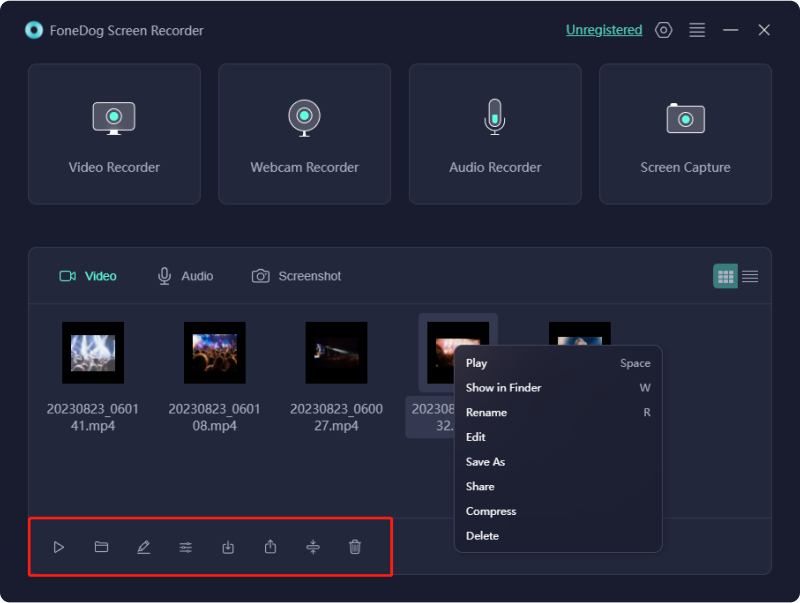
6. If necessary, utilize the software's editing features or export options for the audio recording.
Numerous options exist for recording software while crafting audio for your Google Slides. Nevertheless, within this diverse array of platforms, variations in quality emerge as well. Hence, we have compiled a selection of audio recording software compatible with Google Slides. Keep reading to uncover the recording procedures specific to each of these platforms.
The ChromeMP3 Recorder functions as a complimentary tool for capturing audio without any cost. This uncomplicated application proves ideal for swiftly generating audio recordings. All audio files are compactly stored in MP3 format. Within this application, functionalities include halting, commencing, rewinding, playback, and more during a recording session.
Additionally, the option to directly store recordings in Google Drive facilitates effortless uploads onto Google Slides. Here's a step-by-step guide detailing the process of how to record audio on Google Slides using ChromeMP3 Recorder:
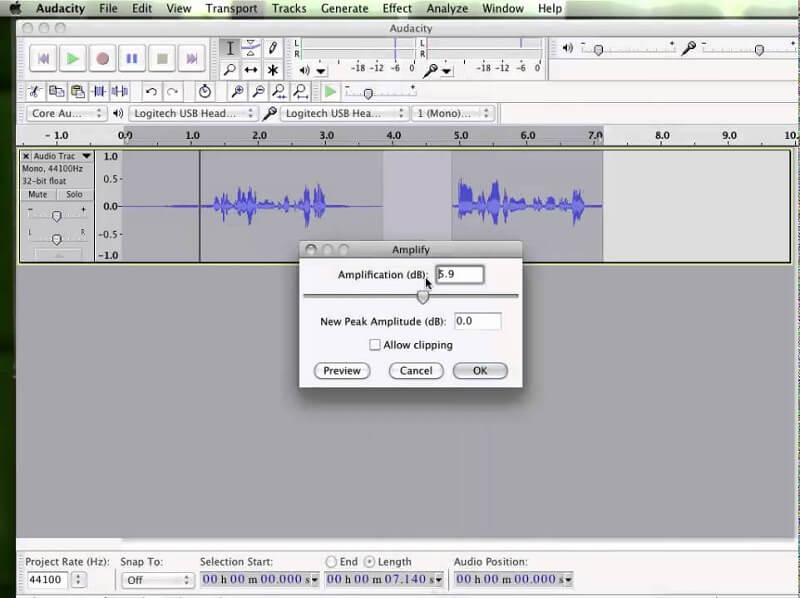
Audacity presents itself as a no-cost, multi-track audio recording tool. This versatile software not only captures live audio but also enables comprehensive editing capabilities for your recordings. Within Audacity, a range of effects, such as alterations in speed and tempo, allows for precise adjustments to your audio content.
It stands as an optimal choice for swift, interactive recording sessions, supporting widely used audio formats like MP3 and WAV. Here are the steps to walkthrough on how to record audio on Google Slides using Audacity:
TwistedWave emerges as an excellent choice catering to relaxed recording needs. Firstly, it accommodates users of both Mac and Windows operating systems, even iOS. It is an available option, for instance, using it to record a Zoom meeting on your iPhone. Plus, it offers the convenience of usage sans the requirement for downloads or installations simply access TwistedWave and commence recording.
Although lacking in sophisticated functionalities, particularly transcription features, it boasts a built-in silence detector and a batch-processing engine. To utilize TwistedWave for recording audio to enhance your Google Slides presentation, follow these steps:
The Online Voice Recorder stands out as a no-cost voice recording solution offering fundamental functionalities. Its complimentary nature, ease of use, and, notably, customizable microphone configurations set it apart. Additionally, a range of editing tools, such as auto silence removal, cropping, and audio storage, further enhance its utility. Here's a guide on utilizing the Online Voice Recorder for recording audio to incorporate into Google Slides:
People Also Read2024 Complete Guide on How to Record Google MeetWhere Are Google Meet Recordings Saved? [2024 GUIDE]
How to record audio on Google Slides in the best quality? To conclude, to really maximize impact, ensure clear and concise audio. Match narration to visuals, maintaining a steady pace. Use audio sparingly for emphasis. Test playback in advance. Optimize volume levels. Remember, audio should enhance, not distract, from your message. Aim for a seamless, engaging experience. Happy Reading!
Leave a Comment
Comment

Tech Website Writing /Content Optimization
Singing, smiling, surprising every day!
So as a technical writer, it is my duty to gather effective and reliable solutions to answer questions on how to deal with the issues they are having with their devices.
Screen Recorder
Powerful screen recording software to capture your screen with webcam and audio.
Hot Articles
 /
/
INTERESTINGDULL
/
SIMPLEDIFFICULT
Thank you! Here' re your choices:
Excellent
Rating: 4.7 / 5 (based on 59 ratings)
