FoneDog Screen Recorder
FoneDog Screen Recorder
Special Offer
Special Offer


By Adela D. Louie, Last updated: February 21, 2024
Ever wish it were easy to capture the magic on your screen? Don't look any further! This piece tells you about the best free screen recording programs that are made just for Windows users. We can help you whether you're a professional making tutorials or a gamer showing off epic times.
Find step-by-step on how to screen record free Windows, insider tips, and suggestions for the best software that will make it easy for you to record, edit, and share what's on your screen. Say goodbye to expensive software and hello to screen capture that works like a charm. Now is the time to step up your screen recording game.
Part #1: 3 Ways to Screen Record Free WindowsPart #2: Best Way to Screen Record for Free on Windows 11/10 (With Audio)Conclusion
Here are popular free screen recording software for Windows along with explanations on how to use them:
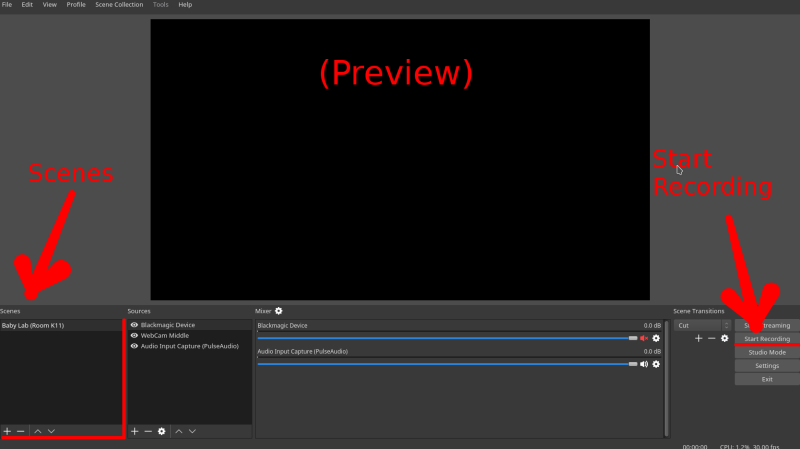
OBS Studio stands out as a robust, open-source software extensively utilized for both live streaming and capturing screen content. This software boasts an array of sophisticated features tailored for capturing and broadcasting diverse types of content.
ShareX stands out as a highly versatile and multifunctional tool designed for screen record free Windows. Its rich array of features enables users not only to take screenshots but also to record their screens seamlessly while facilitating direct sharing across multiple platforms.
The Windows 10 Game Bar is an integrated feature tailored to offer users inherent screen recording functionalities, primarily intended for gaming purposes but adaptable for general screen recording tasks as well.

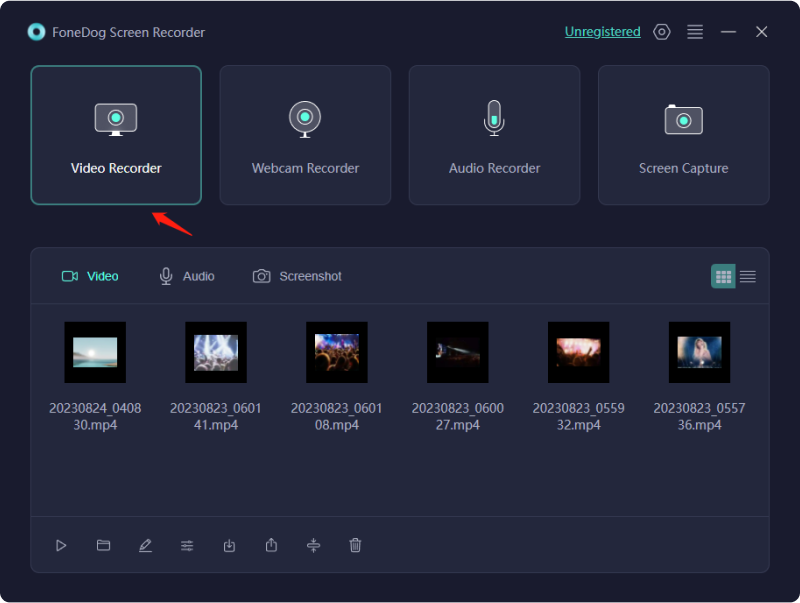
FoneDog Screen Recorder stands as a comprehensive and user-friendly free screen recording software tailored for Windows users. This tool offers a seamless solution for capturing screen activities, be it for creating tutorials, capturing gameplay, or recording presentations, without any financial commitment.
![]() Free Download
For Windows
Free Download
For Windows
![]() Free Download
For normal Macs
Free Download
For normal Macs
![]() Free Download
For M1, M2, M3
Free Download
For M1, M2, M3
To make use of FoneDog Screen Recorder for screen record free Windows, follow these steps:
1. Visit the official website of FoneDog Screen Recorder to initiate the download process.
2. Upon completion of the download, proceed to execute the installation procedure as directed, allowing the software to be installed seamlessly onto your Windows system.
3. Post-installation, after which you have to locate the FoneDog Screen Recorder icon on your desktop or within the installed programs list.
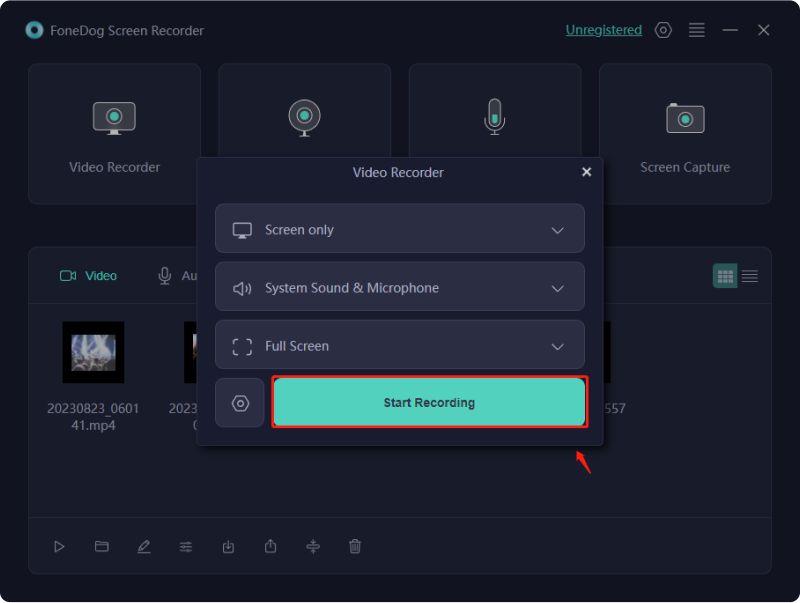
4. Execute the application by clicking on the Video Recorder icon to launch the software interface.
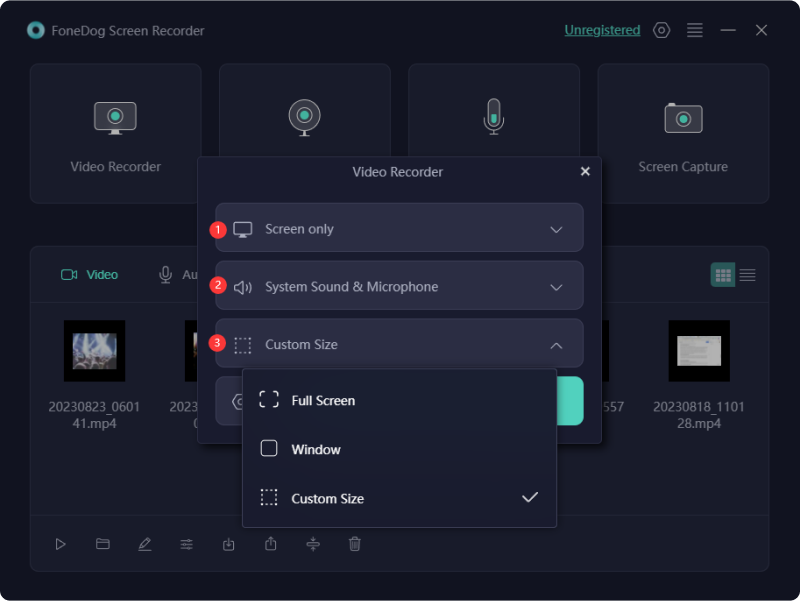
5. Once within the application interface, you might then explore the array of recording settings available to tailor your screen recording experience.
6. Customize the recording area by adjusting the capture frame, and selecting the specific region or window on your screen that you intend to capture.
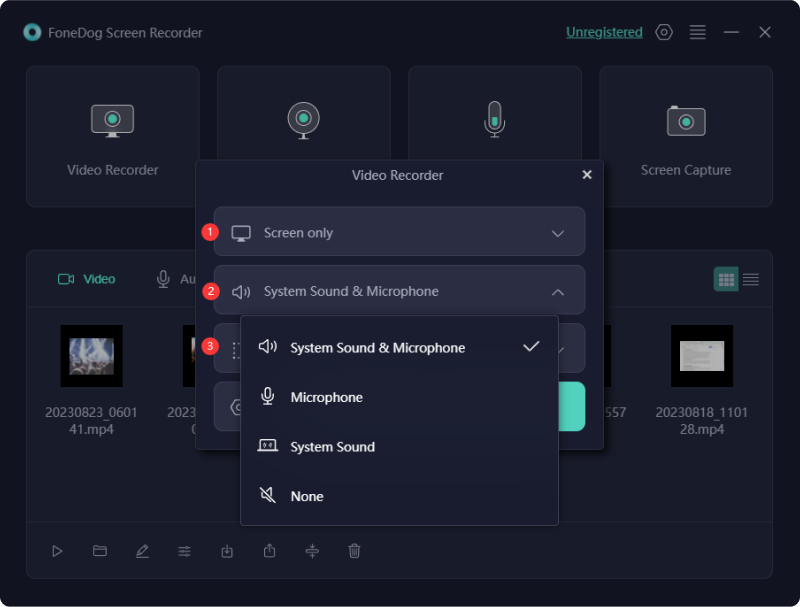
7. Choose your preferred audio input source for recording purposes, whether capturing system sound, microphone input, or a combination of both.
8. After configuring the settings to match your preferences, initiate the recording process by clicking on the designated "Start Recording" button within the application interface.
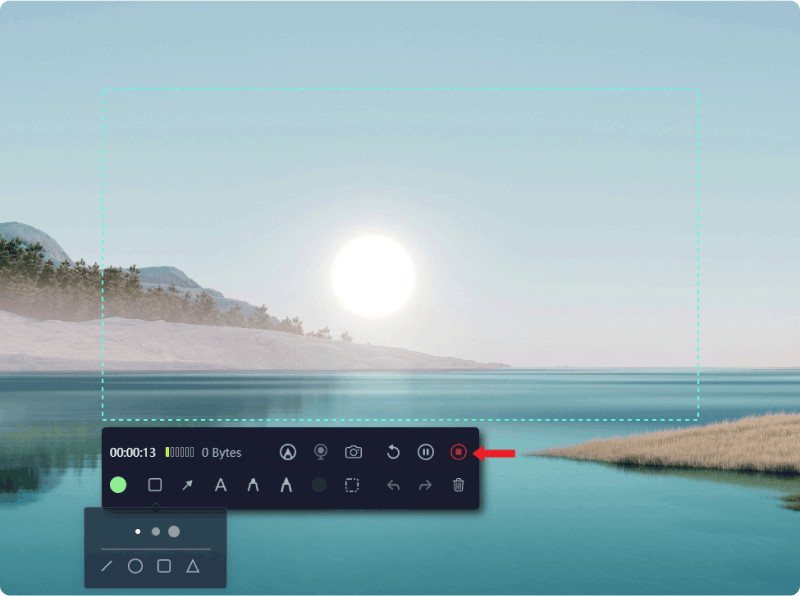
9. Execute the actions, tasks, or content on your screen that you desire to capture, ensuring the software records the intended visual and audio content.
10. To cease the recording session, navigate back to the FoneDog Screen Recorder interface and click on the "Stop" button.
11. The recorded video file will automatically be saved to the destination folder you specified during the setup process, ready for playback or further utilization.
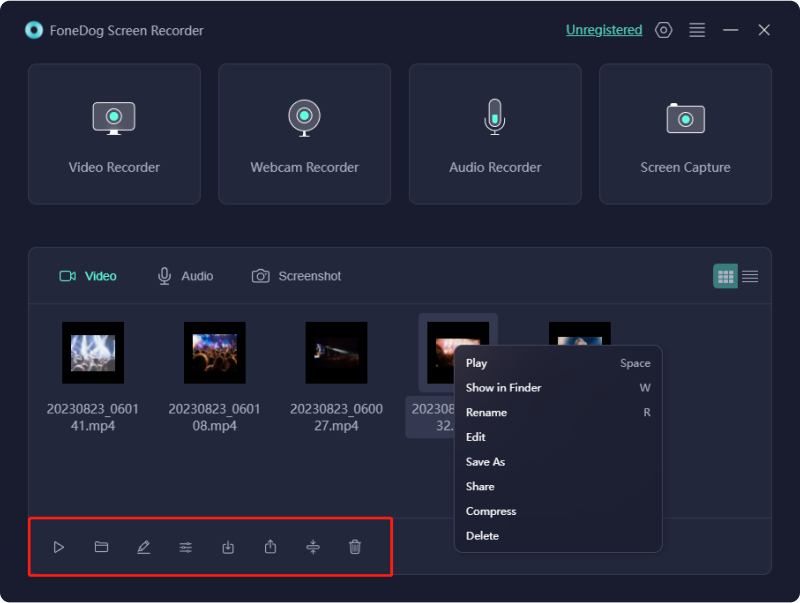
FoneDog Screen Recorder stands out for its intuitive interface, allowing users to effortlessly capture screen activities with just a few clicks. Its versatility caters to various recording needs, ensuring users can create high-quality recordings with ease.
This free screen recording software serves as a valuable tool for Windows users, empowering them to produce engaging content, and educational materials, or capture memorable gameplay moments hassle-free.
People Also ReadCapturing the Moment: Choose the Best GIF RecorderWindows Screen Record Shortcut: Record on Windows 10/11 Easily
Screen record free Windows, through tools like OBS Studio, ShareX, Windows 10 Game Bar, and FoneDog Screen Recorder, empowers users to capture screen activities efficiently. To start, download as well as fully configure the preferred software, selecting capture areas and audio sources. Initiate and cease recording using designated buttons.
Experimenting with these tools enables users to create engaging tutorials, gaming highlights, or presentations, enhancing communication and productivity with ease.
Leave a Comment
Comment

Tech Website Writing /Content Optimization
Singing, smiling, surprising every day!
So as a technical writer, it is my duty to gather effective and reliable solutions to answer questions on how to deal with the issues they are having with their devices.
Screen Recorder
Powerful screen recording software to capture your screen with webcam and audio.
Hot Articles
 /
/
INTERESTINGDULL
/
SIMPLEDIFFICULT
Thank you! Here' re your choices:
Excellent
Rating: 4.5 / 5 (based on 91 ratings)
