FoneDog Screen Recorder
FoneDog Screen Recorder
Special Offer
Special Offer


By Adela D. Louie, Last updated: August 27, 2019
There are a lot of new Mac users who switched from using a Windows PC. And with that, these new users of Mac are a little bit confused on using the device, especially if they would want to end tasks and stop some errant processes. That is why in this article, we are going to show you how to use the Task Manager on Mac and what are the things that you can do with it.
Mac also has the same Task Manager like the Windows devices. However, it comes with a different name. In the Mac world, the task manager is called and goes by the name of Activity Monitor.
TIPS:
The Activity Monitor on Mac has the functionality that is the same as the Task Manager in Windows. It will also allow you to easily view, manage, and as well as to end tasks application and some other active processes that are currently running on your Mac. It can also let you see the processes that are running on your computer. This way, you will be able to see the effect that it does on your Mac.
Part 1: How to Launch Task Manager on MacPart 2: Different Ways on How to Use the Activity MonitorPart 3: How to Force Quit Application Using Task Manager in MacPart 4: What is Control + Alt + Delete on Mac?Part 5: Preventing to Use Activity Monitor OftenPart 6: Conclusion
The Activity Monitor on your Mac can be found if you go to Applications and then go to Utilities folder. There are actually different ways on how you can launch the Activity Monitor on your Mac and the simplest way of doing so is to use the Spotlight application.
If you want to know how you can open Activity Monitor using Spotlight, here is what you will be needing to do.
Step 1: Go ahead and press the Command + Spacebar on your keyboard for you to get to the Spotlight search field.
Step 2: And then, simply go ahead and type in the search bar “Activity Monitor”.
Step 3: After that, go ahead and click on the Activity Monitor and you will be able to get into the application.
But in case that Spotlight does not work, there is another way for you to be able to launch Activity Monitor on your Mac. Here is what you will be needing to do.
Step 1: Go ahead and click and launch the Finder icon located at your Mac’s Dock.
Step 2: Then after that, go ahead and choose Applications located at the side of the window that will appear on your screen.
Step 3: Once that you are in the Applications folder, go ahead and choose Utilities folder and launch it.
Step 4: From there, go ahead and double-click on the Activity Monitor for you to launch it on your Mac.
Aside from that, there is also another way for you to be able to avoid opening the Activity Monitor on your Mac the long way. This is by making a shortcut by pinning it on your Mac’s Dock. And if you do this, you can just simply go ahead now and click on the pinned icon.
For you to be able to pin the Activity Monitor on your Mac, here are the steps that you need to follow.
Step 1: Go ahead and launch the Activity Monitor on your Mac. You can choose from the first two options that we have shown you earlier.
Step 2: Once that the Activity Monitor is launched, go ahead and right-click its icon in the Dock.
Step 3: Then in the menu, go ahead and choose Options and then choose to Keep in Dock.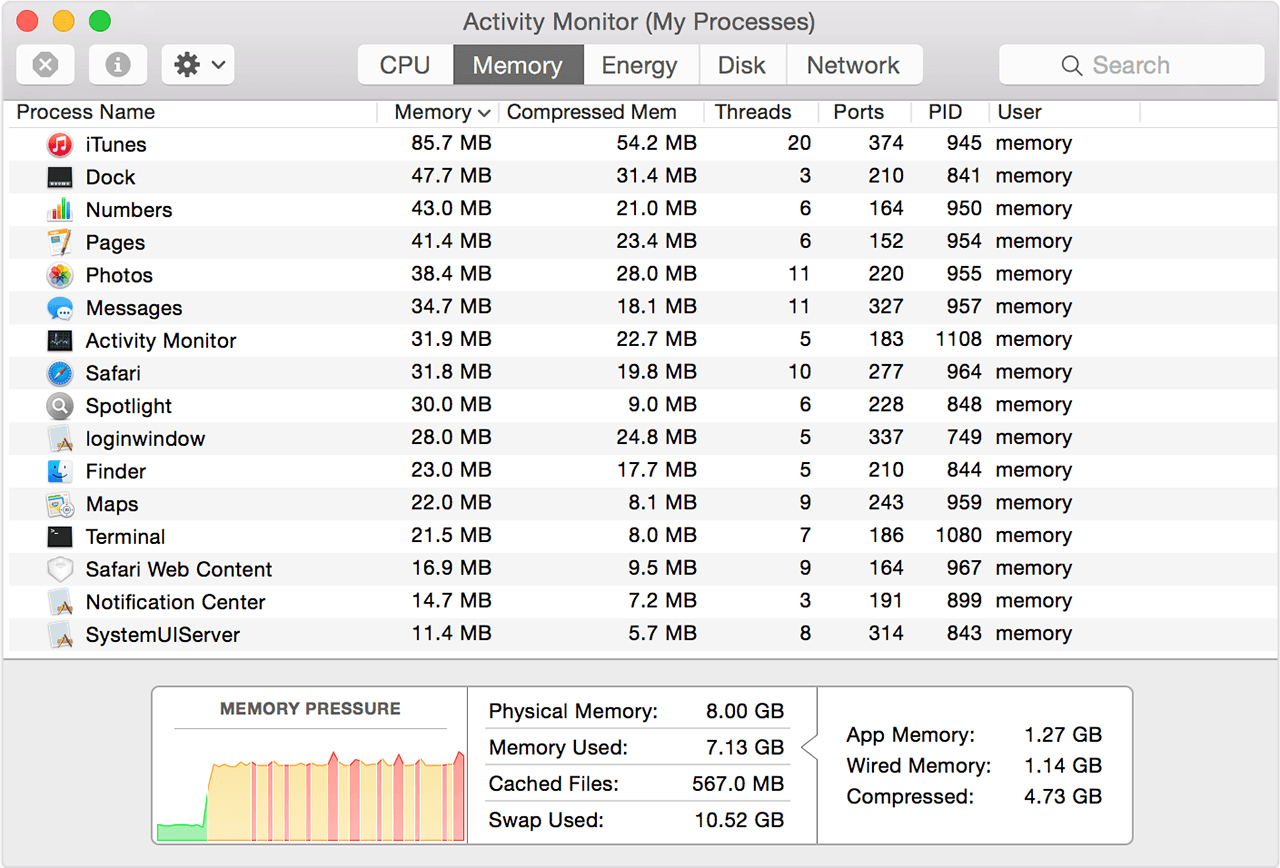
There are a lot of ways on how you can use the Activity Monitor on your Mac. And with that, you can consider this tool as one of the most important tools that you have on your Mac. We are going to show you below the different ways on how or when to use the Activity Monitor on your Mac.
Once that you launch the Activity Monitor on your Mac, then you will be able to have access to five tabs. These tabs are your CPU, Memory, Energy, Disk, and Network. Just by looking at data on your screen, it will be easier for you to identify what is going on with your Mac. Here are the details that you can see on each tab.
The Activity Monitor on your Mac also has the ability to see some additional information about the applications or process that your Mac has. And for you to be able to see those details, here is what you need to do.
Step 1: Go ahead and click on the application or on the process that interests you.
Step 2: And then, go ahead and click on the “I” button located at the upper left corner of the Activity Monitor window.
Step 3: After that, you will then be able to see a pop-up window on your screen that will show you the additional information about the application or the process.
So as you can see, the Activity Monitor on your Mac is really one of the most useful tools. This is because of its function of giving you the insight to some other useful things. This way, you will be able to monitor your Mac easier.
Just like on a Windows PC or laptop, once that you have an unresponsive app, the only way for you to close it is by force quitting it. Actually, this is also the same as the Activity Monitor on your Mac. Once that there are some applications that become unresponsive or freezes, then you will be needing to force quit it by using the Activity Monitor. And for you to be able to do that, here is a simple guide for you.
Step 1: Go ahead and launch the Activity Monitor on your Mac.
Step 2: After that, go ahead and click on the application that you would want to force quit.
Step 3: And then, go ahead and click on the “X” button located at the upper left corner of our Activity Monitor window.
Step 4: Then you will be able to see a pop-up window on your screen asking why you would want to force quit the app.
Step 5: From there, you just need to click on the Quit button for you to close on the app that you are having trouble with.
Step 6: But, if in case that the application is still open, go ahead and click on the Force Quit button immediately for you to be able to end the process.
For Windows users, the combination Control + Alt + Delete is one of the most common and used shortcuts. This is actually the very first thing that they do if they would want to close an application that is being unresponsive or frozen. This shortcut also has a similarity in using your Mac.
Activity Monitor on your Mac also comes with a Force Quit Application Manager that will help you in closing those frozen applications and programs. For you to be able to open this, all you need to do is to press and hold the keys: Command + Option + Escape.
So, if there is a need for you to force quit a certain application on your Mac without knowing the CPU or Energy that the app is using, just go ahead and open a Force Quit Application Manager. This will make immediate access to all the applications that you have and that you can quit the one that you are having trouble with.
Now as you can, the Activity Monitor that you have on your Mac actually solves any issues that you are having with your Applications. This is the main task of your Activity Monitor. However, there is a way for you to be able to prevent your apps from being unresponsive or frozen. This is by making sure that your Mac stays optimized and clean.
And for you to be able to get your Mac clean, you have to make sure that you remove all the unwanted files or folders that you have on your Mac. You can do this by using a powerful tool that could help you in cleaning up your Mac the easiest and fastest way. And this tool is no other than the FoneDog PowerMyMac.
Now, for you to be able to know on how to use the FoneDog PowerMyMac Cleaner, all you need to do is to download the FoneDog PowerMyMac from our website and install it on your Mac. Once that you are done with the download and installation process, you can go ahead and follow the guide below.
Once that you have successfully installed the program on your Mac, go ahead and launch it. By default, you will be able to see the system status of your Mac such as your CPU usage, Memory usage, and your RAM usage.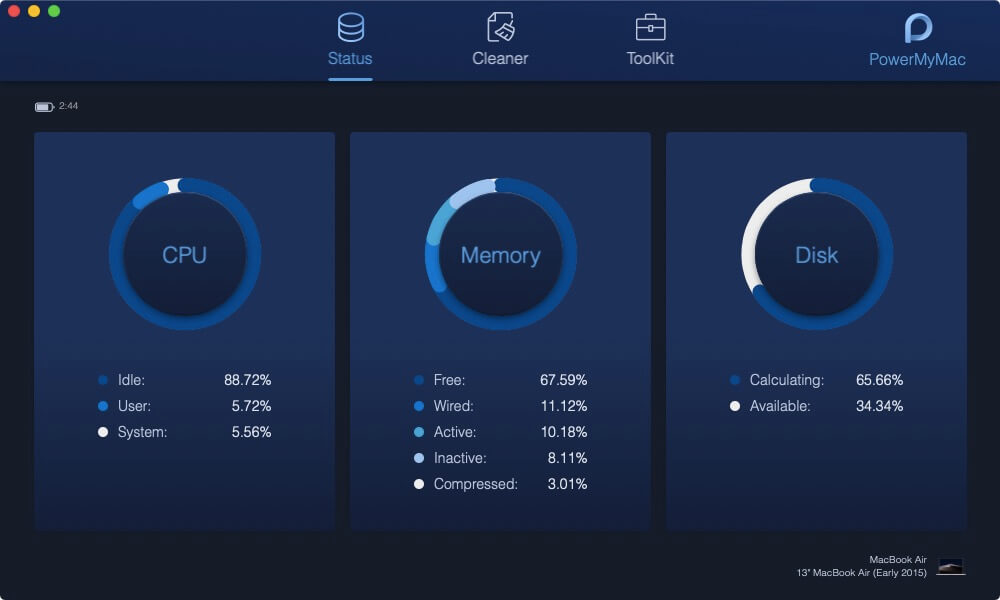
At the top of your screen, you will then be able to see three modules to choose from. Now, for you to start cleaning up all the junks that you have on your Mac, go ahead and choose the Cleaner module.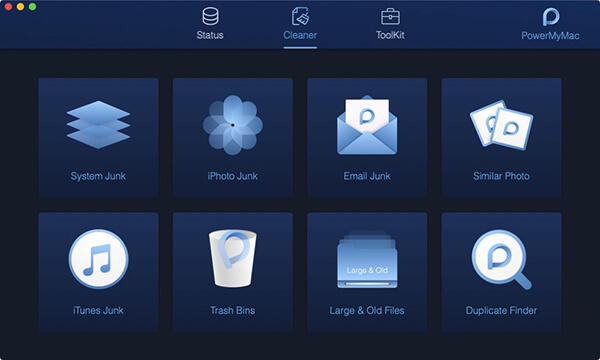
After choosing the module, the FoneDog PowerMyMac will then show you a list of options. From there, go ahead and click on “System Junk”.
After that, the program will then ask you to scan your Mac. To do this, go ahead and click on the Scan button. From there, all you have to do now is to wait until the program is done scanning your Mac.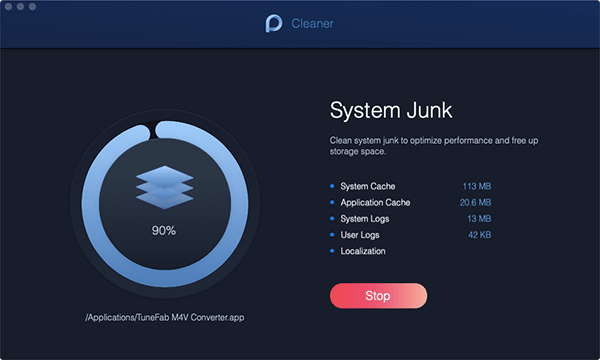
Once that the scanning process is complete, you can now view the result of the process. Just go ahead and click on the View button to do so.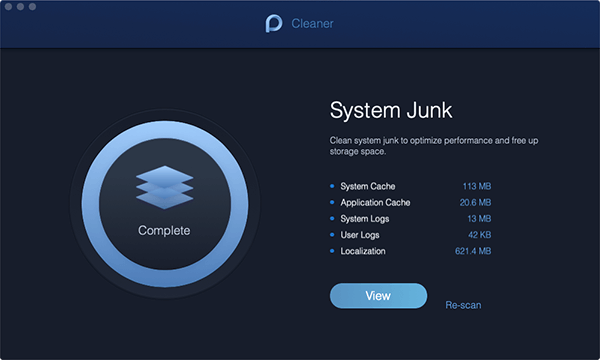
Then, the program will then show you all the junks that you have on your Mac. From the list of files on your screen, go ahead and simply choose all the junks that you would want to remove from your Mac.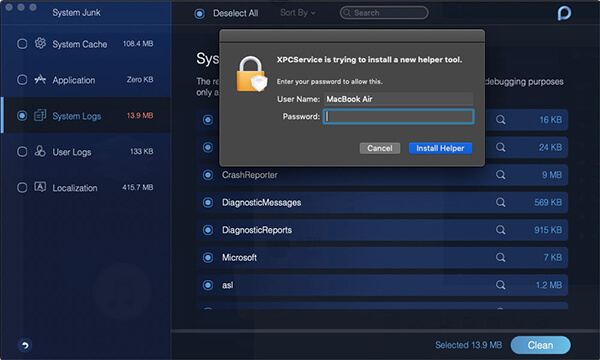
Once that you have chosen all the files that you would want to clean, you can now go ahead and click on the Clean button. This will then start the process of cleaning all the junks that you have chosen to remove from your Mac.
A pop-up window will also appear on your screen. This is because the program will ask you to confirm on the cleaning process. From here, go ahead and click on the Confirm button and wait until the cleaning process is done.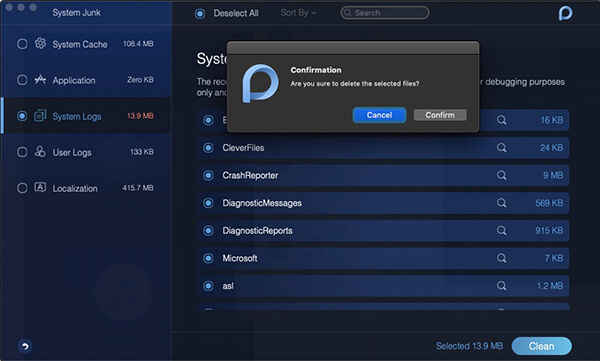
Now you know that Mac also has its very own task manager just like the one that you have on your old Windows PC. The only difference is that they have different names. But you do not have to worry about anything because it has the same function as what you have on your old Windows device. So you have nothing to worry about in using the Activity monitor on your Mac device.
Also, make sure that your Mac is well maintained so that you will not experience any problems with the apps that you have on your Mac.
Leave a Comment
Comment

Tech Website Writing /Content Optimization
Singing, smiling, surprising every day!
So as a technical writer, it is my duty to gather effective and reliable solutions to answer questions on how to deal with the issues they are having with their devices.
Hot Articles
 /
/
INTERESTINGDULL
/
SIMPLEDIFFICULT
Thank you! Here' re your choices:
Excellent
Rating: 0 / 5 (based on 0 ratings)