FoneDog Screen Recorder
FoneDog Screen Recorder
Special Offer
Special Offer


By Vernon Roderick, Last updated: June 25, 2021
You may have heard of recovering your files on Mac using the iCloud server. Besides this method, there are other ways to recover your files. However, if you’re going to recover files, why not just create a backup? That way, you won’t have to go to the trouble of learning a complex method of recovering files.
You can simply create a backup and restore Mac from Time Machine. Fortunately, there are many ways to do this. And that’s what we’ll be discussing today. But before anything else, do you have an idea of what the Time Machine is on Mac?
As a digression, in addition to backing up your Mac to Time Machine, here is an article about backing up your Mac to iCloud. You can learn more about it.
Part 1. What is the Time Machine?Part 2. Alternative - Third-Party SoftwarePart 3. Create a Time Machine BackupPart 4. Restore Mac from Time Machine BackupPart 5. Restore Files Only from Time Machine BackupPart 6. Migrate to a New Mac from Time MachineWrapping Up
For Windows users, the term “Time Machine” might be foreign. Considering that the Time Machine is a feature on Mac, it’s only natural. There are three main ways to back up your Mac. That is by using another storage device, using third-party apps, or using Time Machine.
Personally, we recommend using Time Machine. Why? The Time Machine is a feature that allows you to create a backup of your Mac system, then restore Mac from Time Machine. It’s a very reliable method since it’s a built-in feature in Mac. That means it was developed by the same people that developed the macOS.
It works by creating a copy of your Mac system every once in a while, every hour, in particular. That’s why you can restore Mac from Time Machine even if you only lost one file. Not only files, but you can also get back the data from your apps.
However, before we go into that matter, you may want to learn about an alternative first.
Although there’s no denying that using a built-in feature is the safest and most reliable method to solve problems, you still can’t stop trying other solutions that might prove to be more useful.
That is why we have third-party tools, and why we recommend FoneDog Data Recovery. So what is FoneDog Data Recovery? FoneDog Data Recovery is software that specializes in recovering all kinds of data.
Since your main purpose in this article is to learn how to restore Mac from Time Machine, you might be on a mission to recover your files. Since FoneDog can pretty much recover any files that you lost in Windows 10 or Mac, etc, it’s the perfect solution for your problem.
In addition, you can use this software whether you’re on Mac or in Windows. So how can you use the FoneDog Data Recovery tool?
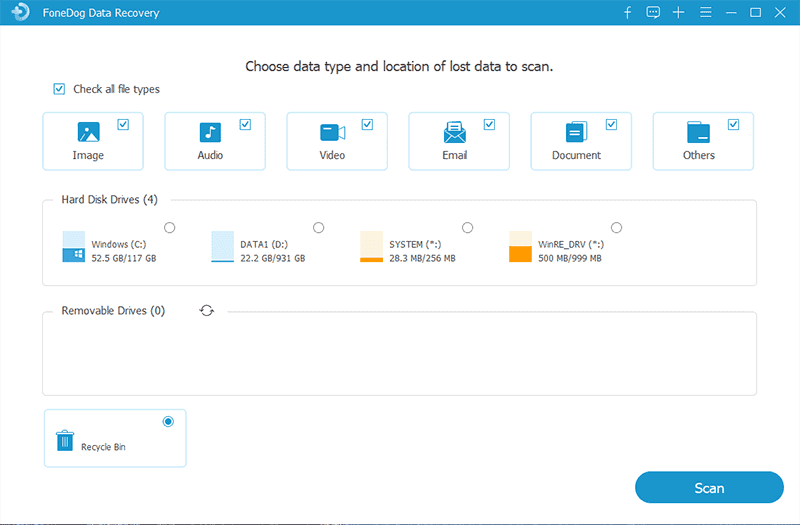
Before anything else, you should first make sure you have downloaded and installed the software on your PC. Now run the FoneDog Data Recovery software. There should be an interface for configurations with the File Type and Storage Drive. For file type, we suggest clicking on Check all file types. Then for the storage drive, select the drive where the file you lost was originally located.
Once the configurations are done, click on the Scan button to start scanning. The speed may vary depending on how many files are being scanned. To have a more accurate scanning, select Deep Scan, although it might take longer than normal.
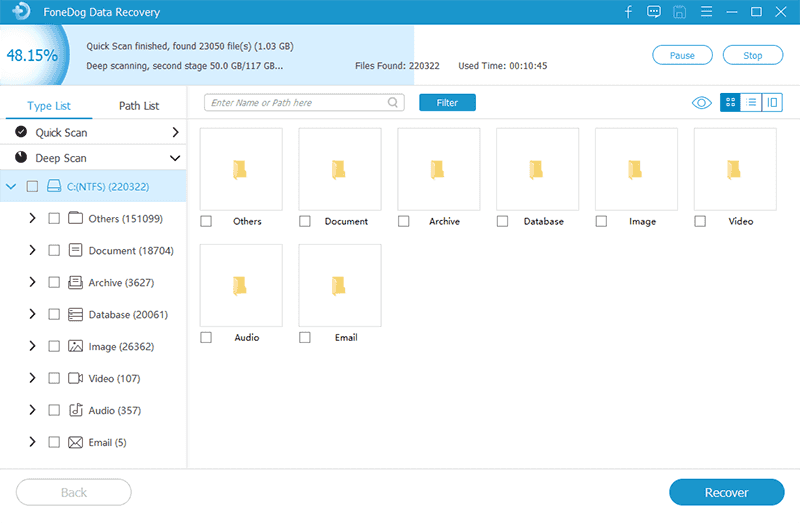
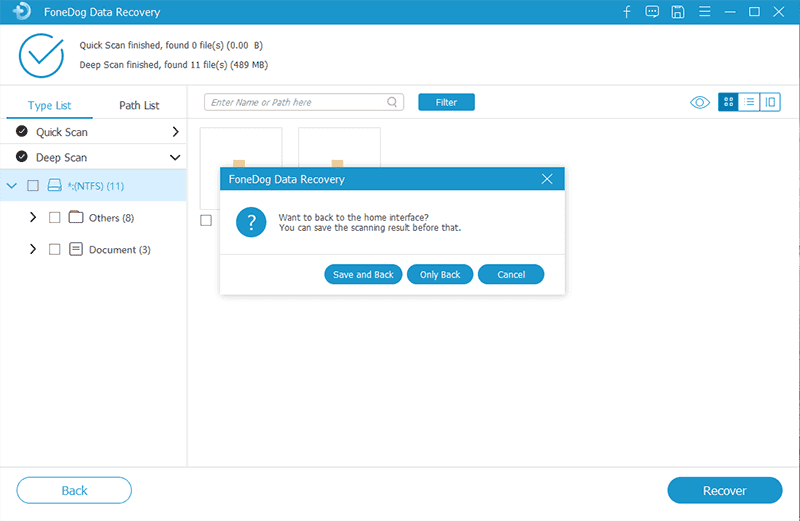
After the scanning, you will be taken to another screen with a selection of items. These are the files that are recoverable. To select a file, click on the box for that item. Once you’re done with the selection, click on Recover.
At this point, there shouldn’t be anything you need to do other than wait for the process to complete. After that, you’ve successfully done your mission to restore Mac from Time Machine.
Now if you really want to avoid using third-party software as much as possible, it might be in your best interest to use the Time Machine after all.
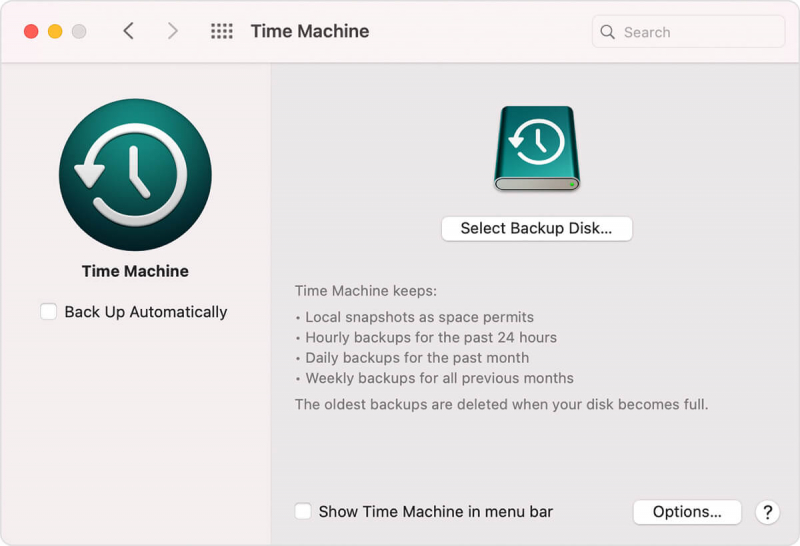
Before you can restore Mac from Time Machine, you have to create a backup first. Creating a backup with the Time Machine feature isn’t really complicated, considering that it was made for that sole purpose.
Unfortunately, you will have to acquire a storage drive first. Once this condition is fulfilled, you can start with these steps:
Make sure this drive has the Mac OS Extended format. If it’s not, you can do so by using the Disk Utility to format the drive.
If for some reason, you don’t see any alerts, you can start by following these steps instead
At this point, all you have to do is wait for the process to complete. You may also add a password for the drive. Once this is done, you are free to do anything you want since you can easily restore Mac from Time Machinewith this backup that you’ve created.
However, make sure you don’t lose the drive that you used for the backup. Now although there is only one way to create a backup, there are two ways to restore Mac from Time Machine.
The first is by restoring the whole system, while the second is to restore individual files. Let’s start with the first one which you may find more useful.
The best way to use the Time Machine is to restore Mac from Time Machine. This means you’ll be restoring your macOS to its default settings. In short, you’ll be turning time back on your PC to when you just bought it.
Since you won’t be picking the files to recover, this would be as easy as pie, although it would take much longer.
To do this, you will have to follow these steps:
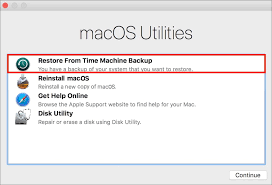
You should be taken to the macOS utility screen.
This might take a while, considering that you’re technically recovering all files of your Mac. If that’s not exactly your goal and you just want to recover some files, then here’s a better idea.
As previously said, there are two ways to restore Mac from Time Machine. The first one involves restoring the macOS as a whole. The second one is when you restore only selected files from your Mac.
Since that’s the case, it might take longer to set it up. However, now that you won’t be recovering the whole macOS, the actual recovery process would be faster.
Here’s how you can do this:
This time, instead of recovering the macOS as a whole, you’ll be able to pick which files you want to recover.
Speaking of Migration Assistant, if you’re a user that wants to transfer your files to a new Mac, then there’s also a way to use the Time Machine for that.
Fortunately, not only can you restore Mac from Time Machine, but you can also migrate using the same feature. As we’ve said, this has something to do with Migration Assistant.
Here’s how you can access this feature:
At this point, your new Mac should now have the files that you once had on your old Mac. That way, you’re technically trying to restore Mac from Time Machinebut with a newer device or PC. Either way, that concludes our ways to use the Time Machine.
People Also ReadBest Way to Force Empty Trash on Your MacHow to Recover Deleted History on Mac (Google Chrome)
There are many ways to restore Mac from Time Machine, and most of them are doable even for a beginner without technical knowledge.
However, you still have to obtain the necessary resources, such as a storage drive. Unfortunately, this is the main problem for most users.
It’s not that they can’t do it, it’s that they just don’t have enough resources. So take this in mind before you do something reckless that might cause you to lose your files.
Leave a Comment
Comment

Technical Expertise for PC/Website Optimization
One of my passion is to develop software of my own
I write articles to share knowledge about IT technology and some experience in developing my own software, and developing my own software is one of my passions for work.
Data Recovery
FoneDog Data Recovery recovers the deleted photos, videos, audios, emails, and more from your Windows, Mac, hard drive, memory card, flash drive, etc.
Free Download Free DownloadHot Articles
 /
/
INTERESTINGDULL
/
SIMPLEDIFFICULT
Thank you! Here' re your choices:
Excellent
Rating: 4.7 / 5 (based on 80 ratings)
