FoneDog Screen Recorder
FoneDog Screen Recorder
Special Offer
Special Offer


By Adela D. Louie, Last updated: January 3, 2020
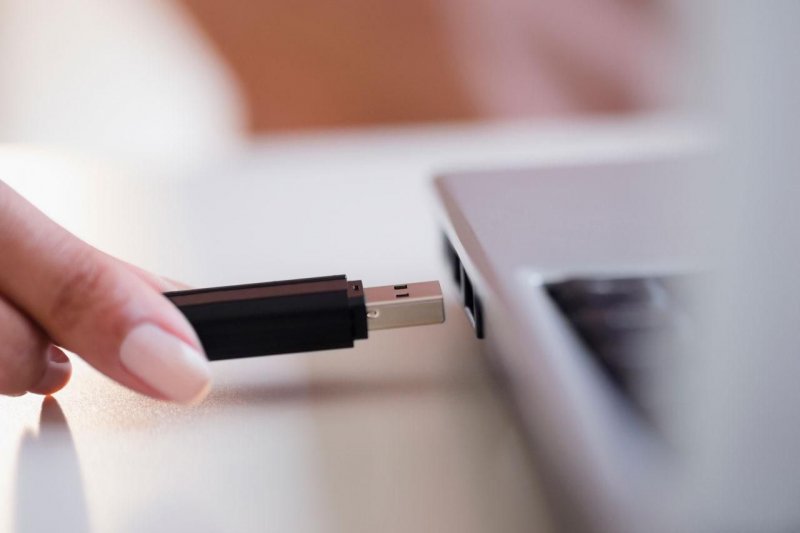
Are you having a faulty USB port ? Are you aiming to do a USB reset on your port because it not working but you do not know you can do it? Then you are lucky because we are going to show you 5 ways on how you can do a USB reset. And in case you have some important data on your USB device that may lose during the process, we also have the perfect data recovery software that you can use to get them back.
One of the most common issues that you might experience on your computer is when the time that it does not detect any plug-in devices. And one trick when you do a USB reset is that there are several factors which can be a cause as to why your USB device is not working on your computer. However, this can be solved with just simple solutions and that is what we are going to show you here.
Part 1 : Que faire quand une réinitialisation USB est nécessaire lorsque le port USB ne fonctionne pas ?Part 2 : How to Recover Data from USB ResetPart 3 : Conclusion
As we have mentioned earlier, there are solutions that you can do when you need to do a USB reset.
Before you go ahead and make some technical steps, you have to make sure first that there is nothing blocking your USB port. There are instances wherein there is debris or some other foreign objects that might be blocking your port and your connector.
So with that, what you will be needing to do is to turn off your computer and then check its ports for any obstruction. And there are any foreign objects inside, then you can make use of thin objects for you to get rid of those obstructions such as a toothpick. Or you can even try blowing your port.
Another reason why your USB port is not working is because of a partial connection in your port. If in any case that there are no foreign objects inside your port, you can turn on your computer, connect your USB and then wiggle it for you to check if there is a chance that it can recognize your USB.
Another thing that you can do is by restarting your PC. This may sound simple but most of the time, a simple reboot to any device can fix minor issues so this could work when your USB port is not working. However, if rebooting your PC does not fix the issue, then you can go ahead and try on the other solutions provided below.
Most users are not aware of this scenario wherein your Windows PC disables those USB controllers that are not used automatically for it to be able to save power. And there are instances wherein those controllers do not come back even when it is in use which can give you the idea to do a USB reset since it not working. So if in any case that rebooting your PC does not work, here is what you need to do.
People Also ReadBest USB Partition Tool For 2020How to Partition A USB Drive
Now, in case that the other solutions above will not work for you, then here is another thing that you can do.
Once that you are done repairing your port that is not working and you are still not able to access your files, then the problem is that your device might be corrupted. So in order for you to get back those files, you will be needing a recovery software.
And when it comes to recovering your data from your USB device, there is one software that you can count on. And that is the Data Recovery software by FoneDog.
The FoneDog Data Recovery software will help you recover lost files from your USB devices such as your documents, emails, photos, videos, audios, and more. Aside from the fact that it can recover from your corrupted USB device, you can also recover lost or accidentally deleted data from your computer like Windows 10, Windows 8, Windows 7, Windows XP, and as well as from your Mac. You can also recover files from a memory card, or from and external hard drive.
Data Recovery
Recover deleted image, document, audio and more files.
Get deleted data back from computer (including Recycle Bin) and hard drives.
Recover loss data caused by disk accident, operation system crushes and other reasons.
Free Download
Free Download

The FoneDog Data Recovery is very easy to use and safe that it will not overwrite any other data that you have. And to know how to use the FoneDog Data Recovery software here is a quick step by step method that you can follow.
After getting the FoneDog Data Recovery software on your PC, you can go ahead and simply run the program to begin using it. Then on the main screen, you can choose the type of data that you want to recover by clicking on them. And at the same time, you can choose the name of your USB device where you had process the USB reset. Here, you have to make sure that the connection between your USB drive and your PC port is stable to avoid any interruptions.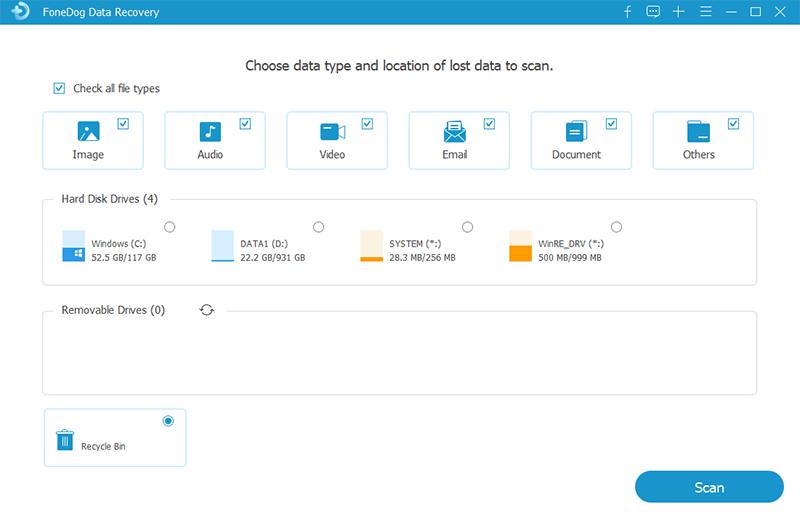
After choosing the necessary options, then you can go ahead and scan your USB device by clicking on the Scan button. You will then be given two options on how you can scan your device. One is the Quick Scan and the other one is the Deep Scan.
And choosing the Deep Scan process may take a longer time than the usual scanning process so you have to be patient on waiting for it to complete.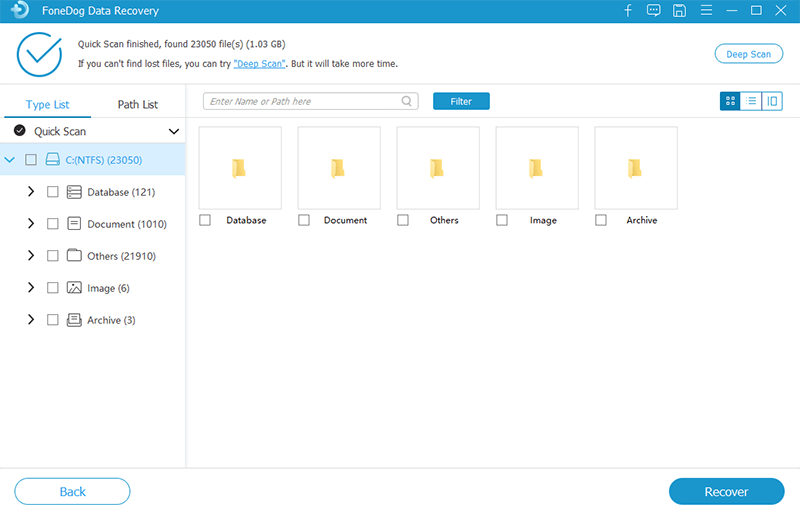
Then, once that the scanning process is done, you can now go ahead and preview your data. Here, you can be sure that you are going to get the right data that you want to recover from your USB device. Just simply click on it one by one.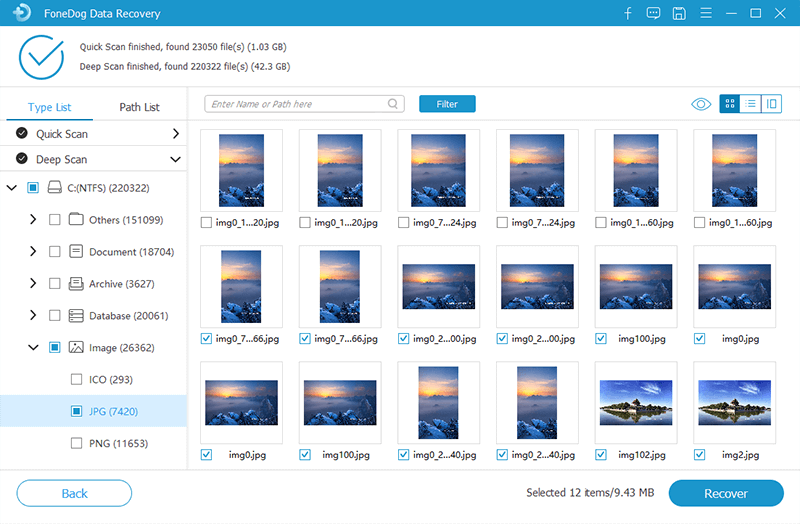
And once that you are done choosing the data that you want to get back, then it is time for you to click on the Recover button. The process of recovering your data will then start so all you need to do is to wait for the process to complete.
With the 5 easy solutions that we have mentioned above, you can now access your USB device. And in case you have lost your files after a USB reset, then you can go ahead and rely on FoneDog Data Recovery and it will surely help you in recovering your lost files.
Leave a Comment
Comment

Tech Website Writing /Content Optimization
Singing, smiling, surprising every day!
So as a technical writer, it is my duty to gather effective and reliable solutions to answer questions on how to deal with the issues they are having with their devices.
Data Recovery
FoneDog Data Recovery recovers the deleted photos, videos, audios, emails, and more from your Windows, Mac, hard drive, memory card, flash drive, etc.
Free Download Free DownloadHot Articles
 /
/
INTERESTINGDULL
/
SIMPLEDIFFICULT
Thank you! Here' re your choices:
Excellent
Rating: 4.7 / 5 (based on 92 ratings)
