FoneDog Screen Recorder
FoneDog Screen Recorder
Special Offer
Special Offer


By Gina Barrow, Last updated: January 18, 2018
“Can I restore my iPad without losing everything?"
Do you experience any problems on your iPad that you need to restore it to its original setup or have you deleted some important data on it?
IPad and gadgets alike are the most convenient devices for everyday uses, especially for personal and business profiles.
It makes your document, photos, calendars, and even videos all intact and convenient and ready for just one device. Just like other iOS devices, you can also backup all your files to iTunes and iCloud so you can easily restore them when things go wrong.
If you accidentally delete the text message, you can still recover the deleted text message.
Is it possible to restore iPad without backup and without losing any data? In this article, you will find the detailed steps.
After coding software for iOS devices during the past few years, we have created a professional and easy-to-use tool to prevent iOS users from data loss.
Here is a tip for you: Download FoneDog iOS Data Recovery to quickly and safely recover iPad data no matter with or without iPad.
In case you want to do the recovery all by yourself, we have gathered some useful information and basic solutions below.
iOS Data Recovery
Recover photos, videos, contacts, messages, call logs, WhatsApp data, and more.
Recover data from iPhone, iTunes and iCloud.
Compatible with latest iPhone and iOS.
Free Download
Free Download

Part 1. How to Restore iPad from a BackupPart 2. Restore iPad from iTunes or iCloud backupPart 3. Restore iPad without Backup [No Data Loss]Part 4. Fix iPad from iTunes using FoneDog Toolkit- iOS Data Recovery (without Losing Data)Part 5. Restore iPad from iCloud using FoneDog Toolkit- iOS Data Recovery (Data Safe)Part 6. Conclusions
To be able to restore iPad from any backups, first, you need to erase and restore the device back to its factory settings. Remember that doing a factory restore erases all the information and settings on your iPad, and installs the latest version of iOS.
To restore iPad to factory settings:
Once you have restored the iPad to its factory default and are now on its clean slate, you can now restore from your iTunes or iCloud backup in order to get back all the important iPad data. Refer to the guides below on how to restore iPad from backups.
Tips:
All apps and other background settings will be restored for the next several hours or days depending on their file sizes and network connection
If you have gotten into serious trouble that you have accidentally deleted some important data from the iPad but you don’t have the backup, then you are on the right page.
There is one effective solution that will easily help you restore your iPad effectively without any backups needed.
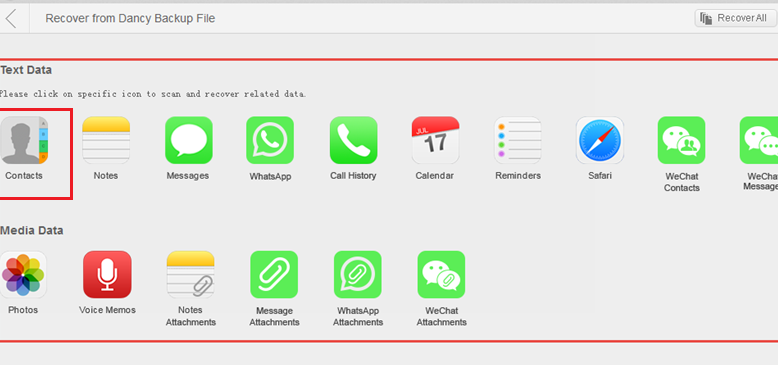
All you need is FoneDog Toolkit- iOS Data Recovery and you are good to go. FoneDog Toolkit- iOS Data Recovery has three different restore options that will surely allow you to recover a lot of files without losing data, such as contacts, text messages, video, calendars, photos, WhatsApp messages, call logs and more. To learn how to restore iPad without backup, follow these steps:
First, you need to download and install the program, FoneDog Toolkit- iOS Data Recovery on the computer and launch it when it is ready. Go to the main menu and choose Data Recovery and click “Recover from iOS device” and then plug in the iPad using an original USB cable. Click ‘Start Scan’ to continue.
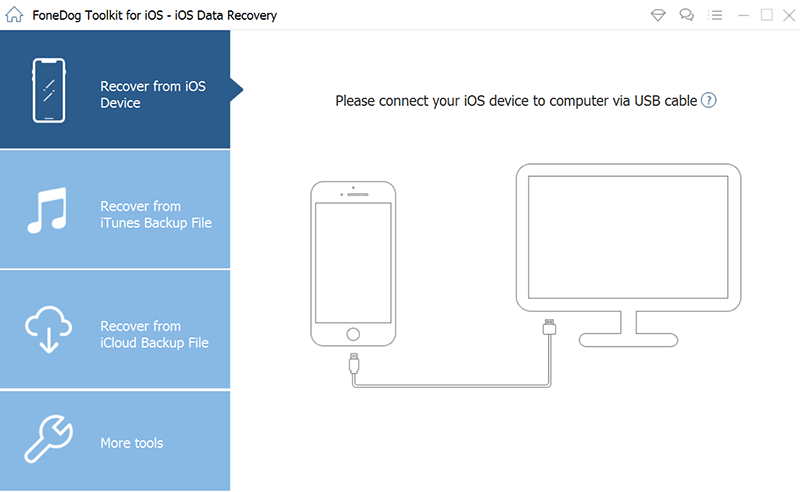
Launch Fonedog and Start Scan--Step1
Tips:
Before doing the recovery, make sure you turn off the auto-sync option in iTunes. To do this, go to: iTunes> Preferences > Devices, check “Prevent iPods, iPhones, and iPads from syncing automatically”
The program will scan the iOS device thoroughly until all the deleted data will be restored. This is possible because not everything on our devices is deleted even if we erased them from the iPad or iPhone. These files are transferred into a hidden storage that becomes unreadable and the only way to get them back is by means of third party recovery tools.
During this stage, it is best that you stop using the device to avoid data overwriting. Now when the scanning stops, you can now see all the files recovered by FoneDog Toolkit- iOS Data Recovery, on the left panel and then you can have the chance to preview them one by one on the right side.
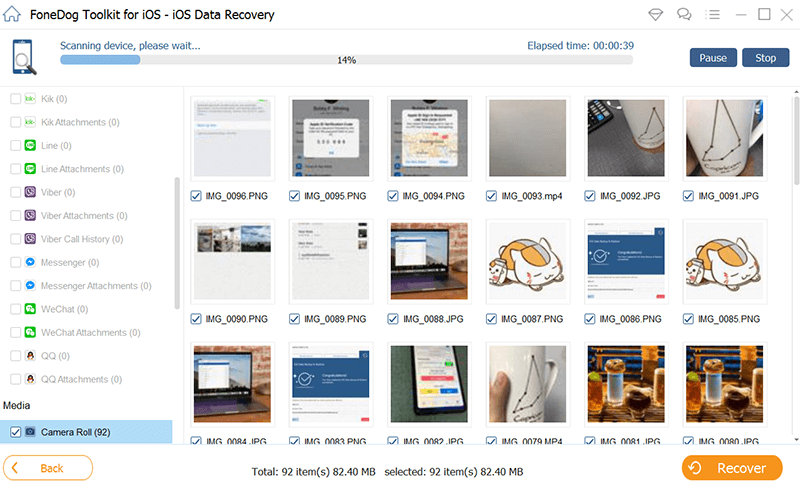
Scan and Preview iPad Data--Step2
Go over the recovered files and then tick the boxes of those important ones and click the “Recover” button at the end of the screen. This will then allow you to create a folder to save all the recovered items.
In just 3 steps, you have been able to restore iPad easily even without backup.
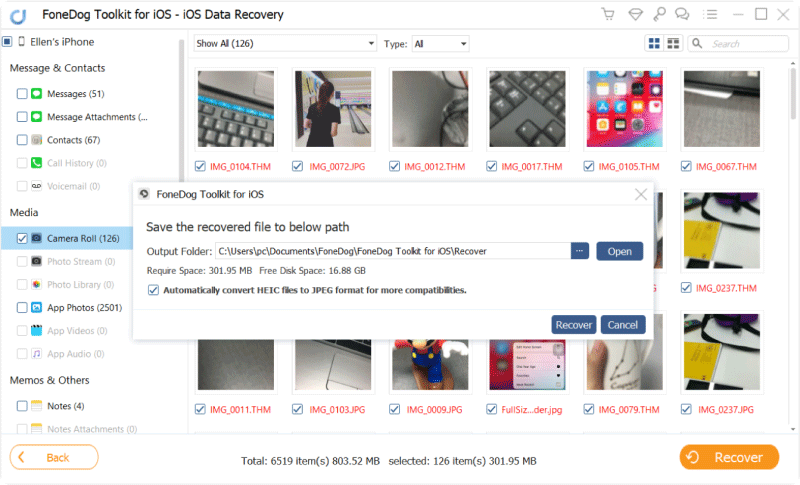
Choose Files to Retrieve--Step3
If you have iTunes backup but hate to restore all of the contents then you can simply use FoneDog Toolkit- iOS Data Recovery. This program has 3 recovery methods and one of them is to “Recover from iTunes”.
This option allows you to perform selective recovery from the backup contents without data loss. To learn how to use this method, check out the steps below:
Launch FoneDog Toolkit- iOS Data Recovery and when you reach the main menu, click on the second recovery method on the left which is to ‘Recover from iTunes’. No need to launch the iTunes on the computer as long as you are using the same with the backups on. FoneDog Toolkit- iOS Data Recovery automatically detects the entire iTunes backup.
Select the most relevant iTunes backup among the given lists and then click ‘Start Scan’ to begin the recovery.
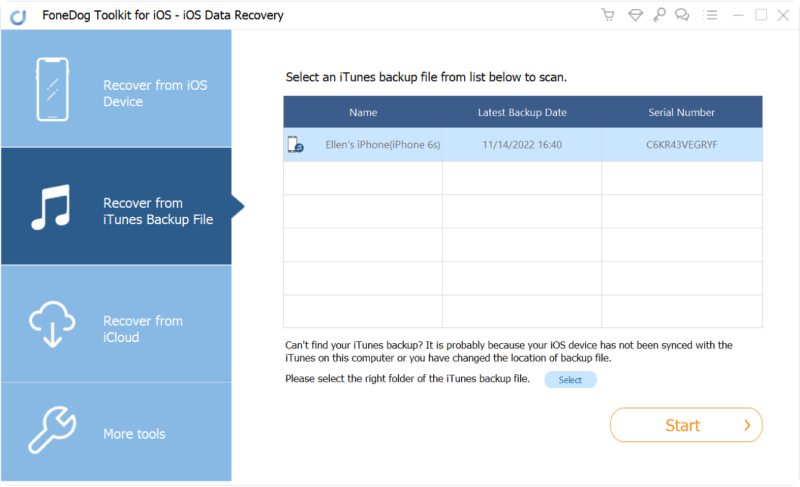
Start Scan--Step #1
The scanning takes a while but you can see its progress onscreen. FoneDog Toolkit- iOS Data Recovery will scan, extract and download the entire iTunes backup contents. You can see the display of files per categories and you can perform selective recovery by simply marking those important files only. You can preview the items on the right and then click ‘Recover’ and save them to a new folder on the desktop for future references.
You have just performed selective recovery to restore iPad using FoneDog Toolkit- iOS Data Recovery’s ‘Recover from iTunes’ option.
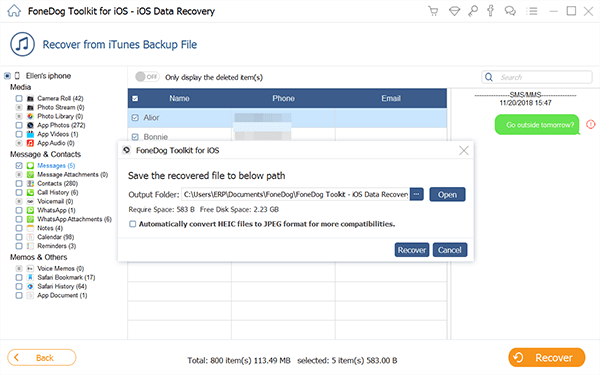
Restore iPad Data--Step #2
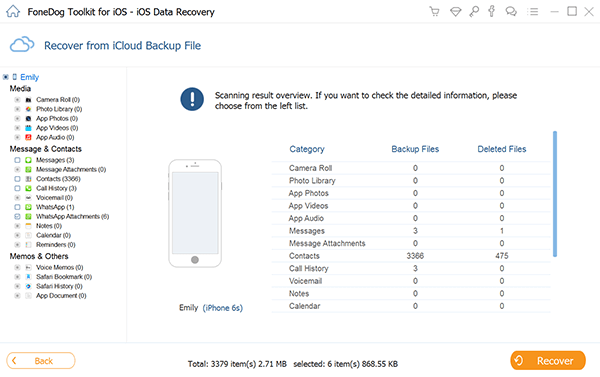
The last recovery option offered by FoneDog Toolkit- iOS Data Recovery is to ‘Recover from iCloud’ which works similar to iTunes wherein you can perform selective recovery without any data loss. To find out how you can restore iPad using this option, check out below:
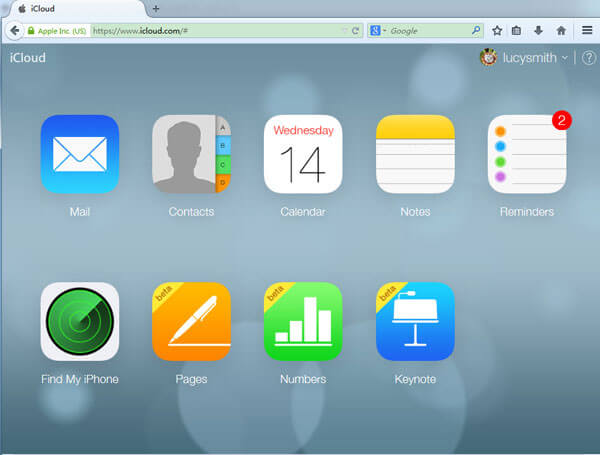
Launch the program FoneDog Toolkit- iOS Data Recovery and then click the third recovery option on the left panel “Recover from iCloud” and then sign in to iCloud.
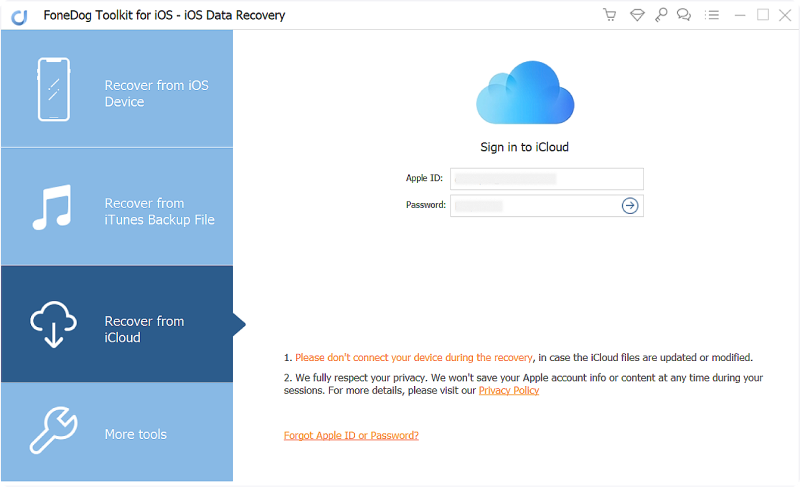
Log in iCloud Account--1
Once logged in, choose the most recent iCloud backup and then click ‘Download’ to extract the backup contents. On the pop-up window, select the files you want the program to scan and download for you. Click ‘Next’ to continue.
Select iCloud Backup and Download--2
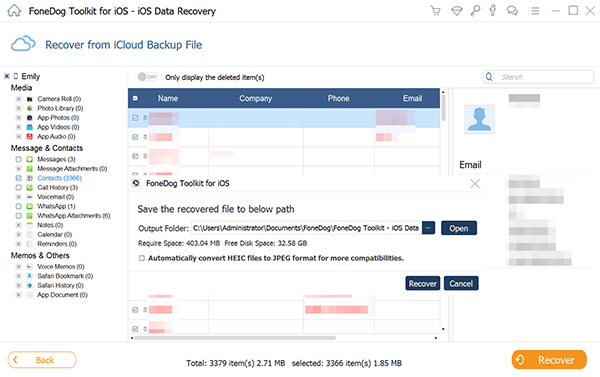
FoneDog Toolkit- iOS Data Recovery will now scan, extract, and download the iCloud backup contents. This process will take some time depending on the file size and network connection. When the scanning and download stop, you can now see the extracted backup files from iCloud and from here you can perform selective recovery by ticking the boxes of the files you desire to recover. Don’t forget to save them to a new folder for easier navigation in the future.
You have been able to recover important files from iCloud backups without the need to extract the entire contents only by using FoneDog Toolkit- iOS Data Recovery.
Preview and Recover--3
There are a lot of ways to restore iPad and one of the most effective options is to use FoneDog Toolkit- iOS Data Recovery. There is no need to endure severe data loss once you have undergone ‘restore to factory settings’.
Now you can freely take advantage and use the iPad’s maximum potential. There is always a way to get back deleted data as long as you have backups and as long as you have FoneDog Toolkit- iOS Data Recovery ready on your computer.
People Also ReadRestore Deleted Messages Without BackupRecover Deleted iPhone Photos without Backups
Leave a Comment
Comment

Technical/Creative Writer
Kitchen, my safe space; black, my favorite color
Was a Technical Specialist for a while, troubleshooting Smartphone and Software-related issues until a writing stint caught my attention.
iOS Data Recovery
3 Methods to recover your deleted data from iPhone or iPad.
Free Download Free DownloadHot Articles
 /
/
INTERESTINGDULL
/
SIMPLEDIFFICULT
Thank you! Here' re your choices:
Excellent
Rating: 4.6 / 5 (based on 77 ratings)
