FoneDog Screen Recorder
FoneDog Screen Recorder
Special Offer
Special Offer


By Nathan E. Malpass, Last updated: February 2, 2020
iCloud is the to-go reservoir of data of many Apple users. It allows backup and better management of data and files. Since the iPhone is not blessed with unlimited storage, iCloud is a solution that Apple provided to extend the memory of your device. Filling in the built-in memory of the iPhone can cause it to slow down in performance. This is why it matters that you know how to move photos from iPhone to iCloud storage.
Transferring photos from the iPhone to the iCloud is the deal solution to clear and free up the memory of your iPhone. You shouldn’t worry about having an iPhone memory full by following these methods to help you ensure that you always have enough memory to capture those eventful moments in your life. Here’s how:
Part 1: How to Move Photos from iPhone Through Phone Transfer AppPart 2: How to Move Photos from iPhone to iCloud Storage - Turning on iCloud PhotosPart 3: How to Move Photos from iPhone to iCloud Storage - Actual TransferPart 4: Conclusion
If you want a quick and simple way to move photos out of your iPhone, the use of third-party apps is the way to go. The App Store is bombarded with many options, but we are here to help. A great choice for data transferring is the FoneDog Phone Transfer app.
You can download FoneDog Phone Transfer to help you with all your data transferring needs. It is a powerful tool designed to flawlessly import numerous data. Be it photos, music, videos or any type of content; FoneDog Phone Transfer can easily move them.
Phone Transfer
Transfer files among iOS, Android and Windows PC.
Transfer and backup text messages, contacts, photos, video, music on computer easily.
Fully compatible with iOS 13 and Android 9.0.
Free Download

If you are looking for the app solution that can provide seamless transfer; go for the FoneDog Phone Transfer app. Overloading of data and data loss is history. With the FoneDog Phone Transfer app, you are guaranteed with data backup and efficient transfers. You don’t need to be tech-savvy to use the FoneDog Phone Transfer app. It easy and simple to use. Here’s how you can use FoneDog Phone Transfer app to move photos from your iPhone:
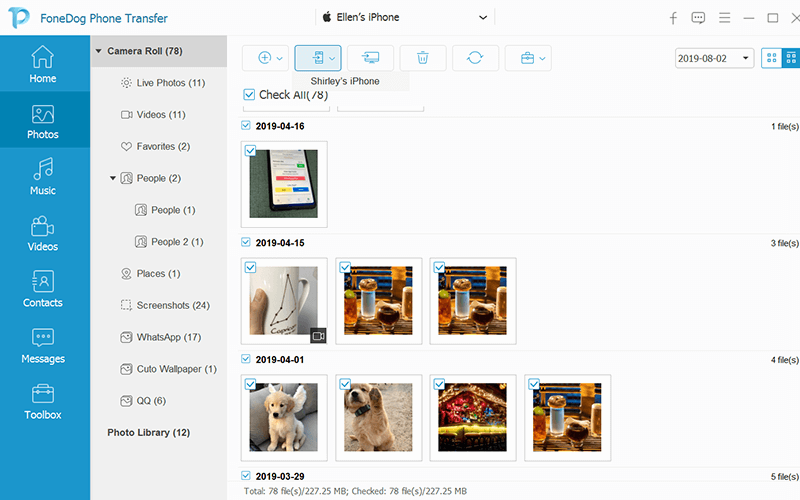
If you are looking for a great alternative to transferring your photos if your iCloud is full, the FoneDog Phone Transfer app is highly recommended. Never fear to lose any of your important photos anymore. You can back them up using these simple steps. FoneDog Phone Transfer app is your lifesaver for 100% safe photo transfer.
You can only make use of the iCloud option if your iCloud Photos is turned on. Ensure that you have an Apple ID that is similar on all the devices that you want to use iCloud Photos with. Once all that is settled, start to turn on your iCloud Photos. Just follow the next steps:
Uploading the whole photo library to the iCloud will depend on the size and amount of photos you have. It can take minutes, hours, even days. Just ensure that you finish the whole process.
That is the initial method to perform to guarantee that you will be able to transfer photos to your iCloud. You are now halfway to enjoying the online storage that iCloud has to offer. Let’s move on to the next steps.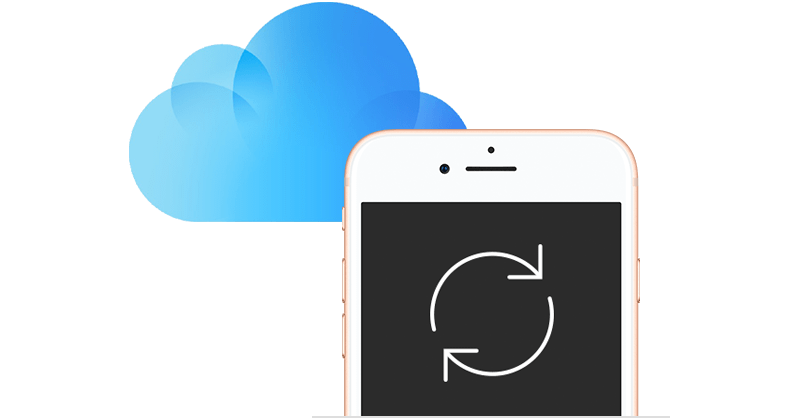
Once you are done with the first half of the process (as discussed above), it’s time to take on the actual transfer, moving photos to iCloud is fairly easy. Just follow these steps and you’re on your way to viewing photos with less stress.
That is how you move photos from iPhone to iCloud storage. Once you moved, you can safely delete photos to free up memory on your iPhone. Note that iCloud offers only 5 GB free. That works for all data types. You also stay connected to a good network connection to ensure the safety of transfer.
Moving photos from iPhone to iCloud is easy. With a stable network connection and by following the above steps, you can do photo transfer. Using iCloud is an effective way to free up space on your iPhone. The sad part is that it only offers 5GB free.
For a better shot on photo transfer, use FoneDog Phone Transfer app. You do not need the internet to do any data transfer. Transfer all you want and any way you want. Never miss out on photo ops. Your iPhone can always stay full on memory with reliable data transfer from FoneDog Phone Transfer app.
Phone Transfer
Transfer files among iOS, Android and Windows PC.
Transfer and backup text messages, contacts, photos, video, music on computer easily.
Fully compatible with iOS 13 and Android 9.0.
Free Download
Data transfer is made more efficient and easy with the FoneDog Phone Transfer app. Download and try out the FoneDog Phone Transfer app now! You will love how this app works! We hope these methods we share works for you. Tell us what you think. Share your experience with us. Comment down below for your ideas. We’d love to hear from you. For more awesome tips, tricks, techniques, and information about gadgets, apps, and technology; visit us at WEBSITE.
Leave a Comment
Comment

iPhone/Android Devices’ Maintenance Expert
Staying home, listening to music, writing tech articles
Many people asked me to repair their mobile phones so I have a lot of experience in mobile phone repair, and I know a lot about Android or Apple phones.
Phone Transfer
Transfer data from iPhone, Android, iOS, and Computer to Anywhere without any loss with FoneDog Phone Transfer. Such as photo, messages, contacts, music, etc.
Free DownloadHot Articles
 /
/
INTERESTINGDULL
/
SIMPLEDIFFICULT
Thank you! Here' re your choices:
Excellent
Rating: 4.7 / 5 (based on 58 ratings)
