FoneDog Screen Recorder
FoneDog Screen Recorder
Special Offer
Special Offer


By Vernon Roderick, Last updated: February 4, 2021
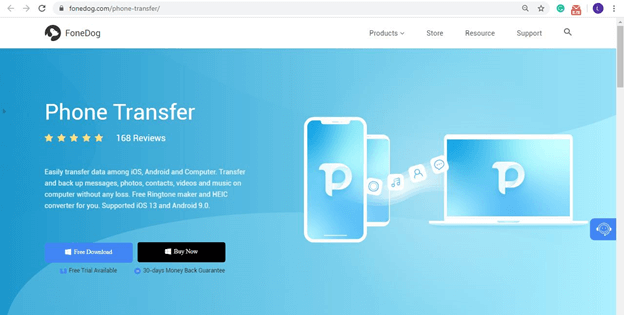
You just bought a new Samsung S8 Plus phone and you want your files to be moved or synced from the old mobile device to the new one. This article presents different means of how you can switch photos to a new S8 Plus device. Another method that is simpler and more convenient is the use of a tool called FoneDog Phone Transfer. It is a highly recommended software that allows you to transfer various types of data like photos, videos, documents, and a lot more, to any kind of device.
To help you transfer various types of files such as photos, music, videos, movies, contacts, messages, documents, and many others, FoneDog Phone Transfer is a better alternative that you can use. The tool enables you to transfer data across multiple devices in different operating systems and versions. Your data is guaranteed to be safe and secured without experiencing any loss of data. The app is available for Windows PC in a free trial version and also offers a 30-day money-back guarantee should you purchase the full package. You can use the FoneDog Phone Transfer in different settings such as:
Here are the steps on how to use FoneDog Phone Transfer software:
Download and install FoneDog Phone Transfer to your Windows PC. Access the app on your PC via the desktop shortcut icon, Start menu program list, or pinned icon on the taskbar. Next, plug in your Android devices (and other mobile devices) to the PC with a USB cable connection. Your mobile devices must be recognized automatically by the tool. If it is not, unplug the device and connect it again. Make sure you are not using a faulty USB cable, adapter, or port.
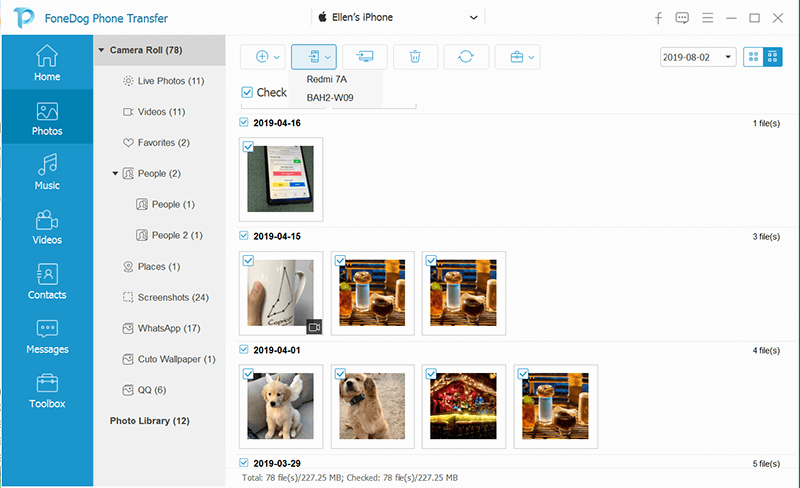
Choose the various types of files that you want to move and the location or category of the files. The files are categorized by data type and folder. Any type of data can be transferred such as photos, music, videos, contacts, and messages. You can choose to preview each file to see the contents before proceeding with the data transfer. In each file, you can see its name, file size, date and time created, and other details.
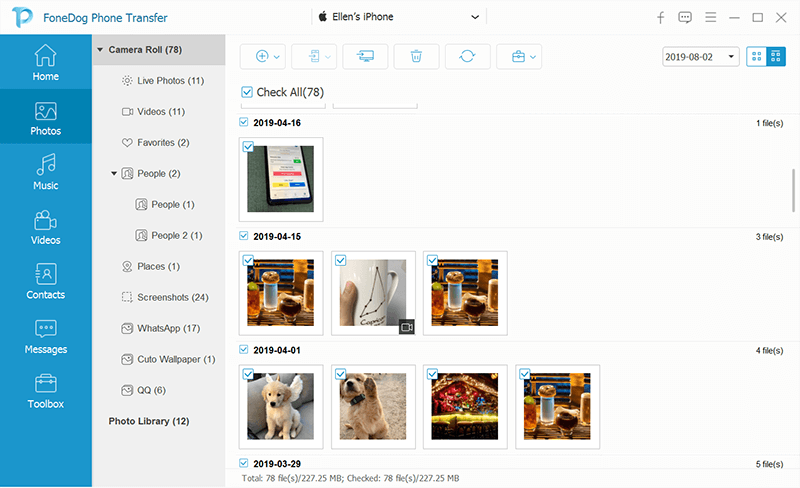
When your mobile devices are connected to the PC successfully, choose all or specific files that you want to transfer across the devices. Then, click on Export to Device to start the file transfer. Wait until the data transfer process is completed ensuring there are no disruptions while the process is in progress. You will be notified that the data transfer is done successfully.
This section will help you on how to switch photo to new S8 Plus using a cloud backup service like Google Drive.
Note: Before doing any data transfer method, make sure you have a stable internet connection with devices fully charged to avoid disruptions while the data transfer is in progress.
Step 01: On your old mobile device, open the Google Drive app.
Install the Google Drive app from Play Store or App Store if you don’t have it yet on your mobile devices.
Step 02: Sign in to your Google account when prompted.
Step 03: Tap on the menu icon on the upper left.
Step 04: Tap on Settings.
Step 05: Tap on Backup and reset.
Step 06: Choose the photos that you want to backup. You can also back up your contacts, calendar events and videos.
Step 07: Tap on the Start Backup button.
Step 08: Wait until the data transfer is done. Verify that your files are successfully transferred.
Step 09: Access and download the backed up photos to your new S8 Plus phone by signing in to Google Drive using the same account from your old mobile device.
You can also upload the photos to Google Drive by tapping on the + icon on the bottom right corner. Then select the photos that you want to upload.
This section will guide you on how to switch photo to new S8 Plus using Bluetooth. Maintain the range of distance limit between the sending and receiving devices to achieve a smooth data transfer.
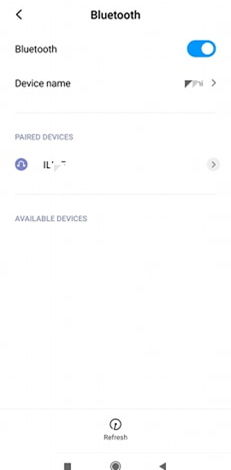
Step 01: On your old mobile device, navigate to Settings.
Step 02: Switch on the Bluetooth feature. Do this as well to your new S8 Plus phone.
Step 03: Tap Refresh.
Step 04: Select the new S8 Plus from the available devices (device name is the same as what is set on the new S8 Plus phone).
Step 05: Tap Pair. The devices are paired successfully.
Step 06: On your old mobile devices, select the photos you want to transfer and tap Share or Send.
Step 07: Select Bluetooth as the sharing method.
Step 08: On your new S8 Plus phone, accept the files that are being sent. Wait for the file download to complete.
This method provides the basic steps that will teach you how to switch photo to new S8 Plus device through File Explorer in Windows.
Step 01: Plug in your old mobile device to your PC with the use of a USB cable connection.
Step 02: Your old device must be recognized successfully.
Open File Explorer. As a shortcut, press and hold simultaneously Windows logo + E keys.
Step 03: Open the drive associated to your mobile device.
Step 04: Navigate to the photo gallery folder.
Step 05: Plug in your new S8 Plus phone to another port in your PC using the USB cable connection.
Step 06: Select and copy the photo files from your old device to your new S8 Plus device.
Shortcut keys:
Select All: Press CTRL + A keys
Copy: Press CTRL + C keys
Paste: Press CTRL + V keys
Step 07: Safely eject and disconnect the mobile devices from your PC.
This section will help you on how to switch photo to new S8 Plus using your Email which will only apply to fewer photos since email storage has data limits.
Step 01: On your old mobile device, open your Mail app.
Step 02: Sign in with your email account when prompted.
Step 03: Create a new message and attach your photos.
Step 04: Save the email as draft or send the email.
Step 05: On your new S8 Plus device, open your Mail app using the email account that will receive the message that was sent.
Step 06: Download the photos to your new S8 Plus phone. Wait for the download to get completed.
This simple method will help you on how to switch photo to new S8 Plus using the Bluetooth setting. Both of your devices must enable Bluetooth.
Step 01: On your iPhone device, copy the photos you wish to transfer to your SD card (if the files are not yet saved on the SD card).
Step 02: Switch off your iPhone device.
Step 03: Remove the SD card from your iPhone device.
Step 04: Insert the SD card to the PC’s card port or to the new S8 Plus device.
Step 05: Go to the folder where your photos are saved.
Step 06: Choose and transfer the files that you want to your new S8 Plus device.
This section discusses Samsung Kies, an official program from Samsung that is used to switch photo to new S8 Plus. This only applies to Samsung devices.
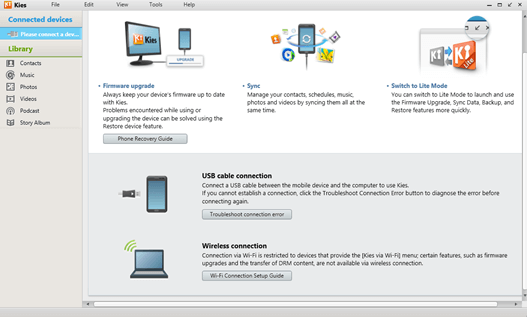
Step 01: Go to the Samsung official website. Download and install Samsung Kies to your PC.
Step 02: Plug in your Samsung devices to your PC using a USB cable.
Step 03: Your device will be detected. Enable the USB Debugging mode on your Samsung device.
Step 04: Click on the Backup/Restore tab.
Step 05: Click Data backup on the left pane.
Step 06: On the list of items to backup, select Photos.
Step 07: Click the Backup button to start the data transfer.
Step 08: Wait until the backup process is done. Copy the photos from your PC to the new S8 plus device which you must connect to the PC.
Instead of the Backup/Restore option, you can also transfer photos using the Import/Export option:
Step 01: Connect your Samsung phones to the PC.
Step 02: Enable the USB Debugging mode on your Samsung phone.
Step 05: Click on the Import/Export tab on the Samsung Kies app.
Step 06: On the left pane, click Export to PC to start the data transfer.
Step 07: On the list of items to import, select Photos.
Step 08: Wait until the data transfer is complete and verify the photos.
This method can help switch photos to the new S8 Plus by utilizing another official program from Samsung that is used to transfer data called Samsung Smart Switch.

Step 01: Go to the Samsung official website. Download and install Samsung Smart Switch to your PC.
Step 02: Connect your Samsung phones to your PC using a USB cable.
Step 03: Enable the USB Debugging mode on your mobile devices and download the Smart Switch app to your Samsung phone.
Step 05: On the Samsung Smart Switch app, choose the Backup option. All your files will be backed up.
Step 06: Wait until the data backup process is completed and check if the data transfer is done successfully to your PC.
This process provides the steps that will guide you on how to Switch Photo To New S8 Plus using the iCloud backup service. This is applicable if you want to transfer photos from iOS devices to Android.
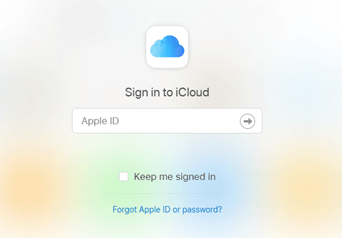
Step 01: Enable the internet connection for your iPhone device.
Step 02: Navigate to Settings.
Step 03: Tap iCloud.
Step 04: Tap Backup.
Step 05: Turn on the iCloud Backup option.
Step 06: Tap Back Up Now to begin the data backup.
Step 07: Wait until the backup process is completed.
Step 08: You can also backup photos by going back to Settings > iCloud.
Tap on Photos.
Tap Cloud Photo Library.
Step 09: On your PC, log on to iCloud.com
Step 10: Download all the photos to your PC.
Step 11: Plug in your new S8 Plus device to your PC.
Step 12: Copy and transfer all the downloaded photos on your PC to the new S8 Plus device.
This simple method will aid you on how to switch photo to new S8 Plus device using the Photos app.
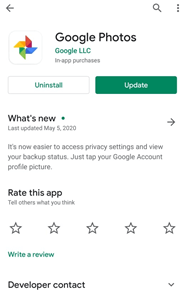
Step 01: On your mobile device, download and install Google Photos from the App Store. Update to the latest version.
Step 02: Open the Google Photos app and sign in with your Google account.
Step 03: Enable the backup of your data on your phone when prompted. Select Backup & Sync.
Step 04: Select the photos you wish to transfer. It will begin uploading the photos. Wait until the upload is complete.
Step 05: On your new S8 Plus device, download and install the Photos app from Google Play Store.
Step 06: Follow the on-screen instructions to download the photos to your new S8 Plus.
This article provides the different solutions you can do if you want to sync your files such as photos across your mobile devices. To switch photo to new S8 Plus, the best recommended program is FoneDog Phone Transfer tool which can allow you to transfer all sorts of data across mobile devices in different versions and operating systems.
Leave a Comment
Comment

Technical Expertise for PC/Website Optimization
One of my passion is to develop software of my own
I write articles to share knowledge about IT technology and some experience in developing my own software, and developing my own software is one of my passions for work.
Phone Transfer
Transfer data from iPhone, Android, iOS, and Computer to Anywhere without any loss with FoneDog Phone Transfer. Such as photo, messages, contacts, music, etc.
Free DownloadHot Articles
 /
/
INTERESTINGDULL
/
SIMPLEDIFFICULT
Thank you! Here' re your choices:
Excellent
Rating: 4.7 / 5 (based on 62 ratings)
