FoneDog Screen Recorder
FoneDog Screen Recorder
Special Offer
Special Offer


By Vernon Roderick, Last updated: January 20, 2021
iPads, especially those that are used for work, are often used along with computers. Users use their iPad when they’re not at home but still want to be productive, but PCs are the way to go when you’re at the comfort of your home.
Unfortunately, it’s not very easy coordinating an iPad and a computer. It may be easy if it’s Mac, but it’s a different story when it comes to PC considering how incompatible they are.
We will tackle the best ways to transfer iPad files to PC in this article. Let’s start with the most ideal solution at the moment.
1. Transfer iPad Files to PC with Software2. Transfer iPad Files to PC with File Sharing3. Transfer iPad Files to PC by Syncing4. Transfer iPad Files to PC (Purchases Only)5. Transfer iPad Files to PC with File ExplorerFinal Words
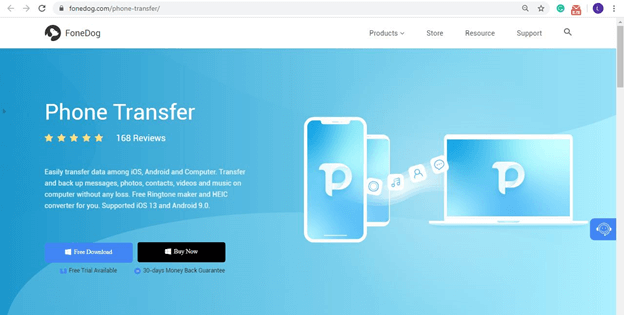
Although there are a couple of options available, most experts will agree that the best and most practical way to transfer iPad files to PC is to use a specialized tool, and that’s where FoneDog Phone Transfer comes in.
FoneDog Phone Transfer is a tool designed to help transfer files from one device to another. It is capable of transferring from or to iOS, Android, and Windows PC. What’s more, it supports the latest versions of these devices.
Below are the steps to transfer iPad files to PC:
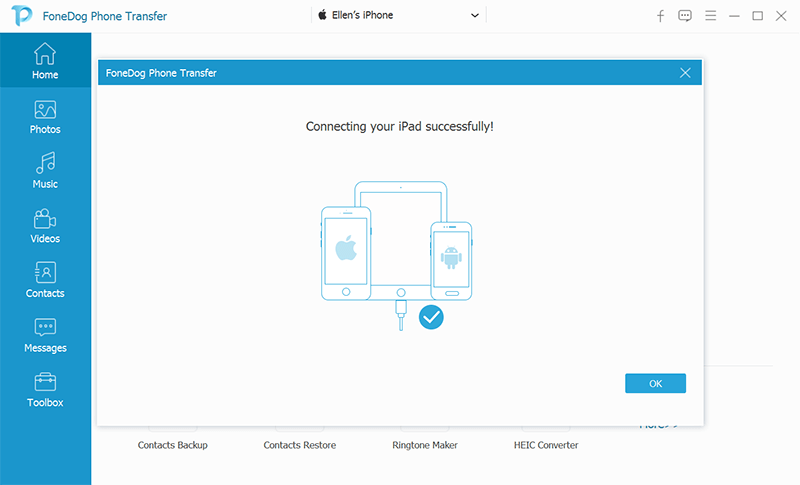
Connect the iPad device to the Windows PC with its USB cord. Make sure FoneDog Phone Transfer is already open. This will recognize the iPad and will show some info about it.
On the left side of the window, there will be a list of file types such as Photos, Music, Videos, and such. Simply select the type that you’d like to settle first. Once an option is selected, it will take a while to scan for files belonging to that file type.
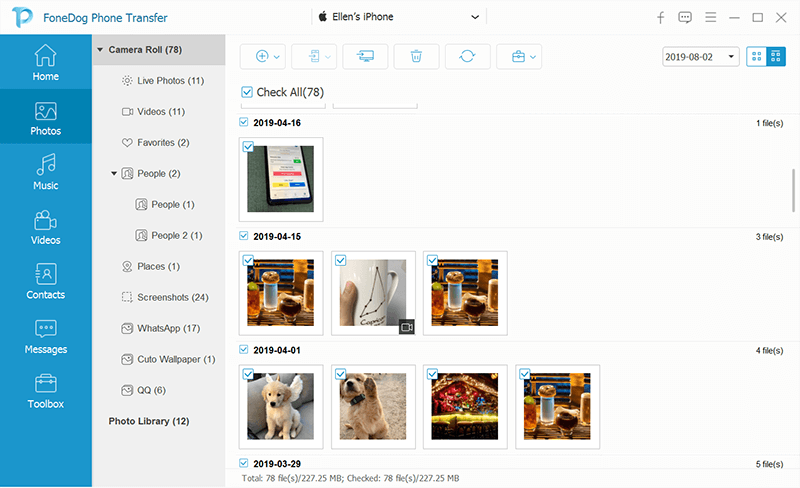
After a while, you will get a list of files on the right side of the software. These are files that can be transferred from the iPad. Simply select the files by clicking on their corresponding boxes. Once you’re done selecting, click the Export to PC button as shown below.

FoneDog Phone Transfer offers a lot of freedom and control to users in regard to file transfer. But if you are the type that would think twice before using a third-party tool, then I suggest proceeding to the other sections to transfer iPad files to PC.
Most iPad users will know about iTunes, so surely you must’ve heard about it before, too.
iTunes is a file management app available on Mac and Windows PC, though Mac doesn’t require installation since iTunes is a built-in app in this operating system.
Basically, you can manage your files in any way you want with iTunes, even as far as trying to transfer iPad files to PC. This would, however, involve a feature called File Sharing.
Below are the steps to transfer iPad files to PC with File Sharing:
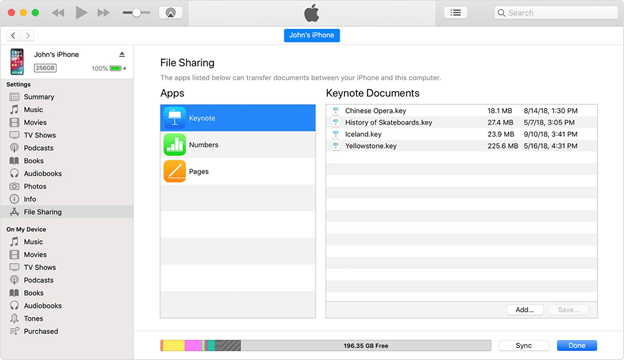
File Sharing can make use of other apps such as Photos, as long as your file is managed by that particular app. However, I still suggest the Files app make it easier to transfer iPad files to PC.
Although using iTunes’ File Sharing feature is one option, there are more methods.
Particularly, if you’re going to use iTunes to transfer iPad files to PC, then you may as well make it permanent, and by permanent I mean setting it up so that files will be transferred automatically.
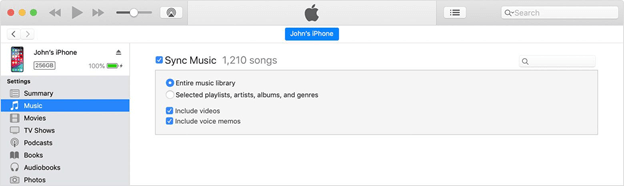
This will involve syncing your iPad and PC, and this can be done easily with iTunes. There are two ways to sync through iTunes.
If you don’t have WiFi, then I suggest using a USB cable instead. This is what I like to call Wired Syncing, and here’s how you can do it:
Example: Choose Music if you want to sync Music files, or choose Movies if you want to do videos first.
Example: Check the Sync Music box if you are in the Music section, or check the Sync Movies if you are in the Movies section.
If you do have WiFi, I suggest using the WiFi option since it will be more convenient, and this time it’s called Wireless Syncing. Here are the steps to do this:
Note: This will be a one-time process, all other syncing operations will be done through the WiFi after this.
Once this is done, you no longer have to worry about trying to transfer iPad files to PC every time a file is added. You simply need to watch as the files on your iPad are matched so that your PC will have the same files.
There are actually three ways to transfer iPad files to PC with iTunes, and this will be our last one that will involve iTunes.
As you may already know, as an Apple user, there are files that came directly from the store. While some of them are free, there are also paid files, but both are treated as purchases.
Often times, purchases belong to the Music, Movies, or Books, category. Lucky for us, if you only want those files to be transferred, you can do it with a few clicks.
Below are the steps to transfer iPad files to PC including only purchases:
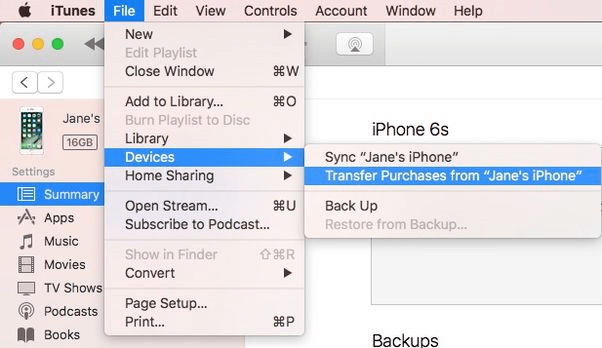
Honestly, this is the easiest way to transfer iPad files to PC, but unfortunately this only works for purchased files such as music, movies, books, and such.
We’ve only been using iTunes which was originally made for Mac, but is there any app that was made for Windows PC?
Well, there is actually an app that fits your criteria, and that would be File Explorer, the built-in file manager in every Windows OS. And as you might’ve guessed, just like iTunes, you can transfer iPad files to PC through File Explorer.
Below are the steps to transfer iPad files to PC:
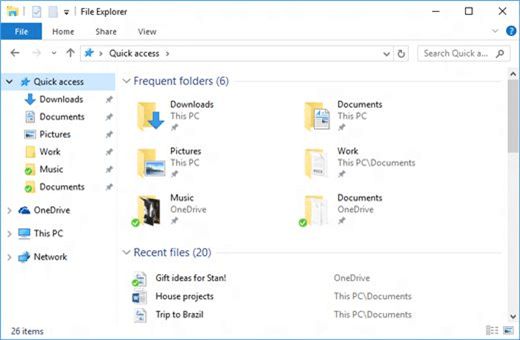
That’s pretty much how you can transfer iPad files to PC without breaking a sweat. The best thing about this is File Explorer is integrated into every Windows PC, so it should be reliable enough.
You are not the only person out there that wants to transfer iPad files to PC. There are also those that want to free some space on their device, but can’t because they’re afraid to delete the files since they may need them later.
With this guide, you should be able to overcome this problem and successfully free some space for you to use later on. Hopefully, you won’t find the need to delete your files.
Leave a Comment
Comment

Technical Expertise for PC/Website Optimization
One of my passion is to develop software of my own
I write articles to share knowledge about IT technology and some experience in developing my own software, and developing my own software is one of my passions for work.
Phone Transfer
Transfer data from iPhone, Android, iOS, and Computer to Anywhere without any loss with FoneDog Phone Transfer. Such as photo, messages, contacts, music, etc.
Free DownloadHot Articles
 /
/
INTERESTINGDULL
/
SIMPLEDIFFICULT
Thank you! Here' re your choices:
Excellent
Rating: 4.6 / 5 (based on 90 ratings)
