FoneDog Screen Recorder
FoneDog Screen Recorder
Special Offer
Special Offer


By Vernon Roderick, Last updated: March 8, 2021
Truth be told, iPhones are not exactly the best brand of smartphones for taking pictures. There are other brands out there that are more suited to photography, and most of them are Android. Alas, you can’t just leave your photos from your iPhones, especially if they are all heard-earned. Now, what do you do?
What better way to have a fresh start with Android by learning how to transfer photos from iPhone to Android. This article will provide you with some suggestions on how to do this. Let’s start with my first recommendation.
People Also ReadHow to Transfer Photos from iPhone to iPhoneHow to Transfer Photos from Android to iPhone
Part 1. Transfer Photos From iPhone to Android with a Specialized ToolPart 2. Transfer Photos From iPhone to Android by Drag and DropPart 3. Transfer Photos From iPhone to Android by ImportingPart 4. Transfer Photos From iPhone to Android using iTunesPart 5. Transfer Photos From iPhone to Android with Sharing AppsPart 6. Transfer Photos From iPhone to Android with Cloud AppsPart 7. Transfer Photos From iPhone to Android through Sending EmailsConclusion
iPhone is not exactly the best smartphone when it comes to compatibility. It doesn’t work well with other devices such as Windows PC or Android smartphones. That’s one of the bad sides of the iPhone, and perhaps also one of the reasons why you’ve decided to switch to Android.
Tip: If you want to know how to move photos from iPhone to PC, you can visit the provided article.
As unfortunate as it may be, you only have to compromise and look for a way to transfer photos from iPhone to Android without relying on the iPhone’s functions, and that’s where FoneDog Phone Transfer comes in.
FoneDog Phone Transfer is a tool that was designed to help users migrate their files from one device to another. It supports various file types including photos. In addition, you can use it regardless of your device since it supports both the latest versions of Android and iOS. Simply put, it’s the best tool for the job, so how can you take advantage of it?
Phone Transfer
Transfer files among iOS, Android and Windows PC.
Transfer and backup text messages, contacts, photos, video, music on computer easily.
Fully compatible with the latest iOS and Android.
Free Download

In addition, if you want to know how to transfer text messages from iPhone to a computer for free, you can visit this link:https://www.fonedog.com/phone-transfer/how-to-transfer-text-messages-from-iphone-to-computer-for-free.html.
Using a connector or a cable, connect your iPhone to a computer where FoneDog Phone Transfer is installed. Make sure the said tool is currently open before you do this so it may be able to recognize the device and display its information just like our figure below.
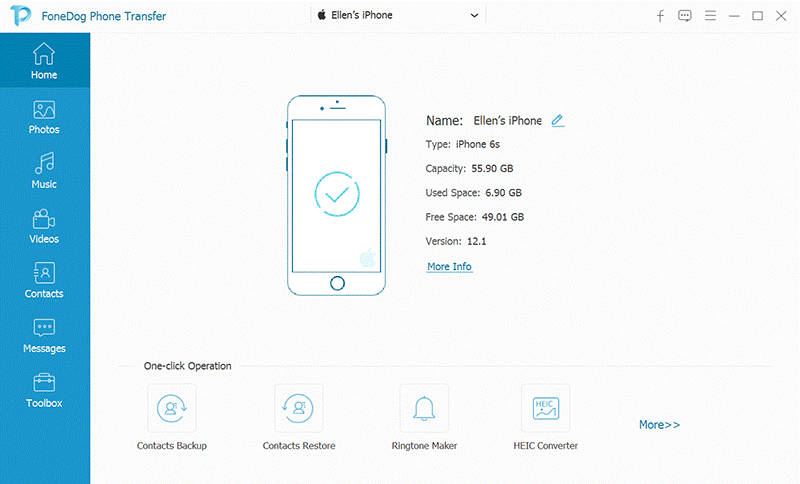
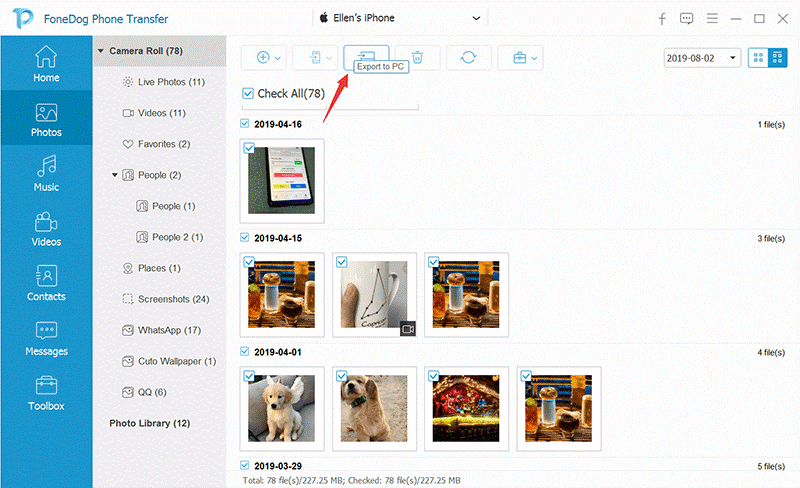
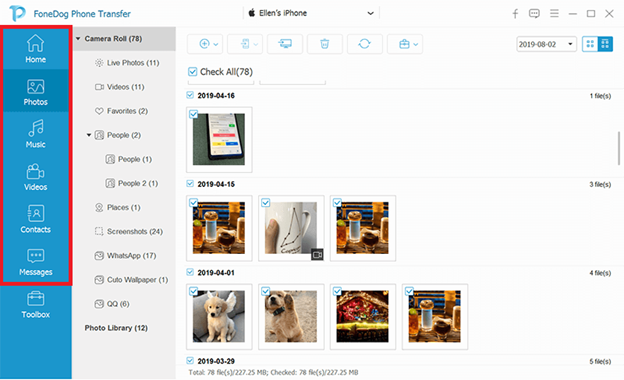
Once detected, you will get some basic info about the device. However, what you need to put your attention on is the left panel which contains a selection of files. From here, select Photos so the tool may begin scanning for files belonging to this category.
Once files are detected, you will get a list of items on the right side of the window. Select the ones that you’d like to transfer by clicking on their boxes. After you have selected the necessary items, click on Export to PC at the top of the selection pane.
Once you’ve done all this, you should now have the necessary files on your computer. All you need to do now is a transfer from the computer to your Android, which should follow the same concept as before. Now if you’re not someone that is fond of using a third-party tool, we have another method to transfer photos from iPhone to Android.
Perhaps the easiest way to transfer photos from iPhone to Android is the Drag and Drop method which you may be familiar with. It’s basically where you drag a file from the internal storage of the source device and drop it to where you want to put it.
Simply put, you don’t even have to press anything on your keyboard, purely just a mouse. Either way, here are the steps that you will need to follow:
Note: Once you’ve done this, you should be able to see two new drives under the Portable Devices or Removable Disks. One should be for the iPhone and another for Android.
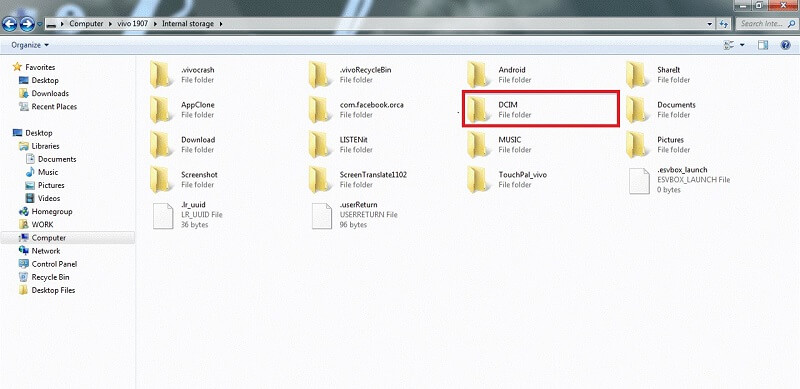
No matter how easy it is, it is as much as great of a method to transfer photos from iPhone to Android as any method. Unfortunately, it is more difficult if you don’t know where the photos are located. After all, DCIM is only a default folder so it may change according to your actions. If that’s the case, we suggest that you use another method instead.
Our third entry is similar to the Drag and Drop method in a way that you won’t be using too much of your brain. It follows the same concept as the previous method, except for the fact that you cannot select the photos as you like since it is automatic.
So as far as manual methods are concerned, drag and drop is the easiest while, if you want to automatically transfer photos from iPhone to Android, importing is your go-to method. Follow these steps if you want to utilize this method:
Note: This will extract all the photos found from the selected device and transfer them all into the My Pictures folder. It may take a while since videos are included, whether you like them or not.
The first method, Drag and Drop, required you to connect the iPhone device and Android device at the same time. Thus, you will need two cables.
This time, however, you only need one, since you don’t necessarily need to connect them at once. This is the main advantage of importing over drag and drop. Unfortunately, it is only available on Windows PC. If you need to transfer photos from iPhone to Android regardless of the operating system, the next entry might be your best bet.
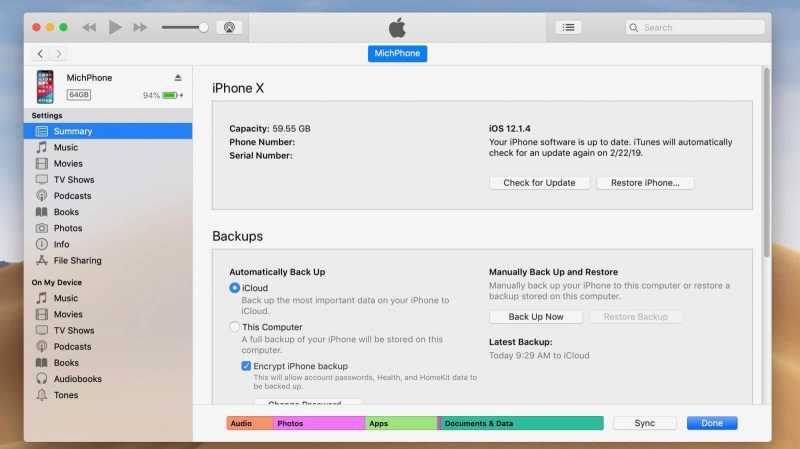
iTunes is a fairly popular utility tool on Apple devices. It was originally a multimedia player, but now it has become a very reliable file management tool. Even experts use it for doing tasks such as storing files, organizing files, and transferring files.
In our case, it is entirely possible to use iTunes to transfer photos from iPhone to Android. The best thing about this is that it is available both on Windows PC and Mac, so you can use it on most occasions. Here’s how you can use this method:
Note: On Windows PC, the transferred photos should be located in User > Pictures > iTunes > iTunes Media.
That’s pretty much everything you need to know so you can transfer photos, or any files for that matter, using iTunes. The disadvantage here is that you won’t be able to do it if your photos aren’t considered to be purchases.
Before, we used iTunes, a built-in app on Mac which is also an available tool for Windows. Thus, I would also like to recommend using apps. If iTunes is a file management app, then we will be using sharing apps this time.
Sharing apps are just as what you’d expect from the name. They are apps that are capable of sharing files across platforms and devices, and that includes sharing files from iPhone to Android. Here are some of the apps that I’d like you to try:
SHAREit is the most popular sharing app on the market. It is available on both Android and iOS devices. SHAREit allows users to share their files with their acquaintances without having to rely on an internet connection, as long as the two devices are nearby. It also has a desktop version for Mac and Windows.
Although not as popular as SHAREit, File Transfer is still a great app by Delite Studio. Basically, how it works is that it creates a local network for the two devices to connect to. Once that’s done, the users will be able to share files freely through this network. Mac and Windows are supported by the app as well.
Instashare follows the same concept as File Transfer. It creates a local area network for users to connect to. The difference, however, lies within their specialties. While File Transfer focuses on Android file transfer, Instashare focuses on iPhone file transfers, though they should both be capable to transfer photos from iPhone to Android.
Zapya is another app that makes use of local networks. However, Zapya is capable of more than that. It has a feature for QR code sharing, which is not available on the two previous apps.
Our last sharing app is Feem. Just like the previous apps, it creates a local Wi-Fi network to share files. The feature that is unique to Feem is perhaps the fact that it supports most platforms including Mac, Windows, Android, iOS, and even Linux.
Although it doesn’t make as much sense as when I recommended sharing apps, using cloud apps is actually as effective when it comes to learning how to transfer photos from iPhone to Android.
Cloud apps are similar to sharing apps in a way that allows you to share files across platforms. This time, however, using cloud apps, besides transferring the files, you are able to store them as well. Here are some of the best cloud apps that I’d like to recommend.
When we talk about cloud apps, we won’t make the mistake of excluding Google Drive. After all, it is perhaps the most popular cloud app out there. It offers 15 GB of free storage that supports most file types including photos. There are also other features that promote collaboration and teamwork. Simply put, it’s the cloud app for professionals.
Another cloud app is Dropbox, and it’s great in its own way. While it may only offer 2 GB of storage for free, it is still a handy tool since it supports both Android and iOS, just like Google Drive. Besides that, there’s really not much to say about Dropbox.
While it may not be as popular as the other two, Mega is still one of the best cloud apps out there. For one, it offers a whopping 50 GB of storage for free, which is perhaps the highest a cloud app can go for. Unfortunately, it lacks features which is perhaps the reason why it’s not as popular as the other cloud apps.
Our last entry involves sending emails. While you may be wondering when has sending emails ever become a way to transfer photos from iPhone to Android, the reason is actually plausible.
Just like how we share files through apps, we can also share files by sending emails to accounts that we have access to. It follows the same concept as when you send a message to yourself, hoping to check it out later. This time, however, we will be using email apps, and here are my recommendations for you.
Gmail is another product of Google, just like Google Drive. Thus, it’s only natural for this app to make it to this list. It’s a fairly popular email app since there are many features that you can make use of, though we won’t enumerate all of them. The only thing you need to know is that Gmail can send emails quicker than most apps, and it supports photos as well. Additionally, the size limit is high so you can send as many pictures as you want.
Our second entry is ProtonMail. It doesn’t have as many features like Gmail, but it still managed to catch my attention. This is because it has its own cloud storage, so it may very well be considered as a cloud app. In terms of sending emails, it specializes in ensuring the security and privacy of its users.
The missive is not exactly the most popular email app, though it really performs really well compared to other apps. It has a built-in chat as well as labels that you can use to better organize your emails, although I don’t think that it is helpful when you only need to transfer photos from iPhone to Android.
If you have the option to switch to a better device, there’s really no reason to take that option. However, when it comes to iPhones, sometimes it’s very hard to make that decision, especially since transferring your files from your iPhone is difficult.
This article provided you with seven helpful ways to transfer photos from iPhone to Android. Hopefully, these are enough for you to not worry about that matter again.
Leave a Comment
Comment

Technical Expertise for PC/Website Optimization
One of my passion is to develop software of my own
I write articles to share knowledge about IT technology and some experience in developing my own software, and developing my own software is one of my passions for work.
Phone Transfer
Transfer data from iPhone, Android, iOS, and Computer to Anywhere without any loss with FoneDog Phone Transfer. Such as photo, messages, contacts, music, etc.
Free DownloadHot Articles
 /
/
INTERESTINGDULL
/
SIMPLEDIFFICULT
Thank you! Here' re your choices:
Excellent
Rating: 4.7 / 5 (based on 68 ratings)