FoneDog Screen Recorder FoneDog Screen Recorder
Special Offer Special Offer
Only Only
$4.49 $4.49
to get a ONE-month license to get a ONE-month license
Sale ends in xx days Sale ends in xx days
Buy Now
sale

How to Transfer Reminders from iPhone to Computer 2022

By Adela D. Louie, Last updated: October 28, 2022

Reminders have become essential for iPhone users as well as other phones. Because it includes an alert system, iPhone reminders can indeed aid us in creating a work routine but also thoroughly before applying bookings or any other tasks on time. Nevertheless, these have caused numerous issues for iPhone subscribers.

For some other reason, if you're trying to figure out how to transfer reminders from iPhone to computer, you've come to the right place. Read through this article until the climax to find solutions that will astound you as well as assist you in transferring reminders right from your iPhone to your computer as well as transferring your files from PC to iPhone:

Part #1: Transfer Reminders Instantly from iPhone to Computer – FoneDog Phone TransferPart #2: Manual Way on How to Transfer Reminders from iPhone to ComputerPart #3: Conclusion

Part #1: Transfer Reminders Instantly from iPhone to Computer – FoneDog Phone Transfer

Looking for an instant and quick transfer of data and important records from your phone to your computer? We’ll before you continue to the next portion which is the manual way of how to transfer reminders from the iPhone to the computer.

Here’s a superb application transferring and backup tool which many users have already tried and super recommended to make use of. This is the FoneDog Phone Transfer.

Phone Transfer Transfer files among iOS, Android and Windows PC. Transfer and backup text messages, contacts, photos, video, music on computer easily. Fully compatible with the latest iOS and Android. Free Download FoneDog Phone Transfer

FoneDog Phone Transfer has always in the top of what it can do, it is full pack of features from transferring, of course, making backups of your data, importing and as well exporting data such as videos, images, contact details, texts or messages, sound clips and many more.

This top iOS data-transferring tool is indeed available on each and every type of device from iOS devices, to Mac, and Windows but is also widely available for Android users too. So to further move ahead with the main procedure by using this amazing app, just continue reading the steps provided below:

To begin the precise operation, ensure that you've already set up but also downloaded the FoneDog Phone Transfer, which can then be obtained from their online web page. After you've obtained the tool software, you can advance with said following step-by-step technique:

  1. To go through, you should really always ensure that your iPhone device is successfully connected to your computer across and making use of a USB power adapter. Following that, the software would therefore assess your iPhone handset, and perhaps the related data or otherwise records might be conveyed among its widescreen monitor.
  2. You should first try looking at all from the very left part of the widescreen monitor for the records you need to identify. Now choose those photos, texts, videotapes, personal details, songs, and perhaps other records that have recently been conveyed.
  3. The latter allows you to inspect and independently confirm the necessary data that you want to transfer. These certain components might be intact with their details, consisting of the label, length, creation time, and various other descriptions.
  4. Presently, you have to choose all such files and transfer them to iPhone and other such devices.
  5. After that, you will only need to wait awhile enough for the operation to ever be executed. And this is all that it requires.

Transfer Reminders Instantly from iPhone to Computer – FoneDog Phone Transfer

Part #2: Manual Way on How to Transfer Reminders from iPhone to Computer

Transferring reminders seems to be not that hard if you just follow on briefly to the steps presented. Remember that reminders do have relevant information which you must look carefully at whenever you were to transfer reminders from your iPhone into your computer system.

To further proceed with this step-by-step guide provided beneath, here are a few ways how to transfer reminders from iPhone to the computer.

Transfer Reminders from iPhone to Computer System through iCloud

The very first option we'd like to demonstrate is just utilizing iCloud to indeed transfer all reminders into your iPhone throughout your computer. To take advantage of this quick fix, your computer ought to be a Mac.

To actually start, comply with the instructions here below.
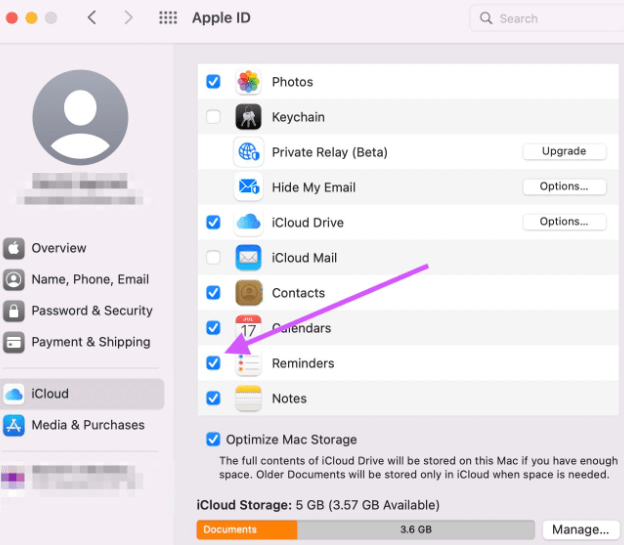
  1. Access the Applications file on your Mac as well as select the option that explicitly states "iCal".
  2. And after that, click upon that option which again says "iCal menu" and would then pick on the option "Preferences".
  3. After that, throughout the Accounts section, create a brand new account but also simply pick "iCloud" from within the drop-down selection that appears.
  4. And from there, just before prompted, enter your iTunes ID as well as password, but also make sure the acct has now become "Enabled".
  5. After which, adjust the frame rates to match the quantity of your action.
  6. After you've facilitated reminders onto your Mac, get through your iPhone but also turn on iCloud.
  7. Whereupon, into your iPhone, start up your Settings application.
  8. Afterward, select iCloud and perhaps even sign in with your immediately preceding iTunes account. Placed your Reminders "ON", so that they will immediately transfer data into your Mac. You have completed the transfer over all those iPhone reminders right into Mac!

Manual Way on How to Transfer Reminders from iPhone to Computer

Sync and Transfer Reminders from iPhone to Computer system through Apple Service

  1. Set your Mac to Reminders mode.
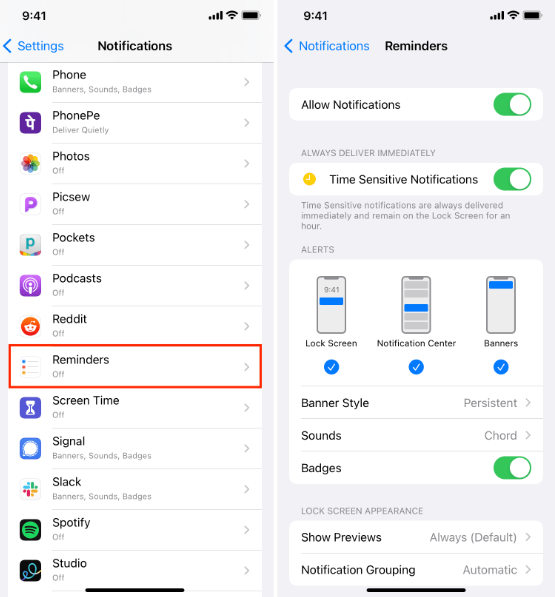
  2. After which, onto your iPhone, get through Settings.
  3. And after that, press "Reminders" and then choose the feature that clearly indicates "Sync".
  4. And from there, go through all of the Reminders that were found to be within sync.
  5. Whereupon, somewhere at bottom of the said preview pane, click "Show More" but also begin accessing reminders.
  6. After that, access the option which thus says "List" and otherwise select "iCloud Reminders".That's about all. Anything you insert into reminders would then emerge onto your Mac processor as well.

Sync and Transfer Reminders from iPhone to Computer system through Apple Service

People Also Read[2022] How to Transfer Music from iPod to Computer Free4 Speedy Ways on How to Transfer Contacts from iOS to Android Phone

Part #3: Conclusion

To the extent of this, we hope that this article will be a great help for you to transfer reminders from iPhone to computer. Leaving outlined steps for you will be a relief, you could always rely on either the instant option or the manual operation. If you indeed preferred to make use of the FoneDog Phone Transfer, just ensure that you have it on your device. Have a very nice day ahead of you.

Leave a Comment

Comment

Comment ()
author image

Adela D. Louie

Tech Website Writing /Content Optimization

Singing, smiling, surprising every day!

So as a technical writer, it is my duty to gather effective and reliable solutions to answer questions on how to deal with the issues they are having with their devices.

Phone Transfer logo

Phone Transfer

Transfer data from iPhone, Android, iOS, and Computer to Anywhere without any loss with FoneDog Phone Transfer. Such as photo, messages, contacts, music, etc.

Free Download

How Do You Like This Article?

Check icon/ Check icon

INTERESTINGDULL

Check icon/ Check icon

SIMPLEDIFFICULT

Thank you! Here' re your choices:

Rate This Article: Excellent

Rating: 4.7 / 5 (based on 85 ratings)

Phone Transfer logo

Phone Transfer

Transfer data from iPhone, Android, iOS, and Computer to Anywhere without any loss with FoneDog Phone Transfer. Such as photo, messages, contacts, music, etc.

Free Download

FoneDog uses cookies to ensure you get the best experience on our website. Click here to learn more.