FoneDog Screen Recorder
FoneDog Screen Recorder
Special Offer
Special Offer


By Vernon Roderick, Last updated: April 16, 2020
As our living standards improve, our demands also become increasingly high. Before, it might have been enough to be able to watch movies on your TV. However, nowadays, we keep on seeking for more convenient ways to watch shows, that is, through smartphones. Unfortunately, watching from such as miniature device is no longer enough.
Particularly, it would be very satisfying if we can watch TV shows on our desktop. So today, I am going to talk about how to transfer TV shows from iPhone to iTunes. That way, you can enjoy the movie experience to the fullest. Let’s start with our first entry.
#1 How to Transfer TV Shows from iPhone to iTunes (TV Shows Only)#2 How to Transfer TV Shows from iPhone to iTunes (Movies)#3 How to Transfer TV Shows from iPhone to iTunes (All Purchases)#4 How to Transfer TV Shows from iPhone to iTunes (Downloads)How to Import TV Shows from iPhone to Other DevicesConclusion
Our first method involves synchronizing iPhone to iTunes in a way that only TV shows will be transferred. Simply put, it will filter out every file that doesn’t belong to the “TV shows” category.
There are many reasons why this can be considered the best method to transfer TV shows from iPhone to iTunes. First of all, since it only includes TV shows, it will save some disk space once the transfer is done. Secondly, it is great if you intend to make the transfer quickly. Follow these steps if you want to enjoy the aforementioned benefits:
Note: You can either use Wi-Fi syncing or a USB cable when establishing a connection between the iPhone and the desktop.
Once this is checked, you are now set to transfer TV shows from iPhone to iTunes. It will automatically share access to the TV shows across your devices.
Unfortunately, it is exclusive to Mac, since Windows PC doesn’t have an app such as the Finder. Although there is the File Explorer, it doesn’t have such an option like this. Now if you don’t have a Mac, then a different approach may suffice.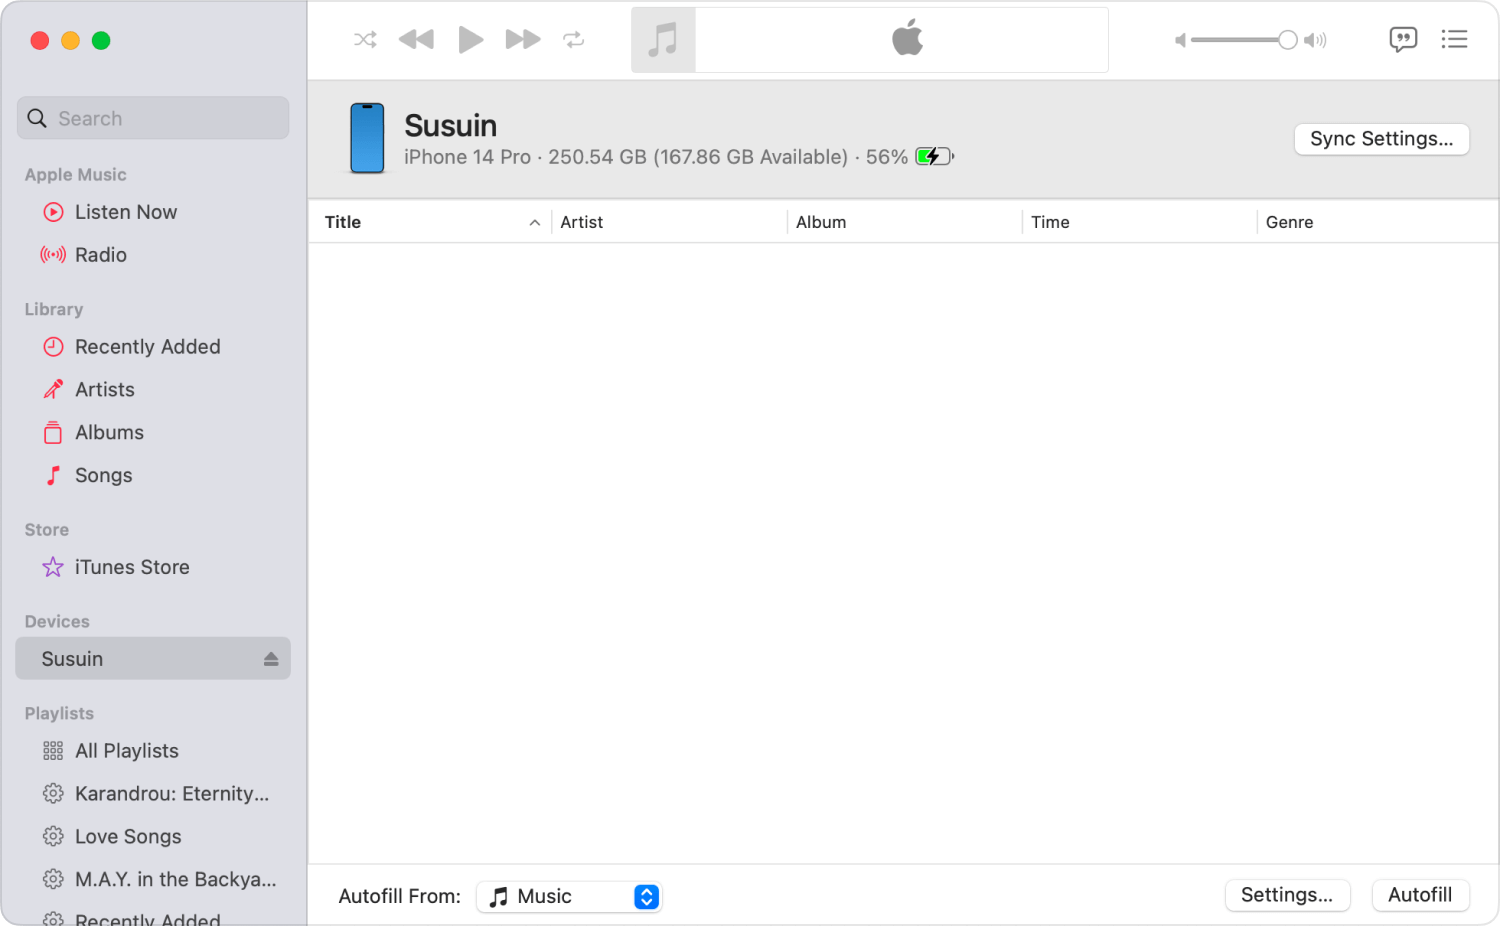
Our second entry is very suitable if you want to transfer TV shows from iPhone to iTunes but this time, not only TV shows but also other files belonging to the Movies category. In other words, it is broader than when we only transferred TV shows.
There are advantages to this as well, just like our first method. The main one is perhaps the fact that it will include movie files that you didn’t know existed in the first place, so it’ll help in exploring your device further. Either way, here are the steps that you will need to follow:
Note: When connected with a USB cable, iTunes usually launches automatically as a response to the connection.
This will ensure that all the movies on your iPhone will be synced into your iTunes. That way, you can access them from the Library. Of course, this includes all TV shows as well, since they are technically included in the Movies category.
First, we tried to transfer TV shows from iPhone to iTunes by only including TV shows. Next, we did it by only including Movies. This time, our target would be even broader since we will be transferring all purchases. In other words, not only Movies, but also audio files, photos, and other files that can be considered as files purchased on iTunes.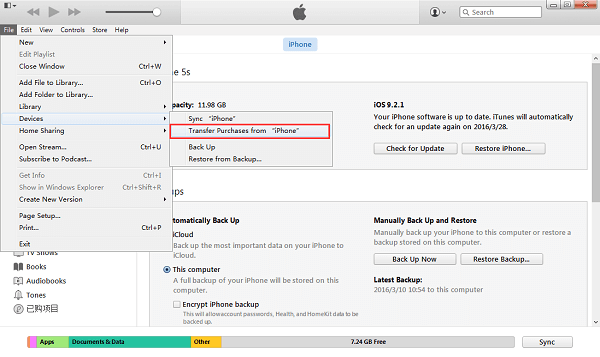
I can’t think of many advantages for this method, but one thing’s for sure, it won’t be leaving any files that can be considered as TV shows behind. That’s the important thing, after all, not to let any file be uncounted.
First, remember that your computer, regardless of whether it is Mac or Windows PC, is not authorized by default. When not authorized, it will not allow any purchases or any changes with your purchases. You can authorize your iTunes by heading to iTunes > Store > Authorize This Computer.
Once your computer is authorized, you will be able to do what you want with the purchases, even transfer them. Here are the steps that you will need to follow:
The main point of this method is to make sure that all purchases are accounted for. Sure, it is one way to transfer TV shows from iPhone to iTunes, but it may consume too much of your space if you have purchased a lot of files, videos and music included.
Additionally, if you didn’t exactly purchase the TV show that you want to transfer, then you won’t be able to access it with this method in the first place. As such, our last method will solve all those inconveniences.
If in our previous method, you had problems since it takes up too much space, then this method might be for you. First of all, it will make sure that you only get TV Shows, just like with our first method. Secondly, it ensures that even those that were not purchased will be included, unlike that of the third entry.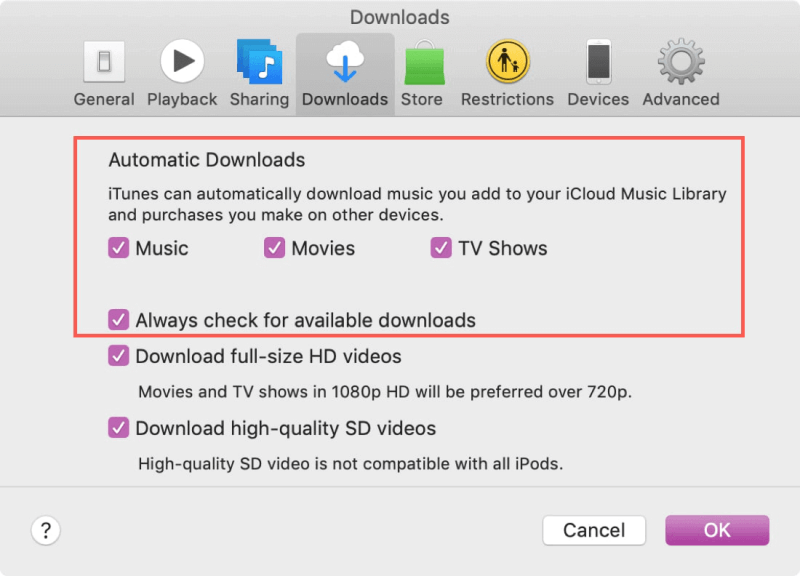
Simply put, our last entry is the best method to transfer TV shows from iPhone to iTunes since it solves all the problems we had up until now. It involves enabling the Download function of iTunes. Here’s how you can do it by yourself:
Once you’ve set it all up, every time you connect your iPhone to your computer with iTunes installed, it will always check for downloadable TV shows. Once it detects them, they will be automatically downloaded. That means you can transfer TV shows from iPhone to iTunes without even trying to, at least once you already set it up.
Previously, we’ve discussed four methods to transfer TV shows from iPhone to iTunes. Now, what if you don’t want to transfer the said file without relying on iTunes?
Fortunately, there is a method to do that, and it involves using third-party software. Since there are only a few reliable tools out there, I personally recommend FoneDog Phone Transfer.
FoneDog Phone Transfer is a software designed to help users transfer all kinds of files, be it photos, messages, and even videos where TV shows belong. Additionally, it supports most devices and even the latest version of iOS. As such, it is the perfect tool for the job.
Phone Transfer
Transfer files among iOS, Android and Windows PC.
Transfer and backup text messages, contacts, photos, video, music on computer easily.
Fully compatible with iOS 13 and Android 9.0.
Free Download

There isn’t much to say when it comes to iPhones. They are reliable devices to watch TV shows from, but it’s a given that it would be better to watch from a bigger screen. After all, that’s why we have computers with big monitors. However, it would be difficult to migrate the said TV shows into your desktop.
Hopefully, this article about how to transfer TV shows from iPhone to iTunes managed to help you in that area. But of course, these are only suggestions and you can always come up with your own method of managing files on iTunes.
Leave a Comment
Comment

Technical Expertise for PC/Website Optimization
One of my passion is to develop software of my own
I write articles to share knowledge about IT technology and some experience in developing my own software, and developing my own software is one of my passions for work.
Phone Transfer
Transfer data from iPhone, Android, iOS, and Computer to Anywhere without any loss with FoneDog Phone Transfer. Such as photo, messages, contacts, music, etc.
Free DownloadHot Articles
 /
/
INTERESTINGDULL
/
SIMPLEDIFFICULT
Thank you! Here' re your choices:
Excellent
Rating: 4.7 / 5 (based on 79 ratings)
