FoneDog Screen Recorder
FoneDog Screen Recorder
Special Offer
Special Offer


By Adela D. Louie, Last updated: May 20, 2022
Nowadays, besides adding music to your video, there are so many ways on how you can reverse clip After Effects you should know. And we know that what you want is only the best. That is why we have come up with this post of us to help you with how to reverse clip After Effects. And we are going to show you as well the things that you need to know about this tool.
Part #1: All You Need to Know About After Effects Part #2: How to Reverse Clip After Effects Part #3: Convert Your Reverse Clip After Effects Video with FoneDog Video Converter Part #4: Conclusion
And since you are curious to know about After Effects, here are the main things that you need to know about this tool before we tell you how to reverse clip After Effects.
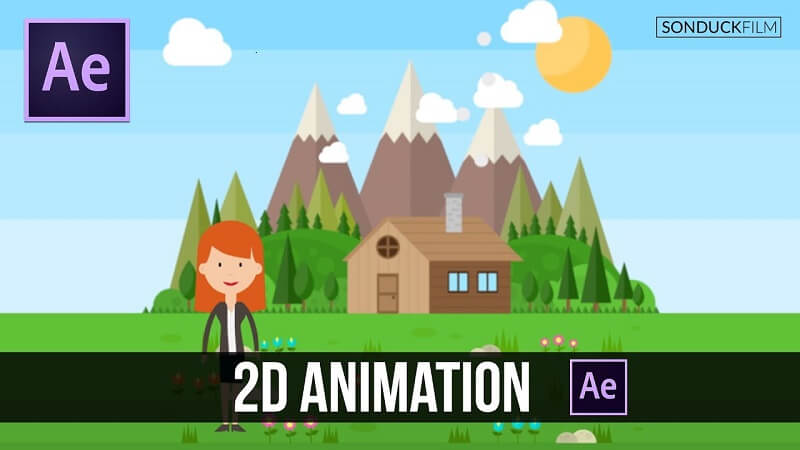
After Effects was developed by Adobe and is a 2.5D animation tool which is commonly used to make animations, motion pictures, and visual effects. This is also commonly used in TV shows, films, and video contents posted on the web.
This software is known to be used in some post-production phase, and some other effects that can be used to have some editing power with your imagery. This way, you will be able to add some more videos and photos and make it as one.
![]()
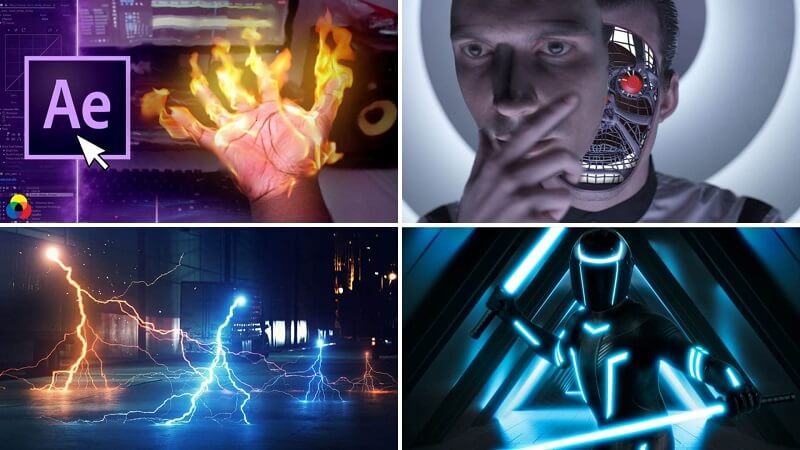
Adobe After Effects is known as a very versatile tool and can actually work on making programs. And you can recognize the work of this tool on some videos created such as the Action Movie Kid, Enders Game, Formula 1, Nike, CNN Color Series, Cowboys, and Freddie. And if you are going to notice the videos we have mentioned, it really comes with great output.
Now that you know the basic information that you need to know about After Effects, now we are going to show you the things that you can do with this tool. As most people know, Adobe After Effects is a deep software which is why there are instances that not all can get all of the features that it has. But if using After Effects is all new to you, then here are the great things that you can do with this tool.
With this feature, you will be able to make a basic image come to life. The After Effects tool gives you the benefit of using its digital features to help you with manipulating and editing your videos. And with After Effects, there are so many ways on how you can make your very own animations. And with that, here are also some other different types of animation masterpieces that you can make with the After Effects tool.
The visual effects that the Adobe After Effects have been home within the tool. And with the years passed, its users were able to manipulate their videos and as well as films for them to add on several post-production.
There are also many ways on how you can use the After Effects using some other programs. And one of which is that you can import 3D scene data.
Now that you were able to know some important information about Adobe After Effects, it is now time to show you on how you can reverse clip After Effects. And to know more about the steps, please refer to the procedure below.
Step 1. Go ahead and open the After Effects on your computer to launch and start using it. And also, you have to launch the video or the project that you want to reverse clip with. And at this point, go ahead and save the section to serve as a separate file for a consideration of your security.
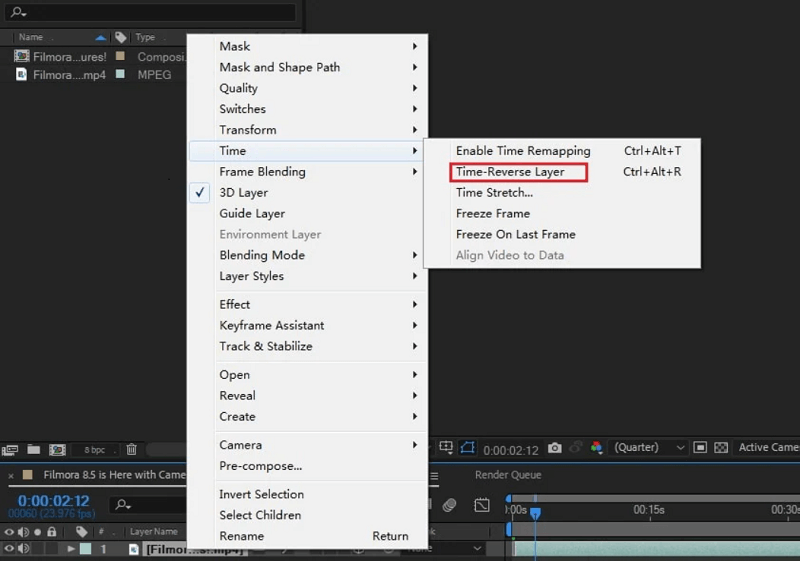
Step 2. And then, simply drag on the video and drop it over the New Composition icon that you see on your screen. Then make a right-click on the layer that you want to include add apply the reverse feature. And you will then see a drop-down menu on your screen.
Step 3. From there, simply click on Time and choose Time Reverse Layer for you to be able to launch another window on your screen. And from here, you will have the option to adjust the speed of your video.
Step 4. Once you are done, you can now simply click on the Apply Effect button and for it to finish the process. And once done, you now can play the reverse clip that you made on your timeline. This way, you can assure that you got the reverse effect that you are aiming for in your video. And when you are satisfied with what you have reviewed, you can now simply save it on your file.
Step 5. If you are also planning to save your clip on a different file, then you have the option to have your file exported. You can also have the option to replace your original file with the new one that you just finished which comes with the reverse effect.
NOTE: You have to keep in mind to try the effects that you are choosing on a copy of the original video first. It is because there is a tendency that the effects you use are a bit destructive and can ruin your video as it is a bit difficult to undo it.
If in case that you want to convert your created video because you want to transfer videos from computer to iPad. But however, there are some instances wherein the video may not be compatible with the device which can result in the reason why you will be needing to convert your video from one format to another.
And since there is a possibility that you may need to convert your video, lucky for you we have the perfect solution that you can do in order to finish this task. And that is by using the FoneDog Video Converter.
The FoneDog Video Converter is known to be one of the best video converters that you can use to change the format of your file from one format to another. This tool was known because of its speed when it comes to converting videos and that it can still remain the same quality of the video before you convert it.
This tool does not only let you convert videos, but you can also use this to edit for you to enhance it more. You can use this to add some subtitles if needed, remove background noise, and brightens up your video after the conversion process. Also, this tool does not only work on video files but it can also be used to convert any audio files that you have.
The FoneDog Video Converter also comes with a very easy-to-understand interface that even beginners can use without prior experience with the tool or other tools. And to show you how easily you can use this tool, below is a process that you can follow to convert your reverse clip After Effects video.
Of course, you have to download and install the FoneDog Video Converter tool on your computer. This tool can work on either Mac or Windows laptops and computers, so you do not have to worry about compatibility issues. And when the installation is complete, go ahead and launch it on your computer.
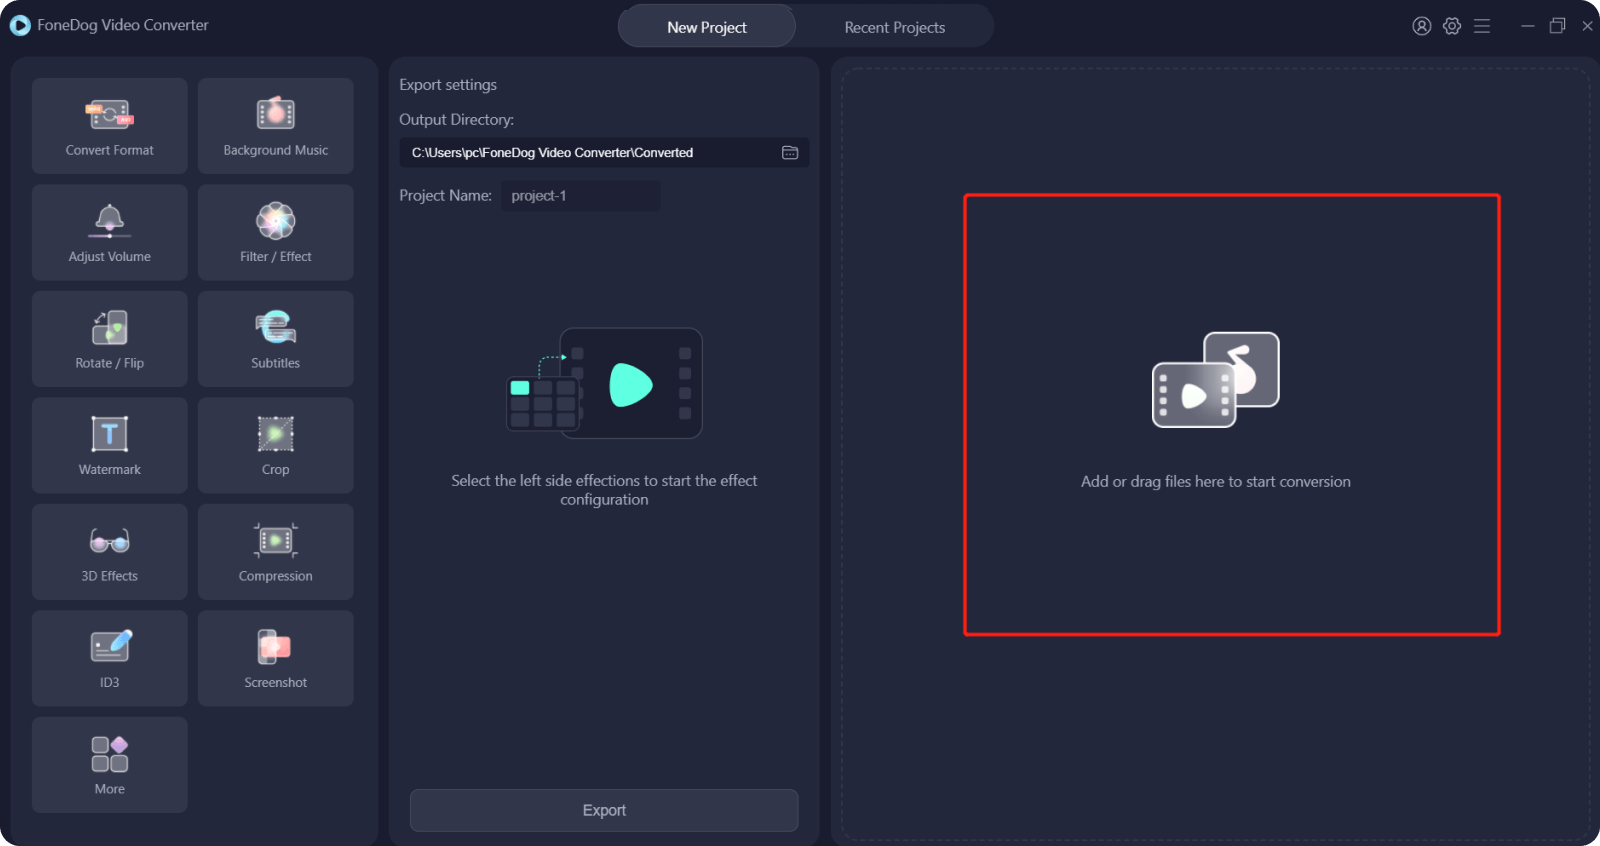
And then, on the main interface of the FoneDog Video Converter, go ahead and click on the section, “Add or Drag files here to start conversion”. Or you can also simply drag your video file over to the main interface of the program as well.
After adding up your video, go ahead and select the format that you need your video to convert to. Just click on the Convert Format button and choose the format you are looking for. Also, you can choose in this section where you want to save your converted video after the conversion process. Then click on the Save button for you to be able to confirm the changes that you want to make.
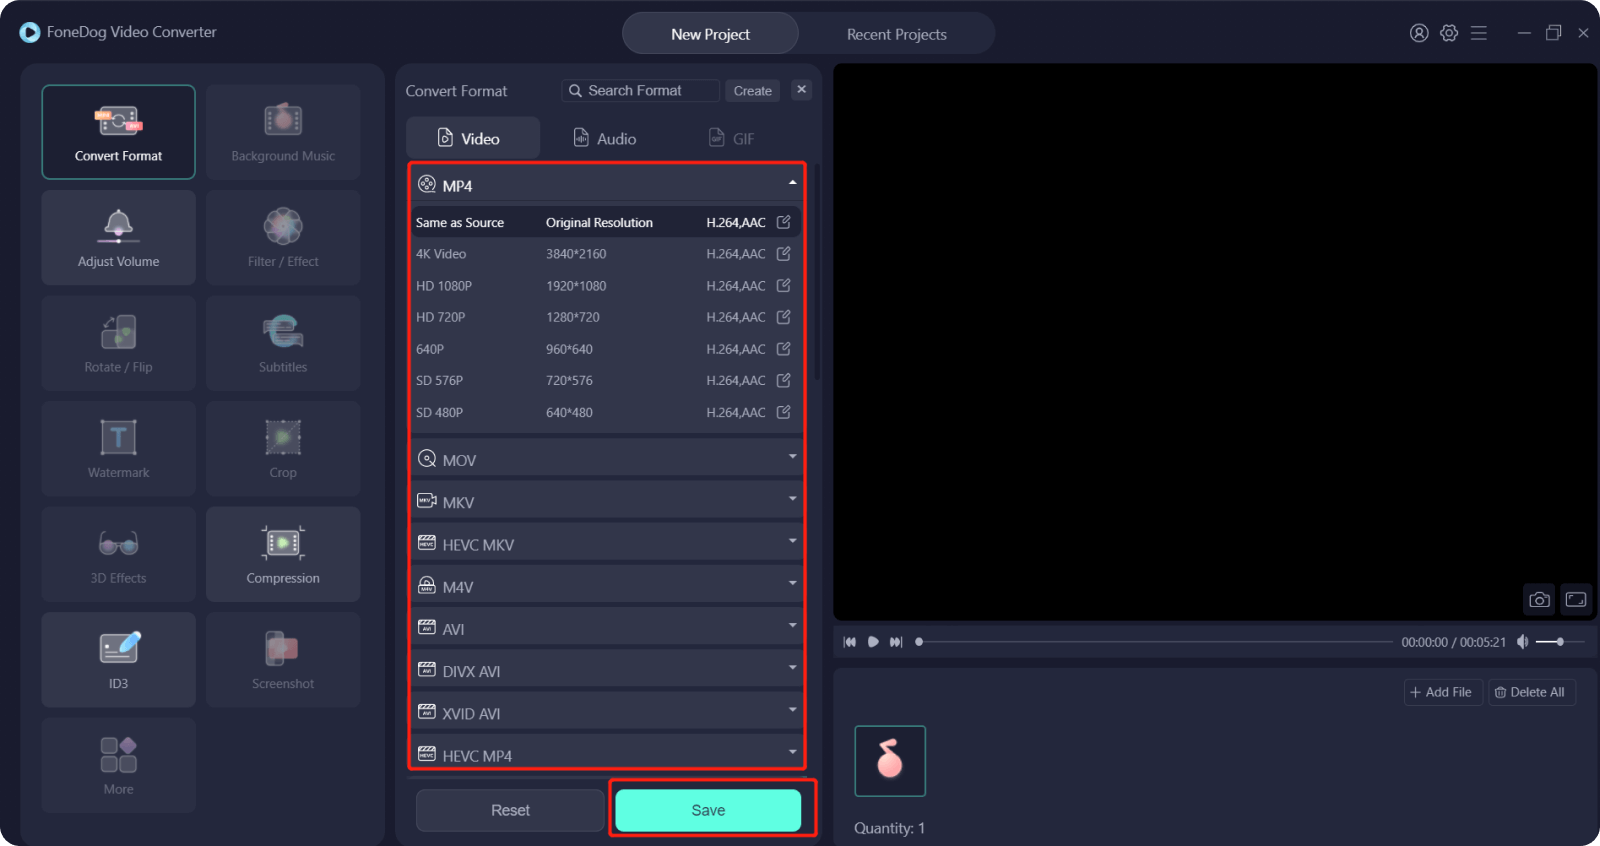
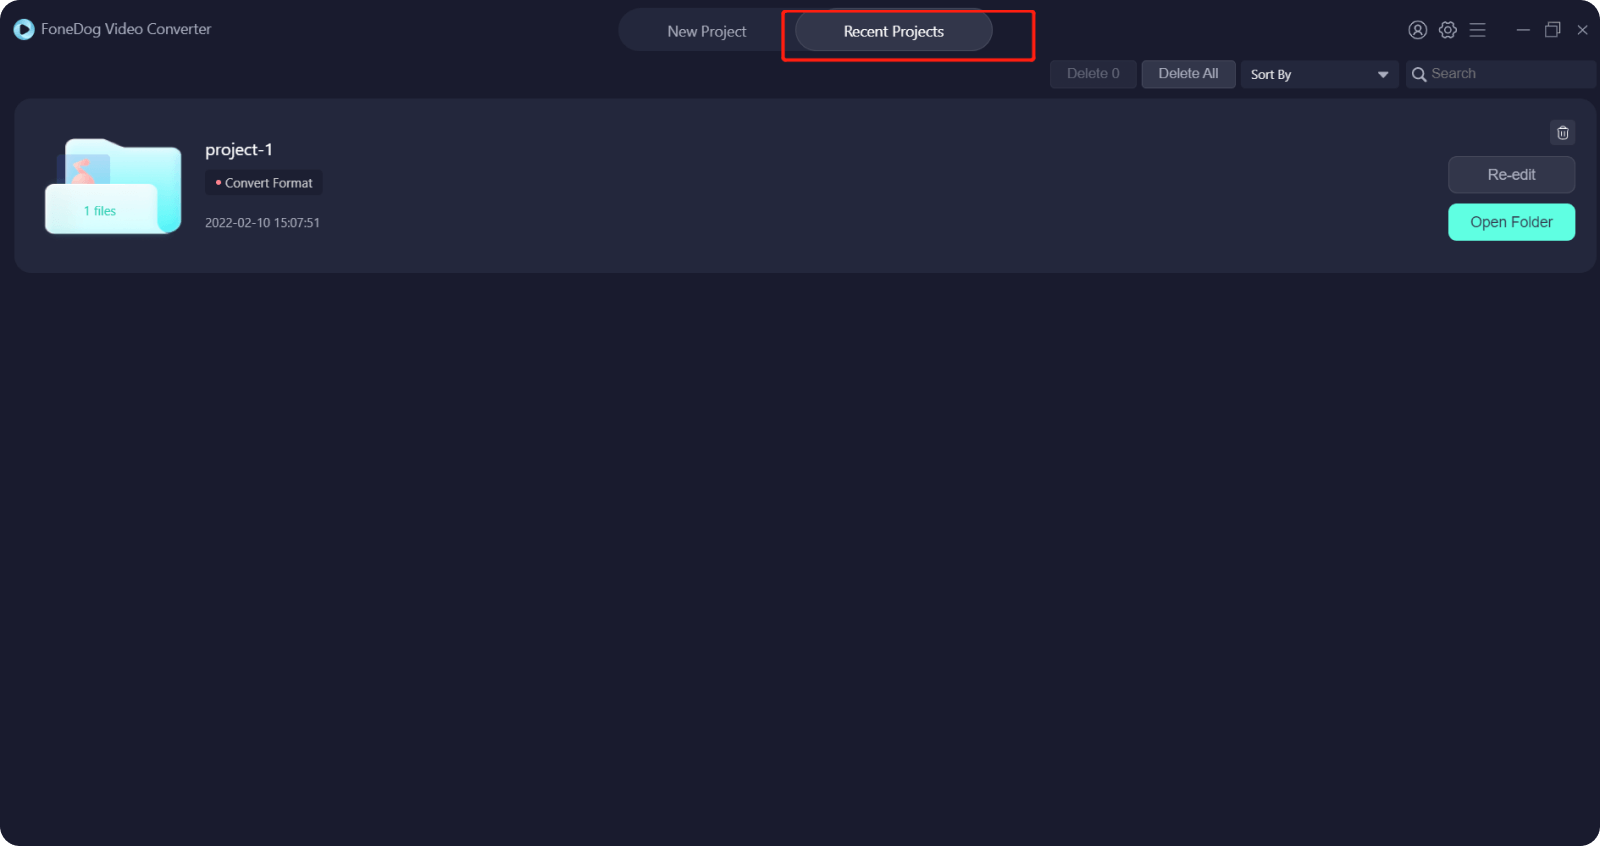
After choosing the format, you can now go ahead and click on the Convert button to start the conversion process. And once done, you can check on your video from the Recent Projects folder. In this folder, you can review your converted video to check if your video still needs some editing or not.
People Also ReadHow to Resize Videos: Quickest and Easiest WayGuide On How To Add Music To Video App (2021 Update)
As you can see, the reverse clip After Effects comes with great output. This is why your video can come out as professional as it looks. And in case you need to convert your reversed video, the FoneDog Video Converter is the perfect tool for the job.
Leave a Comment
Comment

Tech Website Writing /Content Optimization
Singing, smiling, surprising every day!
So as a technical writer, it is my duty to gather effective and reliable solutions to answer questions on how to deal with the issues they are having with their devices.
Hot Articles
 /
/
INTERESTINGDULL
/
SIMPLEDIFFICULT
Thank you! Here' re your choices:
Excellent
Rating: 4.6 / 5 (based on 87 ratings)
