FoneDog Screen Recorder
FoneDog Screen Recorder
Special Offer
Special Offer


By Adela D. Louie, Last updated: March 11, 2019
Have you ever encountered an error message on your Android device that says “Google Drive Access Denied”?. If so, then we bet that it is frustrating right?
Well, you do not have to worry anymore because, in this article, we are going to show you how you can fix this error that you are getting on your Android device.
Also, we are going to give you the best alternative tool to backup data from an Android device and as well as on how you can restore them using just one software.
Having focused on coding programs for Android devices, we've created a tool to be the best alternative to Google Drive.
Check this tip: Download FoneDog Android Data Backup & Restore to backup your data and even restore those data to any Android device. If you still want to give Google Drive a chance, we have gathered some great ideas and common solutions to this situation below.
Android Data Backup and Restore
Selectively backup Android data to computer with one click.
Encrypt your backup files.
Compatible with 6000+ Android devices.
Free Download
Free Download
Part 1: What is Google DrivePart 2: Why Do I Get Error Google Drive Access Denied And How Do I Fix ItPart 3: The Best Alternative Way for Google DrivePart 4: Conclusion
Google Drive is one of the best cloud storage services that every Android user have for them to store all of their important data such as their photos, videos, and more.
The main purpose of having Google Drive is for you to expand the way you store your important files to a cloud storage rather than using all of your Android device’s storage. Once that you have this, Google will be giving you a 15GB free cloud storage when you sign up.
The Google Drive will allow you to store all of your photos, videos, pdf files, and more from your Android device or even from your PC. You will be able to also save some of the email attachments that were sent to you using your Gmail and then it goes directly to your Google Drive.
One of the things about Google Drive is that it will allow you to preview the files that you have when you use your browser without having the need to download them. This way, you will be able to see all the files that you have and just only select those that you want to download.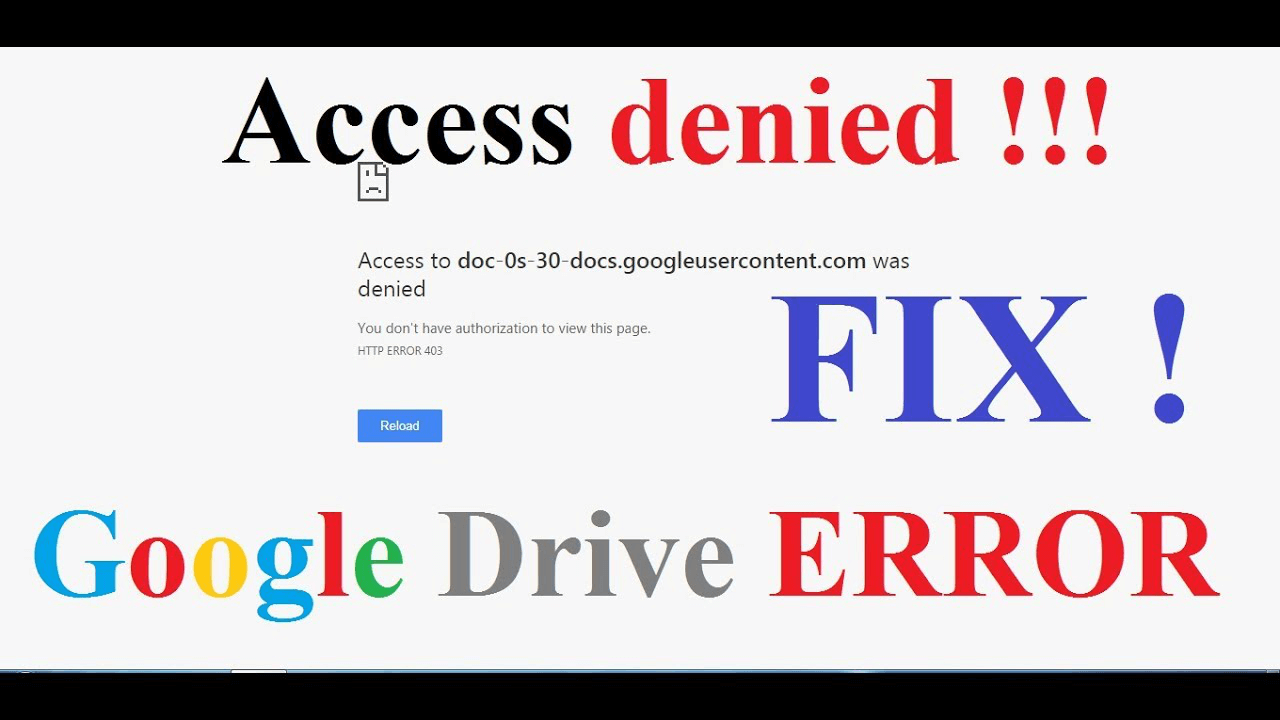
There are actually a lot of reasons as to why you are getting an error message whenever you are trying to access your Google Drive. That is why we have here some tips that can help you to gain access to your Google Drive as soon as possible.
Here are 5 main solutions to fix "Google Drive Access Denied" error on your device:
Once that the Google Drive is down, then that is one reason as to why you will not be able to access any of the files that you have. Therefore, if you wanted to fix the “ Google Drive Access Denied” error, the first thing you should do is to check the status of Google Drive, you can go ahead and check in the G Suite Status Dashboard.
There are instances that the error message “Google Drive Access Denied” can be solved when you make use of different web browser.
What you need to do is for you to try logging in your Google Drive account on a different browser. You can also try to log in or access your account using a different Android device such as using a tablet.
People Also ReadHow to Fix Google Drive Network Error ProblemHow to fix Google Drive Does Not Sync Issue?
Getting your cookies and cache cleaned up on your browser is one of the most helpful things that you should do on a regular basis. This way, you will be able to prevent formatting and other loading problems on your PC. This is also one way for you to be able to access your Google Drive. Here is how to do this on your browser.
Step 1: Go ahead and click on the symbol located at the upper right of your screen.
Step 2: After that, click on “More Tools”.
Step 3: Then choose “Clear Browsing Data” and then choose on “All Time”.
Step 4: Choose “cached images and files” and then choose “Cookies and other site data.
Step 5: After that, click on “Clear Data”.
Once that you have encountered the error message “Google Drive Access Denied” when you are signing in using multiple accounts, then what you need to do first is for you to make sure that you are signed in to your Google account.
After that, try to consider on signing out other Google accounts that have the files that you want to have.
The incognito or InPrivate mode will allow you to be able to browse without having your activity being remembered. This is also one way for you to be able to fix the problem that you have with “Google Drive Access Denied”. Here is how you can do it.
Step 1: Go ahead and click on the “Customize and control Google Chrome” which is located at the upper right section of your screen.
Step 2: Choose “ New Incognito Window” using your Google Chrome browser.
Step 3: And then, click on the “…” icon located at the upper left section of your screen and then choose “New InPrivate Window” if you are using Internet Explorer.
Step 4: Log in to your Google Drive.
Aside from using your Google Drive for you to save your important files or data that you have, there is also another great alternative that you can use.
This is a third-party program that you can use for you to backup all of your data and as well as restore them on any Android device. This is no other than the FoneDog Toolkit – Android Data Backup and Restore.
The FoneDog Toolkit – Android Data Backup and Restore will be able to help you in backing up the important data that you have on your Android device to your PC with One Click.
Aside from that, it has also the ability to backup all of your Apps and as well as your App Data. It can also allow you to preview and restore your backup file to any Android device that you have and even to the device where you got the backup.
Also, the FoneDog Toolkit – Android Data Backup and Restore is compatible with over 8,000 Android device so you do not have to worry about any compatibility issues.
The FoneDog Toolkit – Android Data Backup and Restore can also allow you to easily view the content of your Android backup and then have them restored selectively.
It is also a 100% safe to use. So if you want to know on how you can backup and restore your data from your Android device to your PC in the easiest and fastest way using the FoneDog Toolkit – Android Data Backup and Restore, here is what you need to do.
*Backup Data From Android Device to PC Using FoneDog Toolkit – Android Data Backup and Restore*
Step 1: Download and Install
Go to our official website and have the software download and installed on your PC. If this is the very first time that you are going to download and install the program, then you have the option to try out the program for 30 days absolutely for free.
Step 2: Launch FoneDog Toolkit
Once that you have successfully installed the software to your PC, go ahead and launch it. Here, you have to make sure that there is no other backup application running in the background aside from the FoneDog Toolkit.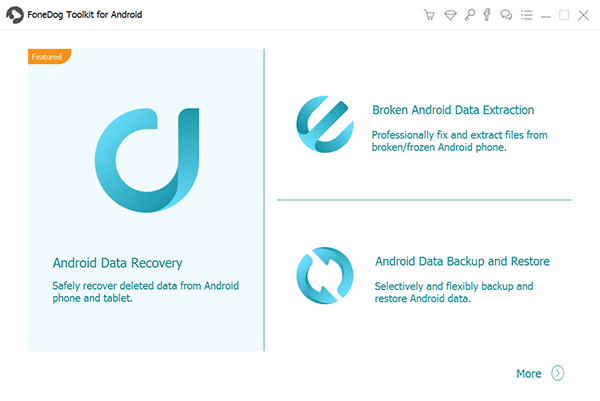
Step 3: Connect Your Android Device and Choose an Option
Once that you have launched the FoneDog Toolkit on your PC, go ahead and connect your Android device to your PC using your USB cable. Make sure that you have enabled USB debugging on your Android device for the program to be able to recognize completely your device.
If you are using an Android device that is running on an OS version of 4.0 then a pop-up window will appear on your screen asking you to allow USB debugging.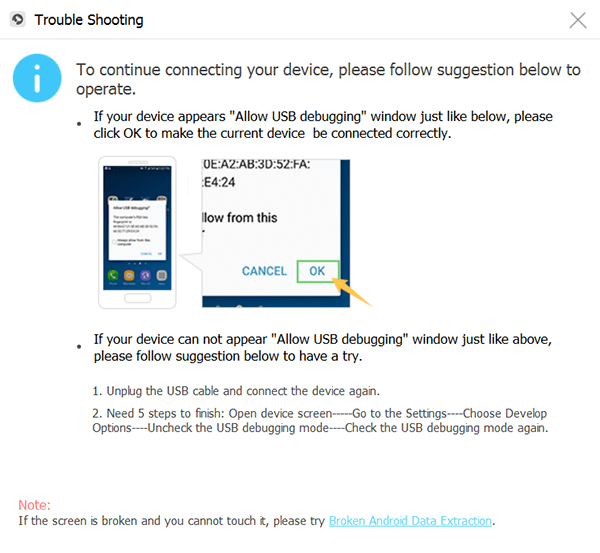
Now, on the main interface of the program, go ahead and choose the option that you want to do. In this case, go ahead and choose “Android Data Backup and Restore”.
Step 4: Select Your Backup Option
Once that the FoneDog Toolkit was able to detect your Android device, go ahead and choose on “Device Data Backup” option. The FoneDog Toolkit – Android Data Backup and Restore will then choose all the files types by default but you can still have them selectively choose those files that you only want to backup.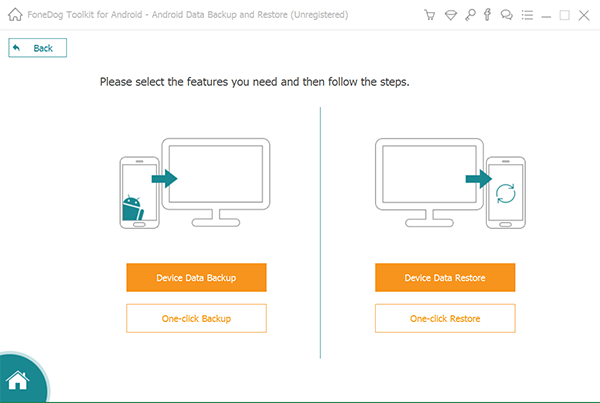
Step 5: Choose the File Type You Wish to Backup
On this step, you will now be able to choose the file types that you want to back up. You can choose the files by clicking on the checkbox beside each file. Once that you are done choosing the files that you want to backup, go ahead and click on the “Start” button.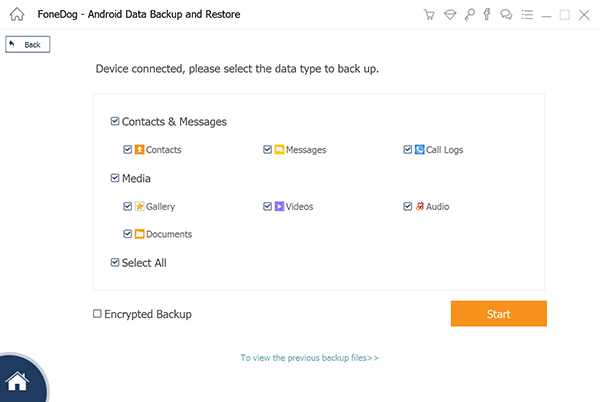
Then, the FoneDog Toolkit – Android Data Backup and Restore will then start scanning all the items that each folder have. This process may take some time so just be patient and wait. Also, make sure that you do not disconnect or use your Android device during this process.
Step 6: Backup Complete
Once that the FoneDog Toolkit – Android Data Backup and Restore is done with the process, then go ahead and click on the “OK” button. From here, you will be able to view the content of each file that you have backed up and had them restored in a later time.
*Restore Backup File From PC to Android Device Using FoneDog Toolkit – Android Data Backup and Restore*
Step 1: Launch and Connect
Go ahead and launch the FoneDog Toolkit on your PC and then have your Android device connected using your USB debugging.
Step 2: Choose Option and Choose Backup File
Once that the FoneDog Toolkit successfully recognized your Android device, go ahead and choose the “Device Data Restore” option. After that, the FoneDog Toolkit – Android Data Backup and Restore will show you all the backup files that you have.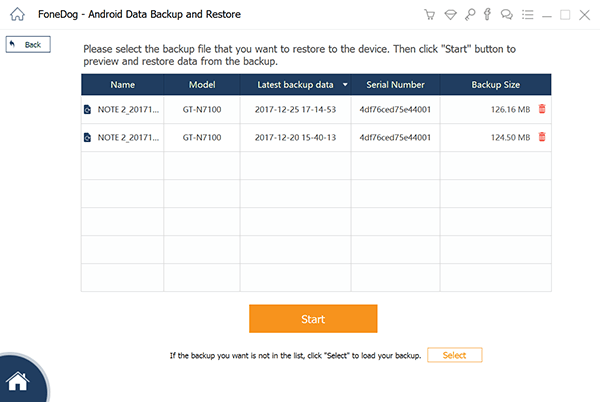
From that list, go ahead and choose the most recent backup file made. You can base it from the time and data included beside each file. Once that you have chosen the backup file, go ahead and click on the “Start” button.
Step 3: Select Data Type to Restore
Once that you have clicked on the Start button, the FoneDog Toolkit – Android Data Backup and Restore will then start scanning your backup file. Once done with the scanning process, all the file types that the backup file contains will appear on your screen.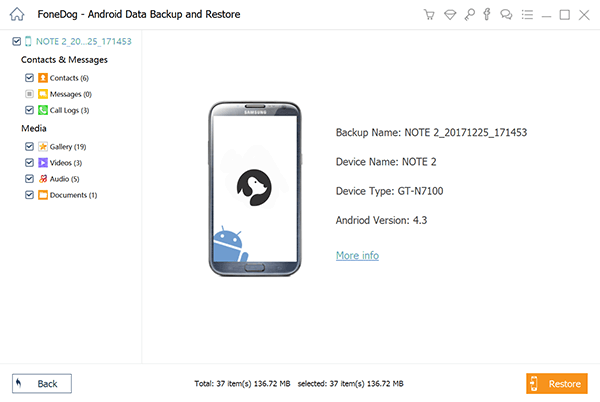
From that list, go ahead and choose the data type on the left side of your screen and then click on the “Restore” button. The restoration process will then start. Here, you have to make sure not to disconnect your device or not to use it. This process may take a few minutes.
Step 4: Backup Restored
Once that the restoration process is complete, the FoneDog Toolkit – Android Data Backup and Restore will then notify you. And you are done!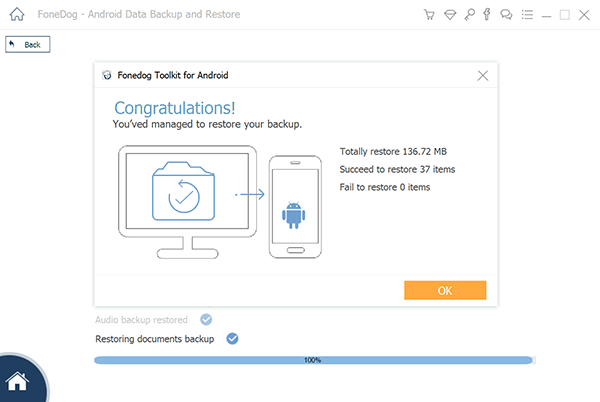
Clearly, having Google Drive is one of the most useful things that we can have. This is because it serves as our cloud storage wherein you can store all of your important file and data from your Android device or even from your PC.
However, just like any other cloud storage, there is some point that it will not work and you need to get the way on how you can fix it.
Luckily, we have the FoneDog Toolkit – Android Data Backup and Restore that you can use as the best alternative to your Google Drive. This program will allow you to backup all of the important data that you have on your Android device as well as your important files.
Using the FoneDog Toolkit – Android Data Backup and Restore will also be able to restore any backup file that you have on any Android devices that you have as it can support more than 8,000 Android devices. Having this program will definitely make everything easier.
Leave a Comment
Comment

Tech Website Writing /Content Optimization
Singing, smiling, surprising every day!
So as a technical writer, it is my duty to gather effective and reliable solutions to answer questions on how to deal with the issues they are having with their devices.
Android Data Backup & Restore
Back up your Android data and selectively restore to Android
Free Download Free DownloadHot Articles
 /
/
INTERESTINGDULL
/
SIMPLEDIFFICULT
Thank you! Here' re your choices:
Excellent
Rating: 4.5 / 5 (based on 91 ratings)
