FoneDog Screen Recorder
FoneDog Screen Recorder
Special Offer
Special Offer


By Adela D. Louie, Last updated: June 28, 2021
Are you using your USB drive to store your important files? Did you ever encounter having trouble with an error that says the last USB device malfunctioned Windows 10 computer? If so, then we are going to show you an easy-to-do solution for you to fix this type of error.
The error message that says the last USB device malfunctioned Windows 10 commonly occurs when a certain USB device was connected to your computer. The USB that it was referring to by your Windows 10 computer is on a general concept and it does not limit to only a USB device. It can also be some other devices that are plugged into your USB port like your mouse, your keyboard, and other external devices that you have.
In addition to the USB device failure mentioned in the article, win10 will also have incorrect parameters error, click the link to solve this problem.
Part 1. How To Fix The Last USB Device Malfunctioned Windows 10 ErrorPart 2. More Troubleshooting: The Last USB Device Malfunctioned Windows 10
Having spent many years writing programs for computers, we have made a good tool for you.
A tip for you: Download FoneDog Data Recovery to recover your files. If you want to find the solution by yourself, you can keep reading.
Now, once that your Windows 10 device cannot recognize your USB device, then you can go ahead and try the different solutions that we have for you below. What we highly recommend is for you to follow the sequence of the solutions that we are going to show you below.
To fix the last USB device malfunctioned Windows 10 error, this may be the easiest thing that you could think of but it actually works. For most of the USB devices that are not recognized, it has been said that there is nothing wrong with it. And then, have your Windows 10 computer restart. However, when it comes to restarting your computer in this kind of situation, you should do this by unplugging your PC directly from its power source. So you have to unplug your PC from its outlet.
Doing this will help your PC to reboot its motherboard as well which is where all of the hardware that you have is connected to which includes your USB device. And being able to reboot the motherboard of your PC will also help to fix the low power supply for your external devices. So here is what you need to do.
Step 1: Unplug PC
Directly unplug your computer from the power outlet for you to turn it off.
Step 2: Wait for a minute
And then, wait for about a minute or two so that your PC has enough time to cool down as well.
Step 3: Plug in your PC
After that, go ahead and plug in your computer and then turn it on.
Step 4: Check for Error
And once that your computer is back and running, go ahead and see if the error still happens.
Another way that you can do for you to fix the last USB device malfunctioned Windows 10 error is to make use of a different USB cable or another USB port on your PC. This is for you to check on which of your devices has the real issue. If the problem was fixed when you change the port, then the problem occurs on the previous port that you are using. So you should have it fixed. You can also someone that has more experience when it comes to fixing USB ports check out yours so they could help you in fixing it.
There are also some people who do not have enough USB ports on their computer that is why they result in using a USB root hub. If your device is plugged into a USB hub, then you have to make sure that it is connected to your computer directly.
The Device Manager is one way for you to fix the last USB device malfunctioned Windows 10 error. So with that, here is what you will be needing to do.
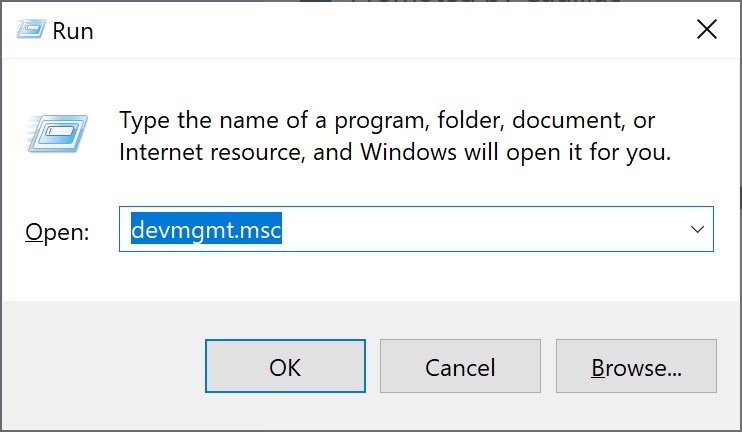
The first thing you need is for you to launch your Device Manager. So what you need to do is to head to your search box and then type in their device manager and double-click on it for you to launch it. In some other devices, another way you can do this is to press the Windows + R keys for you to open up your Run box. And from there, just type in devmgmt.msc and then hit the Enter button.
And then, expand on the Universal Serial Bus Controllers. From there, you will see an option that says Generic USB Hub and then right-click on it and click on Properties. And after that, go ahead and click on the Driver tab and then click on Update Driver and you will see two options.
And lastly, on the same path of updating your driver, you can go ahead and roll back on the previous driver before you had experienced the error. All you have to do is to choose the option Roll Back Driver rather than choose the Update Driver option.
Step 1: Launch your Device Manager option and click on Universal Serial Bus Controller option.
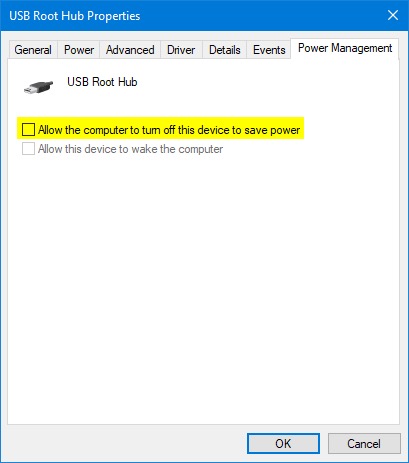
Step 2: Right-click USB Root hub option from the categories seen on your screen and then choose Properties.
Step 3: Choose Power Management and then unmark the option “Allow the computer to turn off this device to save power”. And then click on the OK button for you to save the changes made.
Step 1: Right-click on your Windows icon and then click on the Power Options.
Step 2: Click on the Change plan setting option.
Step 3: Then from the Edit Plan Settings, choose on Change advanced power settings.
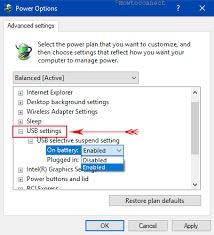
Step 4: And on the Power Options screen, go to USB Settings. Then expand on the USB and then Disable both On battery and as well as Plugged in Settings.
Step 5: Click on the Apply button and then click on the OK button for you to save your settings.
To fix the last USB device malfunctioned Windows 10 error, you should uninstalling your driver could cause you to disable your USB port totally. So in this method, you have to be extra careful.
Step 1: Launch your Device Manager.
Step 2: Then look for and then expand on the Universal Serial Bus controllers option.
Step 3: Right-click on your USB driver and then click Uninstall.
Step 4: Do the same step on the other USB driver that you have one by one.
Step 5: Restart your computer. Then your USB driver will then automatically re-install and it will be able to solve any corrupted USB devices as well.
All the solutions that we have shown you above are all possible ways on how you can fix the error the last USB device malfunctioned Windows 10. One of them will surely help you with solving this error.
However, what if you were able to solve the problem but you found out that you have lost the data that you have on your USB drive? Well if this is the case, then all you need to have is the FoneDog Data Recovery.
The FoneDog Data Recovery has the power to help you when it comes to recovering your lost data from your USB drive. It can help you recover your lost photos, videos, documents, emails, audios, and other data. All you need to make sure is that your USB driver is connected to your computer properly and stable.
The FoneDog Data Recovery also can recover lost data from a Mac or Windows computer. And it comes with a very easy-to-use interface and that will keep your other data safe during the restoration process of your lost data. Now, to start recovering those data, here is what you need to do.
Step 1: Download, Install, Run FoneDog Data Recovery
Go ahead and have the Data Recovery by FoneDog be downloaded from the official website. Then install it on your computer. After finishing the installation process, simply click on the program for you to launch it on your Windows computer. Then connect your USB drive to your computer. Make sure that the connection is stable.
Data Recovery
Recover deleted image, document, audio and more files.
Get deleted data back from computer (including Recycle Bin) and hard drives.
Recover loss data caused by disk accident, operation system crushes and other reasons.
Free Download
Free Download

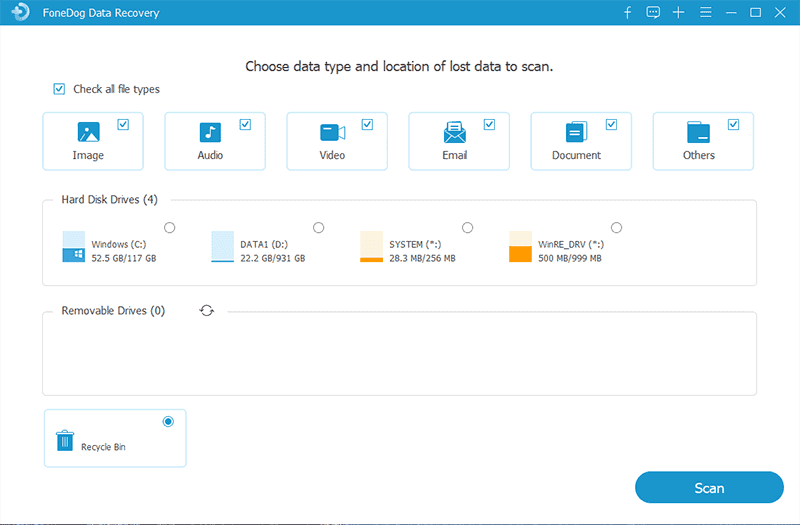
Step 2: Select on Type of File and USB Drive
Then, on the main page of the program, you can different types of files that it can support to recover. From there, go ahead and choose the file type you want. And then, go ahead and choose on your USB drive as well where you want to recover the file type you have chosen.
Step 3: Scan Your USB Drive
And once that you are done choosing all the necessary things you need, go ahead and scan your device. Do this by clicking on the Scan button below. Then you have to choose from the two options on how you want to scan your device. You can choose a Quick Scan or a Deep Scan. Though if you choose Deep Scanning, then you have to patiently wait until the process is complete because it may take a longer time to finish.
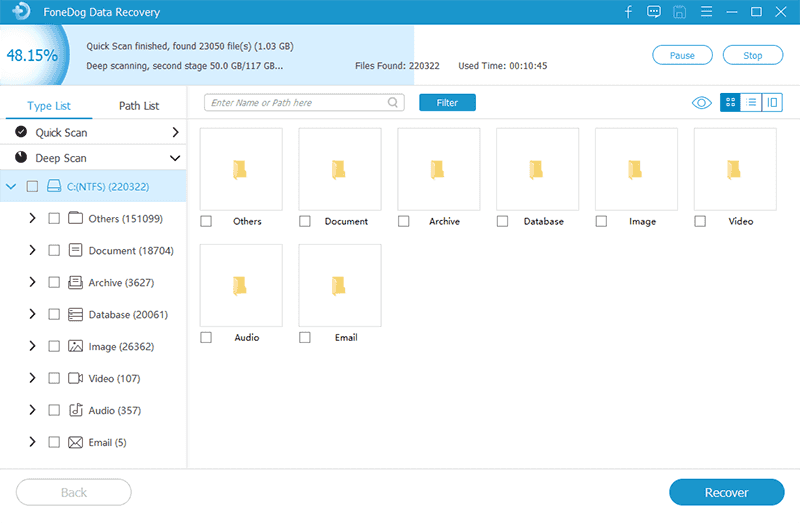
Step 4: View Your Files
After the scanning procedure, you can now go ahead and view your files. You can click on them one by one to view them and choose those that you need. You can also use the search bar for to look for a specific file.

Step 5: Recover Your Files
Once done choosing all of the files that you need, then you can now go ahead and recover them. Do this by clicking on the Recover button just below your screen and the process will start. All you have to do from here is to wait for it to finish.
And that is how easy to use the FoneDog Data Recovery software is. It can recover your files instantly without overwriting other data that you have on your computer. Easy, safe, and has a high success rate when it comes to recovering your files from your Mac, Windows, USB drive, memory cards, external hard drive, and more.
People Also Read3 Different Ways to Use Undo DeleteDifferent Ways to Fix Seagate Hard Drive Not Showing Up
Now, when you experience the error of the last USB device malfunctioned Windows 10, all you have to do now is to follow the solutions that we have indicated above. And it will surely help you fix this type of error. And when needed to recover data that is lost after fixing the problem, then you can count on using the FoneDog Data Recovery software.
It is a great way for you to recover any files or data from your USB drive and as well as from your Mac or Windows computer. An easy to use and reliable software that you can count on when recovering your files and other important data.
Leave a Comment
Comment

Tech Website Writing /Content Optimization
Singing, smiling, surprising every day!
So as a technical writer, it is my duty to gather effective and reliable solutions to answer questions on how to deal with the issues they are having with their devices.
Data Recovery
FoneDog Data Recovery recovers the deleted photos, videos, audios, emails, and more from your Windows, Mac, hard drive, memory card, flash drive, etc.
Free Download Free DownloadHot Articles
 /
/
INTERESTINGDULL
/
SIMPLEDIFFICULT
Thank you! Here' re your choices:
Excellent
Rating: 4.8 / 5 (based on 109 ratings)
