FoneDog Screen Recorder
FoneDog Screen Recorder
Special Offer
Special Offer


By Nathan E. Malpass, Last updated: December 27, 2017
“I was trying to update my iPhone’s iOS when suddenly my phone froze. When I managed to restart it, I realized that my photos are all gone. Lots of them are family photos taken on Christmas for the past years. Unfortunately, I wasn’t able to keep a copy of them anywhere else. Can I still get back old Christmas Photos from iPhone?”
Your old Christmas photos are a testament to the holidays’ joyous spirit. But losing them would translate to frustration and a whole lot of stress. It doesn’t matter if your iPhone crashed or you mistakenly pressed the Delete button. You might feel a bit blue on Christmas day if you remember that you’ve just lost your old holiday photos.
If you’re determined to get back old Christmas photos from your iPhone, this post is perfect for you. Our simple tips would surely help you out and put the smile back on your face.

How to Get back Christmas Photos from iPhone
Part 1. Easy Ways You Can Try to Get Back Your Old Christmas Photos from iPhonePart 2. Use Fonedog iOS Data Recovery to Get Back Old Christmas Photos from iPhonePart 3. Return Old Christmas Photos from iPhone Via iTunes BackupPart 4. Restore Old Christmas Photos from iPhone Via iCloud BackupVideo Guide: Get Back Old Christmas Photos from iPhonePart 5. Conclusion
Solution #1: Restart your device.
Try turning your iPhone off and then on again. If you’re lucky, you can see your images back in your Photos app.
Solution #2: Check the Recently Deleted album.
Newly deleted photos are automatically transferred to the Recently Deleted folder. They are stored there for 30 days before they are permanently deleted. Simply go to Photos > Albums to access the folder.
Solution #3: Check for hidden photos.
One possible reason why you can’t see your photos is that you hid them. To view those hidden images, open your Photos app > Albums > Hidden Album > Choose which photos you want to unhide > Unhide
Solution #4: Restore your iCloud Photo Library backup.
If you have enabled syncing with iCloud Photo Library, that means your photos are uploaded there. To check, head to Settings > [Your name] > iCloud > Photos. If the toggle is set to on, that means you may have a chance to recover your photos. However, any changes you have made to those files, including deletion, reflect on the cloud once your iPhone is connected to the internet. With that said, disable syncing by sliding the toggle.
You may now connect your iPhone to the internet. Return to Settings > [Your name] > iCloud > Photos > Download and Keep Originals. This will start the download of your photos from iCloud.
You also have the option to get back your old Christmas photos from your iPhone using your computer. Simply access icloud.com on your browser and log in to your account. Select Photos from the available options.
Solution #5: Use your iTunes backup.
Another program that iPhone users can take advantage of to back up their photos is iTunes. If you enable automatic syncing of your device to iTunes, chances are you’ll be able to restore your photos using your backup.
On your computer, simply launch iTunes and turn off automatic syncing. This is important to ensure that your old backup file remains intact. After this, you may connect your iPhone to the computer. Your device’s name will appear in the top right-hand corner of the window. Click on it and select Restore Backup.
The downside to this method is that the backup will completely replace your existing files. Before you proceed with the process, make sure that you have recently synced your iPhone.

Recover Old Christmas Photos from iCloud
Have you ever used a data recovery software? If not, it is high time you do. One like FoneDog iOS Data Recovery can restore deleted photos, even those that were lost due to a system crash or phone malfunction. With its simple interface, first-time users can easily navigate around it. It supports the newest iPhone X and is installable on both Mac and Windows computers. There are 3 different recovery modes, so file retrieval is possible whether you keep backups or not. The icing on top is that you can use it for 30 days for free.
Download FoneDog iOS Data Recovery on your computer, so we can start getting back your photos.
After a successful installation, launch the software. Choose Recover from iOS Device from the options. Connect your iPhone to the computer and click Start Scan to proceed.
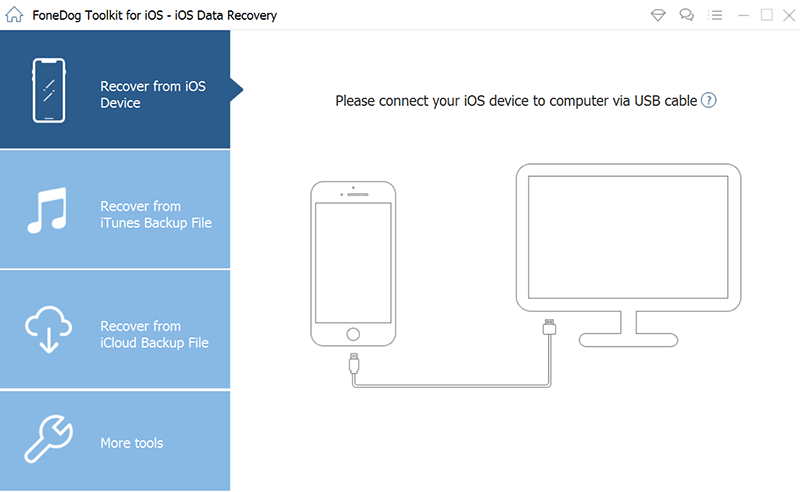
Launch Fonedog Recovery and Start Scan--Step1
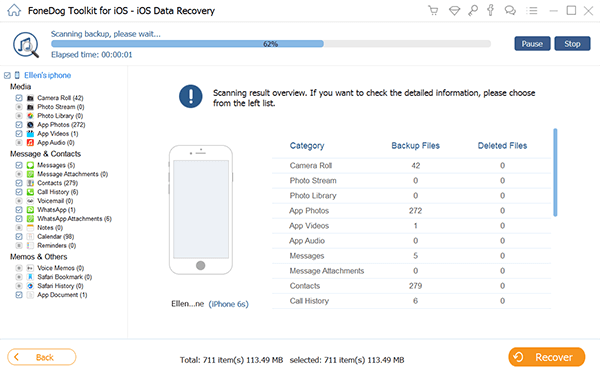
When the scan ends, you will see a list of all files on your phone. You will see various file types on the left tab. Since your goal is to get back old Christmas photos from your iPhone, check out Camera Roll and Photo Library. When you click on them, you will see the photos on the window.
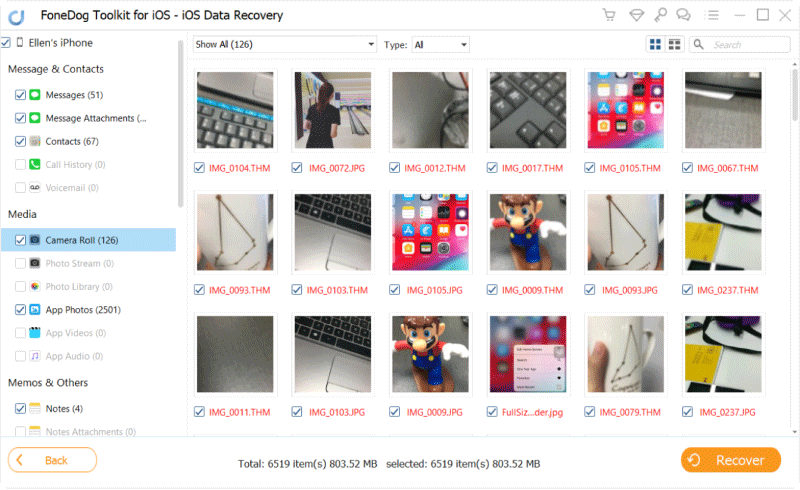
Select Desired Old Christmas Photos to Restore--Step2
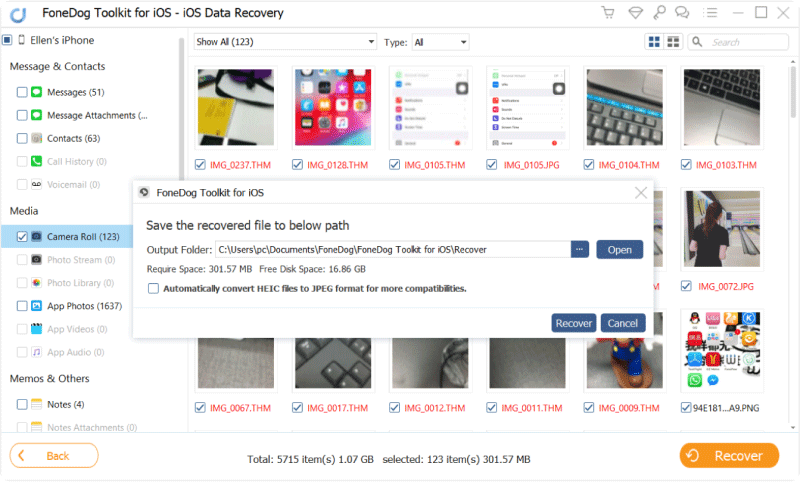
Tick the box on the pictures that you want to restore. Click the Recover button to download them to your computer.
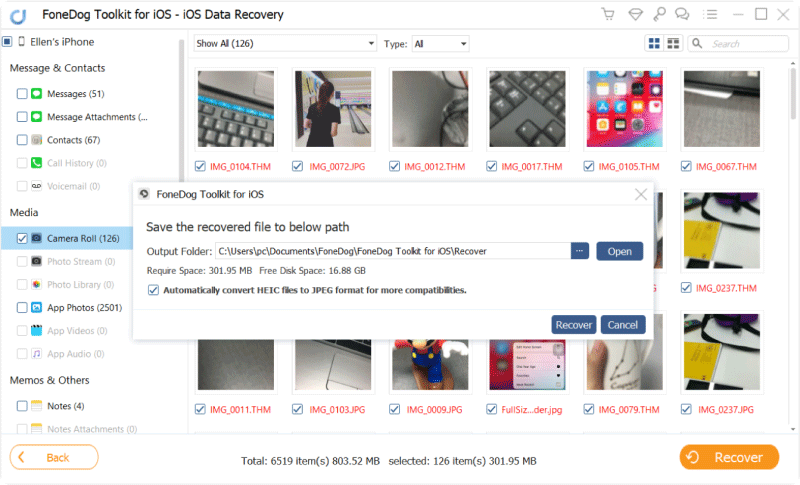
Retrieve Old Christmas Photos from iPhone--Step3
If our first 5 tips had not successfully recover your old Christmas photos, don’t give up yet. We still have tricks up our sleeve.
Follow the steps below if you were able to sync your iPhone to iTunes. The software will scan the backup file, so it can extract photos from it.
Download and Launch Fonedog iOS Data Recovery.And then select Recover from iTunes Backup File from the left tab.
You will be asked to choose one iTunes backup file. Select one and hit Start Scan. The software will start scanning all files in the backup.
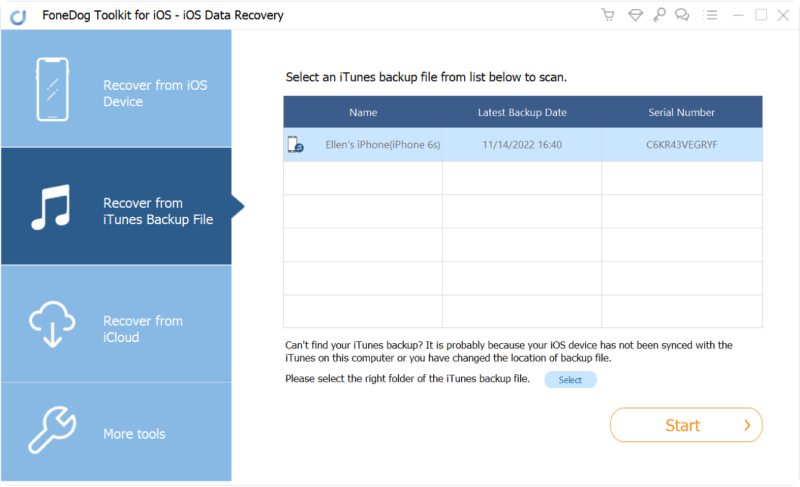
Launch Fonedog Toolkit and Scan Your iPhone--Step1
Once the scan ends, the window will display all file categories. From there, click on Camera Roll and Photo Library one by one. The right portion of the interface will show you the images in the folder. Take your pick of photos by ticking the box beside the items.
Choose Desired Old Christmas Photos from iPhone to Retrieve--Step2
You will see all the photos on your screen, when the scan ends.You will be able to preview and select the Christmas photos you want to get back. And then click Recover to finally get back your old Christmas photos from iPhone.
Preview and Get Back Old Christmas Photos from iPhone--Step3
If you sync your device to iCloud, this is a good method to use. By accessing your iCloud account, the software can extract files from the backup file of your choice.
Run the program. From the 3 recovery modes, select Recover from iCloud Backup File.
You will be directed to an iCloud login window. Enter your Apple ID and password to proceed.
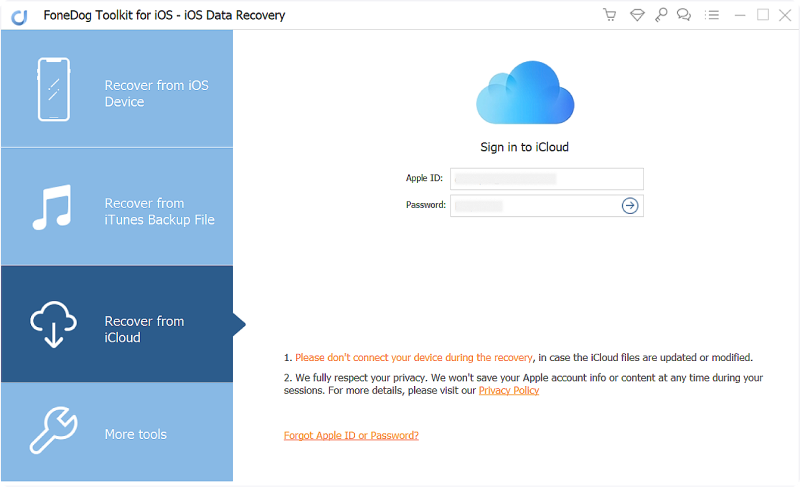
Run Fonedog Recovery and Log in iCloud Account--Step1
Upon logging in, you will be asked to choose from the existing iCloud backup files. Select the one you think has the photos that you need. Click the Download button beside it.
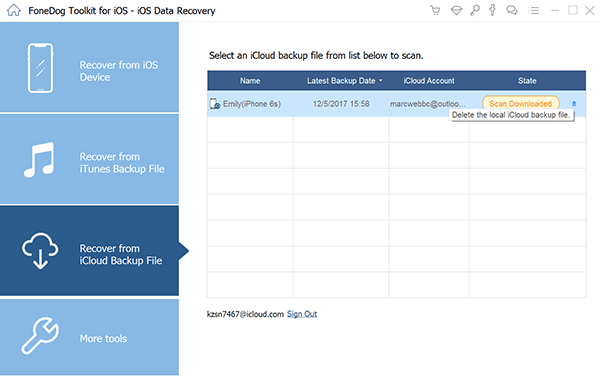
Choose iCloud Backup File--Step2
A pop-up window will appear. It displays different file types. Tick Camera Roll and Photo Library. This will prompt the software to extract photos from the backup file. Once done, hit Next.
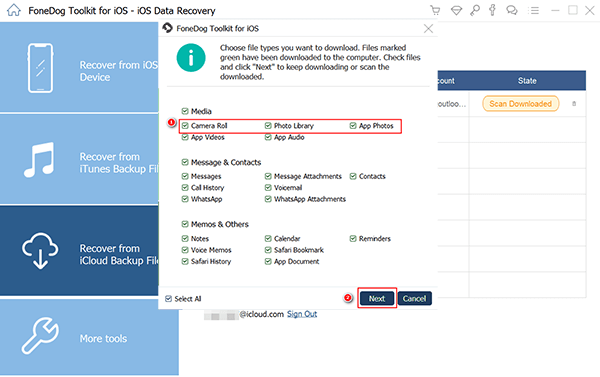
Select Type of Photo Files to Recover--Step3
The screen will now show you files under Camera Roll and Photo Library. Review them and choose the photos you want to keep. Hit Recover once you’re doneAlso read: iCloud Recovery: How to Download Photos from iCloud
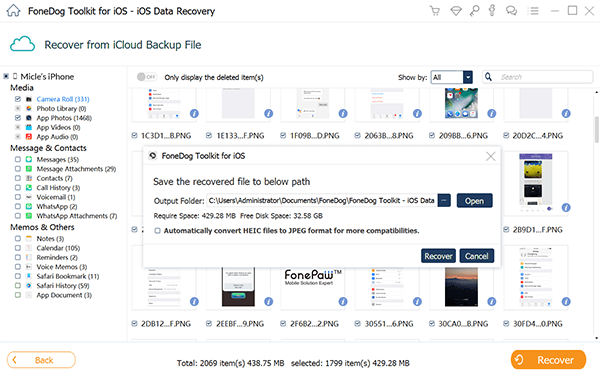
Get Back Old Christmas Photos from iPhone--Step4
Your iPhone is susceptible to data loss, so why not keep FoneDog iOS Data Recovery on your computer? Your photos are not the lone possible victim. Your messages, contacts, memos, and videos can be lost too. In case you need help getting them back, simply launch the software and click away!
Leave a Comment
Comment

iPhone/Android Devices’ Maintenance Expert
Staying home, listening to music, writing tech articles
Many people asked me to repair their mobile phones so I have a lot of experience in mobile phone repair, and I know a lot about Android or Apple phones.
iOS Data Recovery
3 Methods to recover your deleted data from iPhone or iPad.
Free Download Free DownloadHot Articles
 /
/
INTERESTINGDULL
/
SIMPLEDIFFICULT
Thank you! Here' re your choices:
Excellent
Rating: 4.7 / 5 (based on 107 ratings)
