FoneDog Screen Recorder
FoneDog Screen Recorder
Special Offer
Special Offer


By Gina Barrow, Last updated: November 29, 2017
Have you deleted important documents and data on your iPhone? Do you want to know how to recover documents and data on iPhone?” We have solutions for you! Read Along!
Having spent several years writing programs for iOS devices, we have created a powerful data recovery program to save data from being permanently lost.
Here is a tip for you: Download FoneDog iOS Data Recovery to recover App documents and data from iPhone in the fastest way. If you want to recover data on your own, we have collected some basic solutions below for you.
iOS Data Recovery
Recover photos, videos, contacts, messages, call logs, WhatsApp data, and more.
Recover data from iPhone, iTunes and iCloud.
Compatible with latest iPhone and iOS.
Free Download
Free Download

Part 1. What Is Documents and Data on iPhone?Part 2. How to Recover iPhone Backup Documents and Data?Part 3. How to Quickly Restore Documents and Data on an iPhone?Video Guide: Selectively Recover Documents and Data iPhone.Part 4. Conclusion.
iPhone being the unbeatable smartphone in this generation has a lot of things to offer apart from the basic call and text functions.
Now you can enjoy seamless conversation through instant messaging apps, take professional photos with the best camera app, and do more with office works or documents while on the go right on the iPhone.
You can access your documents, data, and other files as long as you have saved them on the device and have opted to synced all these in an iCloud drive where you can get them anytime and anywhere as long as you can access iCloud.
Due to our busy lives and chaotic environment, one cannot disregard that sometimes we tend to be stressful and might have made some serious mistakes on our iPhones like accidentally deleting important documents.
What are we going to do now? If you are the type of person that does backup your iPhone, well you have better chances of recovery.
If you don’t have, well then you should start searching for the best solution that can help recover documents and data on an iPhone.
In this article, we will discuss the easy ways to recover deleted files and data as well as other options to get them back.
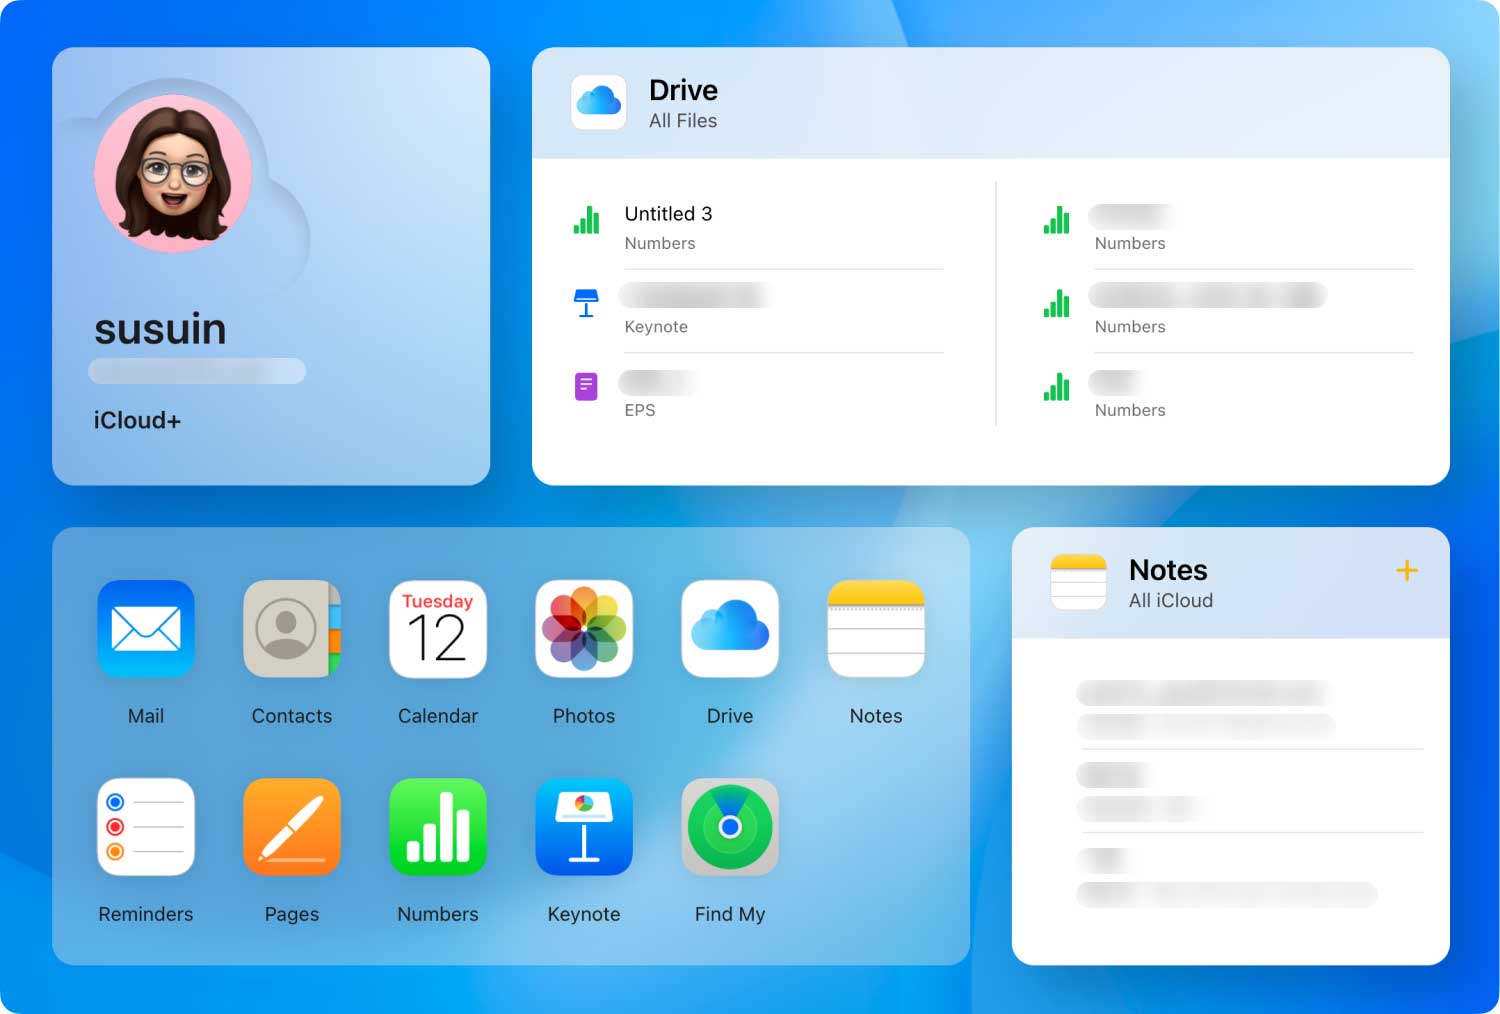
iCloud Drive is secure cloud storage for all the important documents and data iPhone, iPad, Mac, iPod Touch, and even Windows computer.
It syncs all the documents and data across all devices and shares the files with anyone.
The iCloud drive can accommodate 50GB file size limit for all your office documents, projects, reports, presentations, and more as long as you don’t exceed the file size limit.
There are different ways to recover documents and data on an iPhone using the iCloud drive. You can refer to any of the steps below:
Method 1: Recover iPhone Documents and Data Via iCloud.com
You may also choose to restore all files by going to Settings and clicking on Restore Files. Remember that you only have 30 days to recover any deleted documents and data from iCloud.com.
Method 2: Restore iPhone documents and data Via Mac
Method 3: Retrieve Data and documents Via iPhone, iPad, and iPod touch running on iOS11
Reminder:
You only have 30 days as well to recover documents and data on iPhone from the Files app.
Recovery on iPhone, iPad, and iPod touch is very much possible as long as you have created the backup for all the documents and data or have synced them across all iDevices.
You can also recover documents and data on iPhone using iTunes backup file if you have backed them up on iTunes.
The only thing quite frustrating about these backups is when you only needed to recover certain or few files but you are unable to do so unless you extract the entire contents which can lead to further data loss.
Another thing is if you have missed the grace period of 30 days then you don’t have any choice to recover these important files at all.
However, the real issue arises when you have just discovered that you have forgotten to backup. You may have heard a million times that you need to backup your iPhone or you might regret it.
How are you going to recover documents and data on iPhone now? Don’t fret! We have a very good solution for you.
There are many recovery programs out there that prioritize data recovery for iDevices with and without backups. We highly recommend one program that has all the recovery options one is just looking for. Find out below.
The best part? Next, it is the best easy way to fix documents and data iPhone.
Looked over!!The very first option is to recover iPhone documents and data without backup.
This may sound pretty weird on how the program will perform the recovery but mind you, technology will really find its way to evolve and make sure everyone gets their real mobile experience.
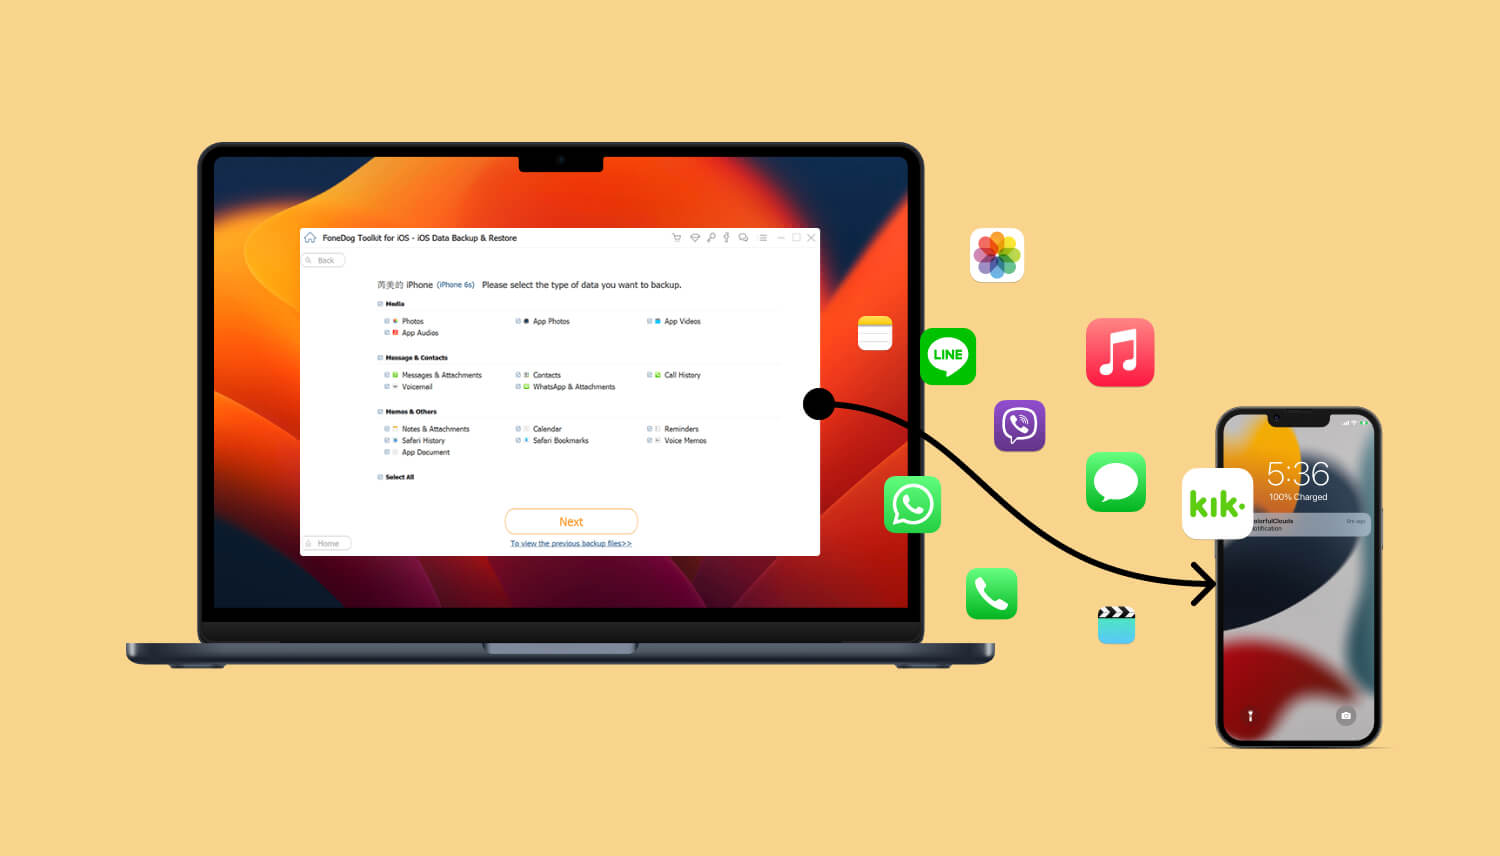
FoneDog Toolkit- iOS Data Recovery will run a deep scan on the iPhone or any iDevice in order to restore all the deleted or lost files.
So while it is still early, make sure you have already downloaded and installed the program FoneDog Toolkit- iOS Data Recovery to get those important documents and data back. To begin the recovery, follow the steps below:
Tip: Once documents are deleted from the iPhone, they become unreadable files and are transferred to a virtual space where they stay there until they will be overwritten.
It is best that you should stop using the iPhone when you discovered that those documents are lost or deleted to avoid overwriting.
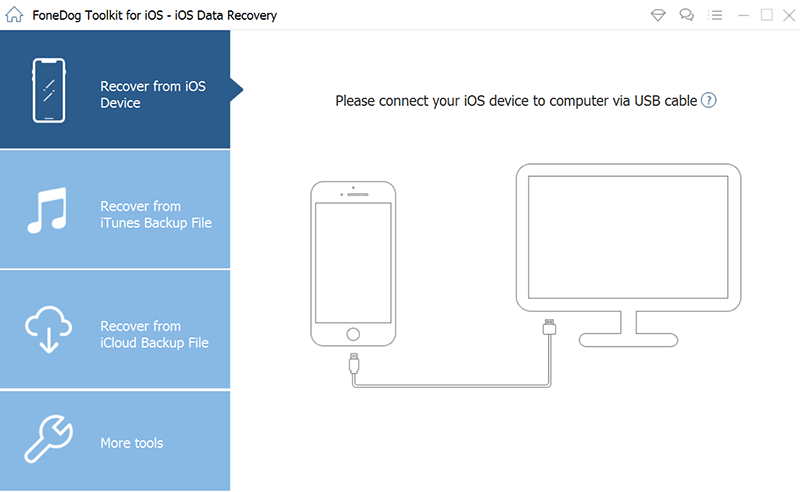
After you have downloaded and installed the program, launch FoneDog Toolkit- iOS Data Recovery. Click the first recovery method on the left panel “Recover from iOS device” and connect the iPhone using an original USB cable.
Wait until the connection is automatically detected and then click “Start Scan”. This will then allow the program to analyze the device and start the deep scan.
Note: if you have iTunes installed on the computer that you are using for recovery, do not launch it or better to turn off the auto-sync option.
To turn off the auto sync, go to iTunes > Preferences > Devices, check “Prevent iPods, iPhones, and iPads from syncing automatically”
When the scanning has begun, avoid using the iPhone to avoid interrupting the recovery. This will actually take a while depending on the files and documents being recovered.
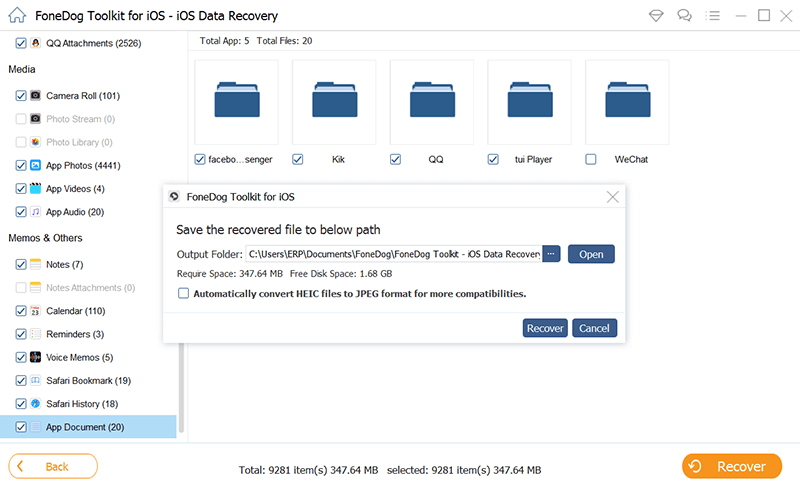
Little by little the program will display all the documents it has recovered from the iPhone. Once you have found all the documents, you can pause the scanning and preview the items.
If you are sure enough that these are the documents needed, mark them individually and then click the ‘Recover’ button at the end of the screen. You may then create a new folder on the computer to save all the recovered documents.
You only have two steps away from getting back those important documents on iPhone.
The second recovery method offered by FoneDog Toolkit- iOS Data Recovery is via iTunes.
We all know that you are unable to selectively recover documents only from the iTunes backup and it is such a big hassle to restore the entire backup contents.
FoneDog iOS Data Recovery has made a better way to get only the important documents without the need to extract the rest of the backup contents.
Here are the steps on how to use iTunes via FoneDog Toolkit- iOS Data Recovery.
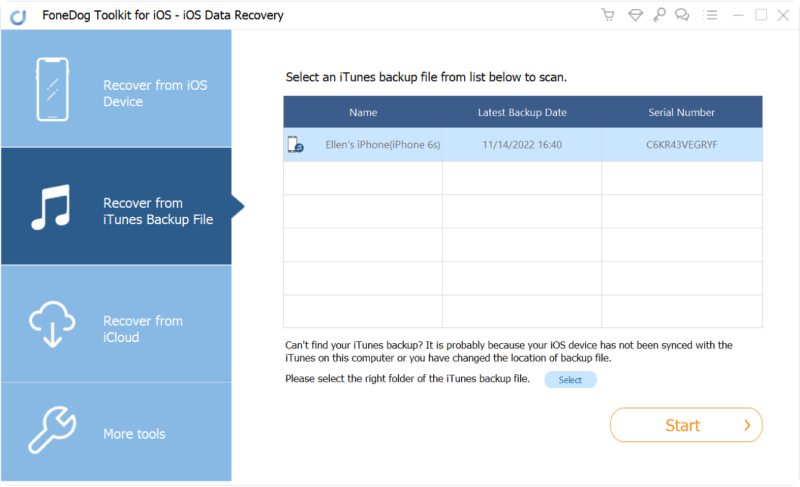
On your computer launch FoneDog Toolkit- iOS Data Recovery and click ‘Recover from iTunes Backup File’.
There is no need to launch iTunes on the computer since it automatically detects the entire iTunes backup as long as you are using iTunes on the same computer.
Wait for a few seconds until all the iTunes backup will display on the screen. Select the desired backup file and then click “Scan”.
FoneDog Toolkit- iOS Data Recovery will now scan the iTunes backup file and will extract it right after. This process will also take time since it will go over the entire backup contents.
Once the scanning stops, you can see all the file type categories on the left panel of the screen. Head over to the desired documents and data and preview each item one by one on the right side.
Once you have what you needed, mark them individually and then click ‘Recover’ at the end of the screen. Don’t forget to save them in a new folder on the computer for easier access later on.
These two steps are vital in order to recover documents and data on iPhone using iTunes backup.
The third recovery method offered by FoneDog Toolkit- iOS Data Recovery is via iCloud.
As we have presented in the first part of this article, you are able to recover documents and data on iPhone via iCloud drive as long as you are inside the 30 days grace period.
However, it might be too late if you missed the 30 days windows and it will be a hassle if you needed to erase all contents and settings on the iPhone just to restore from iCloud backup.
Good thing FoneDog Toolkit- iOS Data Recovery made it easier to recover any files from iCloud without the need to gamble other phone contents.
Find out how you can use iCloud recovery method of FoneDog Toolkit- iOS Data Recovery.
Launch FoneDog Toolkit- iOS Data Recovery and click “Recover from iCloud Backup File” option on the left panel and then sign in to iCloud using the same account details you use on the iPhone.
If you have enabled the two-step authentication then you need to temporarily disable it before running this software.
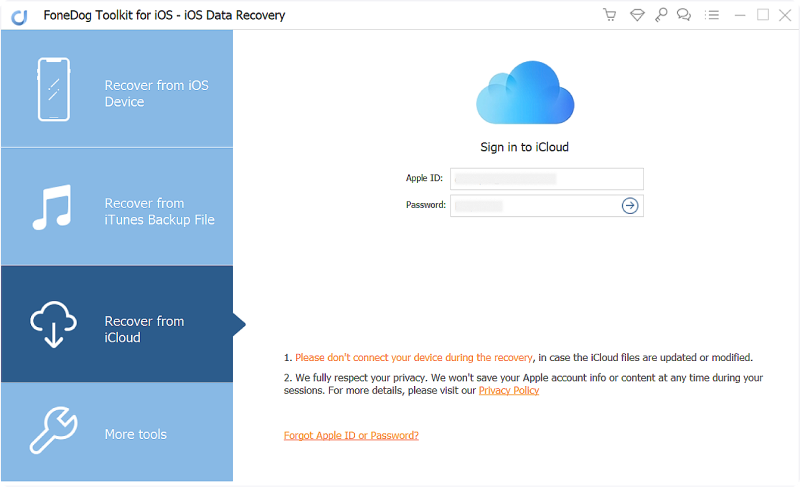
All account details are not saved on the server of FoneDog Toolkit- iOS Data Recovery to adhere to privacy protection.
After logging in, you will then see the display of all the iCloud backups with all the date and timestamps. Select which one you think has the documents and data you needed to recover and then click “Download”.
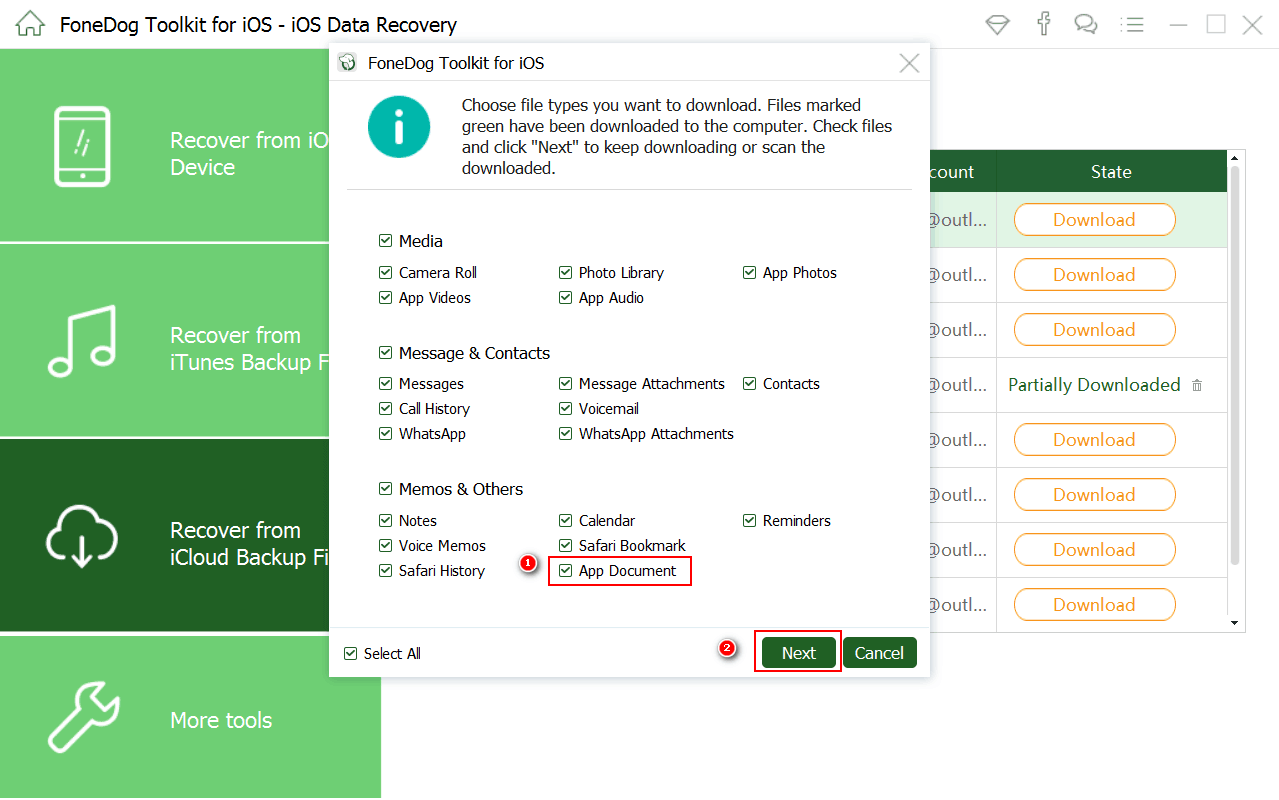
The program FoneDog Toolkit- iOS Data Recovery will now prompt you to mark the file types you want to recover in order to make the scanning and extracting easier.
Mark the boxes of the file types you think contain the documents and data you needed. Click “Next” to continue.
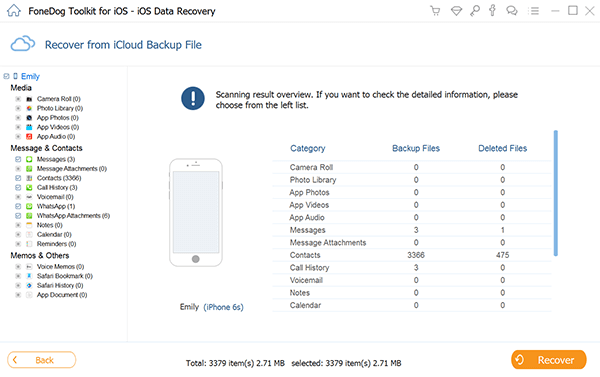
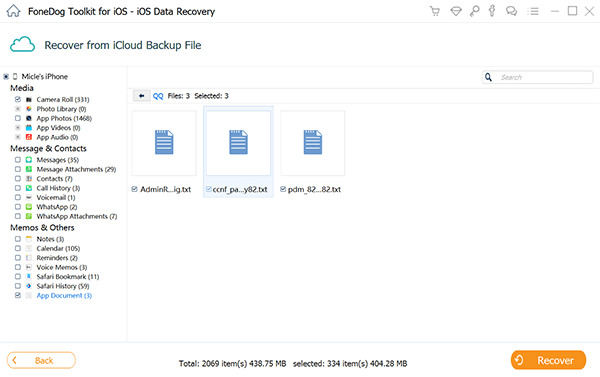
FoneDog Toolkit- iOS Data Recovery will now extract the files and will display the items based on its category on the left panel. Go over to the documents and data you wish to recover and preview them one by one.
Once you have found the documents you were looking for tick their respective boxes and then create a new folder to save them and click the “Recover” button at the end of the screen.
Also Read:
3 Ways to Recover Deleted iMessages from iPhone
Recover Deleted Text Messages on iPhone X/8 in Easy Ways
These 4 steps to recover iPhone documents and data are essential in helping people with light to severe types of data loss.
FoneDog Toolkit- iOS Data Recovery made it easier to recover documents and data on iPhone, iPad, and iPod touch with or without backups.
This software does not require any special skills or knowledge in order to use this. FoneDog Toolkit- iOS Data Recovery is very good for beginners.
For any of your future data recoveries needs like contacts, documents, photos, messages, WhatsApp messages, songs, videos, audio files, and more, you can only rely on FoneDog iOS Data Recovery Tool and surely you will never go wrong.
Download the Free trial version today. Click Share with Your friends.
Leave a Comment
Comment

Technical/Creative Writer
Kitchen, my safe space; black, my favorite color
Was a Technical Specialist for a while, troubleshooting Smartphone and Software-related issues until a writing stint caught my attention.
iOS Data Recovery
3 Methods to recover your deleted data from iPhone or iPad.
Free Download Free DownloadHot Articles
 /
/
INTERESTINGDULL
/
SIMPLEDIFFICULT
Thank you! Here' re your choices:
Excellent
Rating: 4.4 / 5 (based on 105 ratings)
