FoneDog Screen Recorder
FoneDog Screen Recorder
Special Offer
Special Offer


By Nathan E. Malpass, Last updated: March 6, 2020
Part 1: Why you’d enter DFU ModePart 2: Starting Up DFU ModePart 3: Alternative Method to Enter DFU Mode (All iOS devices)Part 4: How to Exit DFU ModePart 5: Solution: Using FoneDog toolkit - iOS System Recovery - Making the Process EasierVideo Guide: How to Fix with Various iOS System Issues
When your iPhone or iOS device has the problems such as a red screen, keep restarting, or the app no longer works. Do you feel nervous and want to know how to solve these problems. After trying a common troubleshooting method and none of them succeeded, you decided to switch to the recovery mode feature. But sometimes recovery mode does not necessarily solve your problem. At this time you will think of the DFU mode function. DFU stands for Device Firmware Update and is accessible through any iOS device such as the iPad, iPod, and iPhone.
The mode reaches into the deepest parts of an iOS device and allows for the best chance for recovery. This is done by reinstating a previous state where the device was still functional.
If functionality is not the issue, DFU Mode can be used for jailbreaking. This would perhaps be the number one reason for many iOS device users looking to get more out of their Apple device.
Aside from jailbreaking, unlocking the iPhone so it can accept any SIM worldwide is also quite popular.
More information about what DFU Mode is can be found here (link to DFU Mode: The Basics and its Functions).
Now let us look into how we can prepare and enter this mode.
We will now show you step-by-step on how to enter this mode, but before anything else please take note of these needed preparations and precautions.Preparation
1. Make sure that you have successfully backed up all your data. Do this via iTunes or iCloud FoneDog - iOS Apps Backup and Restore.
Click the free trial button to backup your iPhone data.
2. It is a good practice to charge your iOS device to at least more than 50% battery life. This ensures that the process won’t be interrupted - important if your area suffers from power outages. During these times a laptop may be needed as a desktop will completely be unusable.
3. Know what all the buttons do - Home Button, Power Button (a.k.a Sleep & Wake Button). For an iPhone 7 or 7 Plus, the Home Button is no longer relevant. In this case, the Volume Down button is used in its stead.
4. Have your iOS device compatible USB cable ready.
5. Count your seconds properly or use a timer. This is very important.
Precautions
1. Completing recovery with the DFU Mode results in loss of data, it is, therefore, imperative to have your data backed up so it can be easily retrieved later.
2. Make sure no damages to any components are reported, especially with water - this may abruptly cause ‘premature completions’ or none at all. Please note that while the iPhone 7 and 7 Plus are waterproof, any open cracks will still allow water to do damage.

1. Have iTunes up and running. DFU Mode communicates with iTunes in order to retrieve previous states.
2. Connect your iOS device to your Mac or Window computer.
3. Shut off your iOS device. (Hold the Power Button until a red slider appears then slide to the right) (This can also be done by holding both the Power Button and Home Button until it turns off).
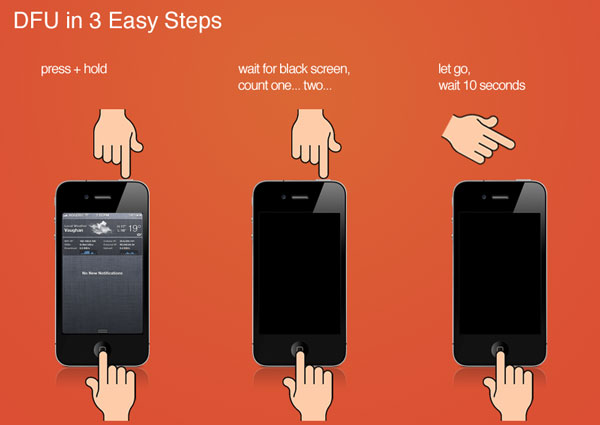
4. Hold down the Power Button for 3 seconds.
5. CRUCIAL STEP: While still holding down the Power Button, press and hold the Home Button.
6. Hold both buttons for exactly 10 seconds and release ONLY the Power Button.
7. Keep holding on to the Home Button for 5 seconds.
8. Once you noticed your screen is staying black without seeing the Apple logo, you have successfully done it!
On your Mac or Windows computer, a screen should pop up indicating that it has detected a device in DFU Mode. (It may say “recovery mode” - but as long as the screen is black you are officially in DFU Mode).
*This process may take a few tries to succeed. Timing is important so proper counting or a timer is recommended.
People Also ReadDFU Mode: The Basics and its FunctionsHow to Fix iPhone Touch Screen Not Working
The alternative method on how to get into DFU Mode is through the use of a third party software. This is usually required in cases where your Home Button, Power Button or both are not functional. It is a long and complex process but may serve as a last-ditch attempt.We shall provide you the steps here:
1. Create a folder, either on your desktop or anywhere available, and name it Redsn0w.
2. Find and download the latest version of Redsn0w. Usually found in the Downloads folder after it has completed downloading.
3. Find and download the latest iOS firmware for your iOS device. Put it someplace where it can be easily found.
*Note that firmware can vary between iOS devices so download the one appropriate to what you have and the desired version (if you are downgrading or staying updated). Take note that the file extension is (.ipsw).
4. Run and extract the Redsn0w zip file into the Redsn0w folder you have created.
5. Launch the application (.exe). You may need to click on ‘Run as an Administrator’ to confirm.
6. On the interface, click on the ‘Extras’ button.
7. Next, click on the ‘DFU IPSW’ button.
8. The program will ask you to select an IPSW file - this is the firmware you downloaded awhile ago.
9. Allow the process to run and confirm with the ‘OK’ button once it has finished. The result of the created file should start with ENTER_DFU_.
10. Launch iTunes. Be aware that the version should also be up-to-date.
11. Select your iOS device when it appears under the Device tab.
*Note that this would be a good time to back up your files with the iTunes interface open.
12. Click on the Summary tab.
For Mac: Hold down the Option key and click on Restore.
For Windows: Hold down the Alt key or Shift key and click on Restore.
13. Select the IPSW file that was created. It should start with ENTER_DFU_.
14. Allow the process to run. The result will be a black screen on your iOS device. You have now successfully entered the DFU Mode!

While DFU Mode is a feature that can save your iOS device with good success - more than common fixes and Recovery Mode - it can also run into a few hiccups that may worsen things. Here are the of the problems that may occur with improper use.
It has been noted that a damaged iOS device, especially if the inner components were affected or worse yet - through water - can prevent the mode from even completing. So it is highly advised to check for any damages that may hinder a successful recovery.As stated before, the iPhone 7 and 7 Plus are deemed as waterproof. The only thing is even waterproof products have their limits. Keeping your iOS device away from physical damage and water are your best bets.
There are also times when the device will be stuck in DFU Mode, a very undesirable issue. It has been reported that occurrences like these may arise when trying to jailbreak your iOS device. There are ways to get out of it, but we at FoneDog will save you the long process and headache - more into this later.

Your phone could have the potential to be ‘bricked’. This is the utmost worst nightmare for cellphone users alike. This is when your cell phone will not turn on no matter what you try to do it. It basically means one thing, your iPhone becomes an expensive, fancy paperweight!

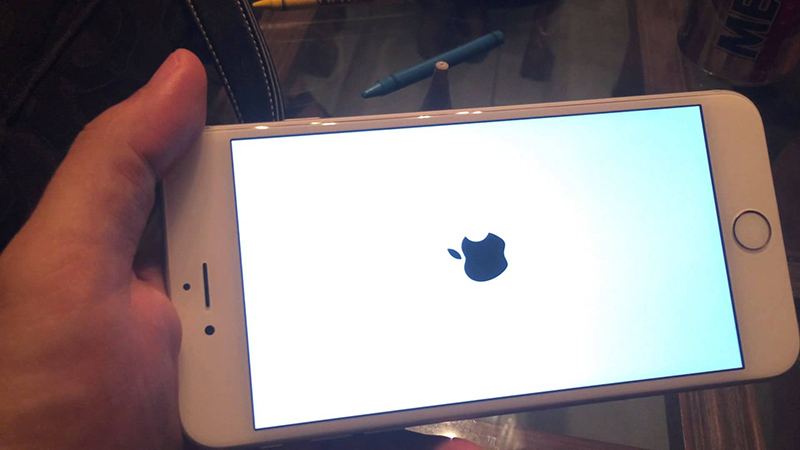
All you need to do is to first disconnect your iOS device then press and hold down the Power Button and Home Button for 10 seconds.Alternatively, for the iPhone 7 and iPhone 7 Plus it would be the Volume Down button instead of the Home Button. The same thing applies for an iOS device which entered DFU Mode through the alternative method.The Apple logo should appear as an indicator that it is booting up again and successfully exiting out of DFU Mode.
Now you know how to get into DFU Mode, how to get out of it and potentially use it. Being aware of the problems that can arise if things go awry, wouldn’t it be best to avoid the hassle and risks altogether?
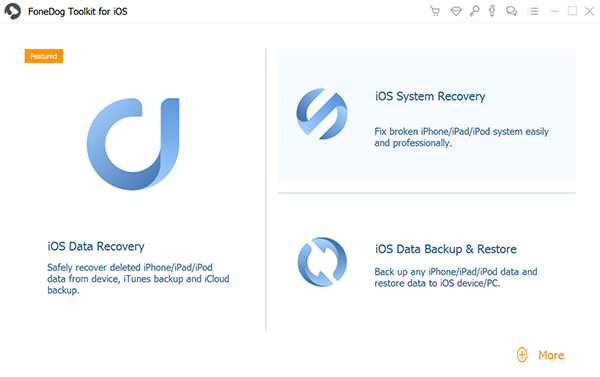
This is where FoneDog - iOS System Recovery becomes a total no-brainer to use. Here are the steps:
1. Plug in your iOS device to the computer via USB cable.
2. Launch FoneDog and click on ‘System Recovery
3. Click ‘Start’.
4.Your iOS device will be automatically detected and updated by clicking on ‘Download Now’.
5. Recovery will begin immediately.
6. Finished!
As you can see, with FoneDog all the work is done for you. You would not need to go through the long processes anymore, especially the alternative method.It does everything from a complete system recovery to getting your precious data back to fixing those annoying restarts. All you need is a computer or a laptop.You can be assured that all your data will be 100% restored. Never again would you need to worry about losing your precious photos and videos, important notes and dates as well as contacts. It would be a hassle to re-install large applications and reconnect with people just to inform them that your cell phone went haywire - or worse yet, your boss!Most importantly, you never again would have to bring your iOS device to a repair shop where your data may potentially be at risk from prying eyes as well as having to pay huge fees. Your data is only accessible by you and you alone.Our program even saves your phone from being stuck in Recovery Mode and even DFU Mode. A bit ironic isn’t it? Anything that either Recovery Mode or DFU Mode can do, FoneDog - iOS System Recovery does better!
After using FoneDog - iOS System Recovery your iOS device is ready to go but it does not just end there.If you have forgotten to backup your data, worry not because of the FoneDog - iOS Data Recovery has you covered. As easy as all of our software, it is always good to have a one-stop program that does everything efficiently for you.So give our products as shot with a free trial to start off. With our user-friendly interface, immediately you will see what it is capable of and why it is well loved and received amongst our satisfied customers. We stand proudly by our product and so will you. Go on and give it a try. It is as easy as 1, 2, 3!
Leave a Comment
Comment

iPhone/Android Devices’ Maintenance Expert
Staying home, listening to music, writing tech articles
Many people asked me to repair their mobile phones so I have a lot of experience in mobile phone repair, and I know a lot about Android or Apple phones.
iOS System Recovery
Repair various iOS system errors back to normal status.
Free Download Free DownloadHot Articles
 /
/
INTERESTINGDULL
/
SIMPLEDIFFICULT
Thank you! Here' re your choices:
Excellent
Rating: 4.7 / 5 (based on 70 ratings)
