FoneDog Screen Recorder
FoneDog Screen Recorder
Special Offer
Special Offer


By Adela D. Louie, Last updated: April 24, 2022
Being able to erase your iPhone actually comes with a lot of benefits. Nope, you are not reading it wrong. Being able to erase your iPhone can actually fix some issues that you are experiencing with your device.
Erasing your iPhone can fix the apps that are freezing and crashing, keypad issues, blank screen, sync problems, cannot make or receive any calls, and so much more. However, there are instances wherein problems occur and can’t erase iPhone happens.
And if you have the same experience as this, then you came to the right place and you do not need to worry about a thing anymore. We are going to show you some ways how you successfully erase your iPad or iPhone.
Part 1. What to Do When You Can’t Erase iPhone? Part 2. The Best Solution When You Can’t Erase iPhone Part 3. Conclusion
As we have mentioned above, we are going to show you how you can fix when you can’t erase your iPhone. So read the methods that we have below.
Sometimes, cleaning up your iPhone is not enough. There are some things that you also need to consider. One of the main reasons why you can’t erase iPhone is because there is some program or application on your iPhone that prevents it from doing so. And as we know, Apple comes with a lot of features that prevent such processes.
And one of the features that the iPhone has that prevents you from erasing your iPhone is its Find My iPhone feature. This is why you have to make sure that you have disabled the Find My iPhone feature first so that you will be able to erase your iPhone.
Another reason as to why you can’t erase iPhone is because of your Apple ID. That is why you have to also make sure that you were able to sign out your iCloud on your iPhone. And when you do this, you will be needing to give a verification code, and this will be sent over to the trusted device for the re-activation process.
Another way that you can fix this kind of problem is by deleting the profiles that you have on your iPhone device. So, you also have to make sure that you have logged out of your Gmail, iCloud, and other accounts that you have signed in on your iPhone device.
And once that you have logged out of your accounts and deleted your profiles, simply reboot your iPhone. If this still does not work, then you can refer to the next method below.
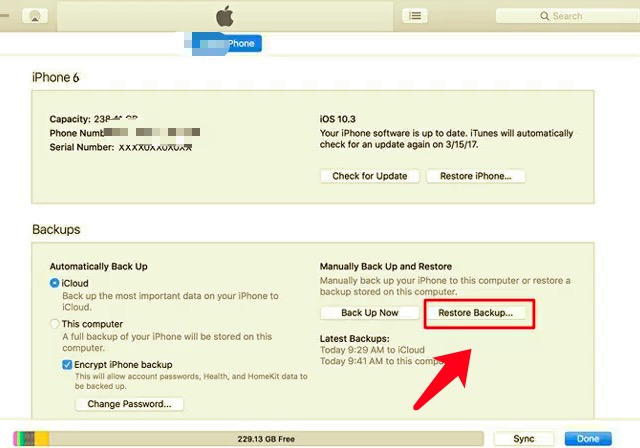
If you were able to do all of the methods that we have shown you above and you still can’t erase iPhone, then you can also try to restore your iPhone by using your iTunes program. And if in case you do not know how to do this, here are the steps that you can follow.
Now, the methods that we have shown you above might or might not work for you. That is why we have saved the best for last. This is by using the best tool in order for you to erase your iPhone device. And the tool that we are referring to is no other than the FoneDog iPhone Cleaner.
The FoneDog iPhone Cleaner is considered and known to be the best iOS cleaner that you can use in order for you to clean up all of the unnecessary files that you have on your iPhone. We know that one of the most common reasons why users want to erase iPhone is because it might be running super slow because of the insufficient space left on your iPhone device.
The FoneDog iPhone Cleaner has the ability to clean up your iPhone in just a few clicks. By using this device, you will be able to clean up all of the junk files that you have on your device, uninstall the applications that you no longer need, remove the large files that you do not use anymore, and export your photos, and so much more.
Will hard reset delete everything on your iPhone? The answer is yes. So you'd better back up important data first. And in order for you to clean up your iPhone using the FoneDog iPhone Cleaner, here are the steps that you can easily follow. Do not worry because using this program is safe and certainly effective.
Once you have completely installed the program on your computer, enter your email address and the registration code that you got from us for you to register. And once done, have your iPhone connected to your computer using your USB cable. Make sure that you trust this device and that you have an iTunes program installed on your computer as well.
Then, click on the Quick Scan button on your screen so that the program will start to scan your iPhone and find all of the data that you have saved in it.
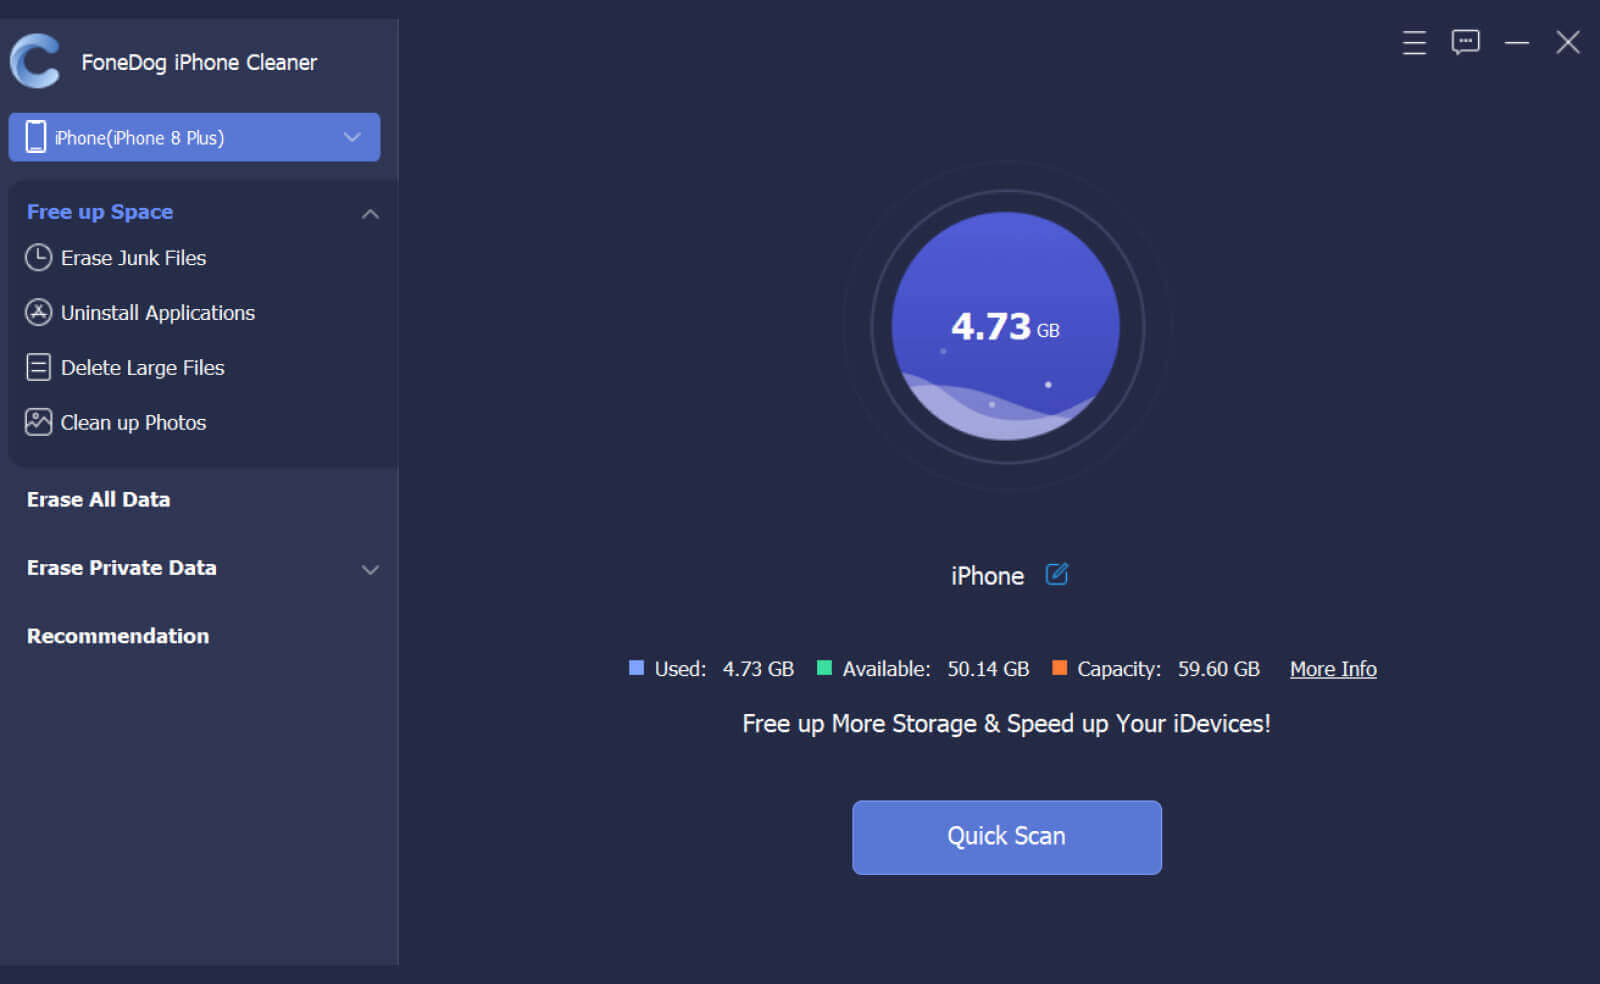
And then, choose the area that you wanted to clean up from the list shown on your screen. You can choose from Junk Files, Uninstall Applications, Delete Large Files, and Clean Up Photos. Choose whichever you wanted to erase.
After choosing the areas that you want to delete from your iPhone, go ahead and click on the Erase button found at the bottom of your screen. This will then delete all of the data that you have selected earlier.
Another way that you can erase your iPhone using the FoneDog iPhone Cleaner is by simply clicking on the Erase All Data located at the left side of the main interface of the program.
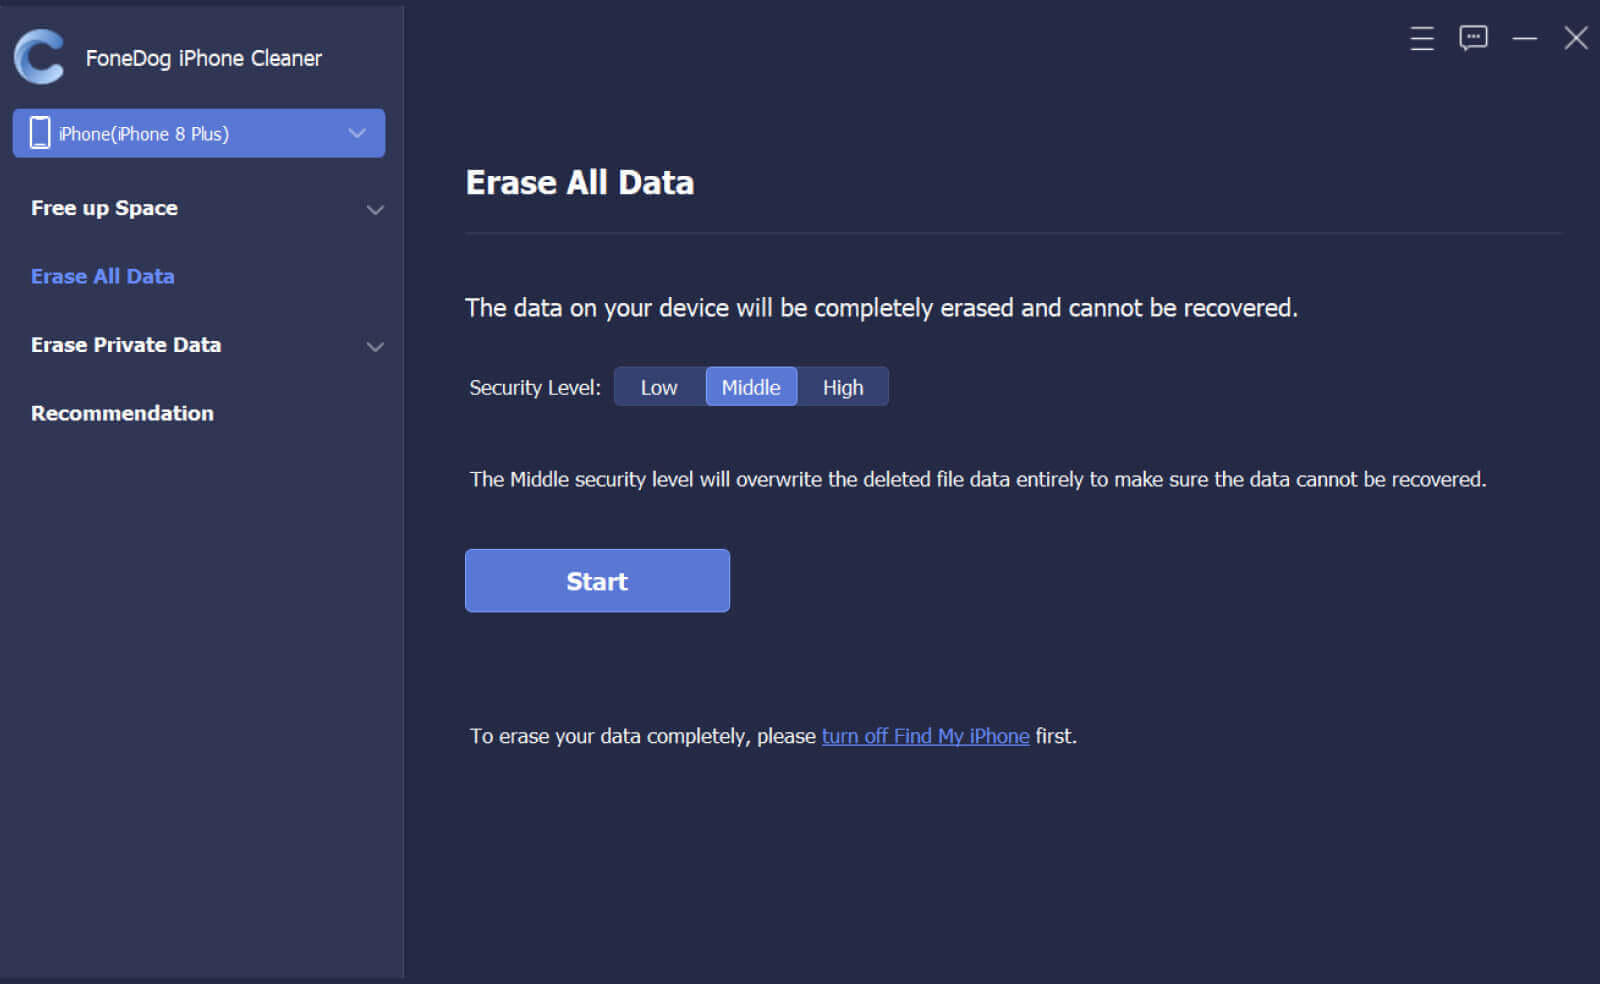
And on that area, you will be able to see three types of security. The Low, Middle, and High Level. Choose either of those three levels and then click on the Start button. This will then start to erase all of the data that you have on your iPhone.
People Also ReadHow to Securely Erase iPhone in Simple StepsHow to Fix iPhone Erase All Content And Settings Not Working
We know how frustrating and annoying it is when you can’t erase iPhone when you need it the most. That is why we have gathered all of the most effective ways how you can solve this problem.
But if you do not want to go around in circles anymore, then the best way to solve this is by simply using the FoneDog iPhone Cleaner. This is highly recommended by many iOS users because it is indeed safe, effective, and very easy to use.
Leave a Comment
Comment

Tech Website Writing /Content Optimization
Singing, smiling, surprising every day!
So as a technical writer, it is my duty to gather effective and reliable solutions to answer questions on how to deal with the issues they are having with their devices.
Hot Articles
 /
/
INTERESTINGDULL
/
SIMPLEDIFFICULT
Thank you! Here' re your choices:
Excellent
Rating: 4.5 / 5 (based on 92 ratings)
