FoneDog Screen Recorder
FoneDog Screen Recorder
Special Offer
Special Offer


By Adela D. Louie, Last updated: December 15, 2022
When you open your iTunes app, the first thing that you will see is the iTunes library. But what will you do when you cannot find iTunes library location? Well, if you are in the same situation, you will probably cry in a panic especially if you have had music all your life. If you are an Apple user before, you know that Apple iTunes stores all the files or items that you have purchased in the Apple Store.
There is also another folder called the iTunes Media Folder, this one contains the items that you have imported from your DVDs and CDs, and it also contains other items that you have imported into the program. This folder stores the iTunes library, so one way to immediately find the iTunes library location is to look for the iTunes Media folder. Is there any other way to find the iTunes library location?
Let us find out as we go along the article. One of the methods can even help you transfer your iTunes Library to your new Mac!
Part #1: How to Find iTunes Library Location through The iTunes Media Folder?Part #2: What Are The Locations of The iTunes Media Folder on Different Devices?Part #3: How Can I Easily Access My Songs?Part #4: To Summarize It All
We have mentioned above, that one way to find iTunes library location is to locate the iTunes Media folder, so how are we going to do this? Let us check the steps below.
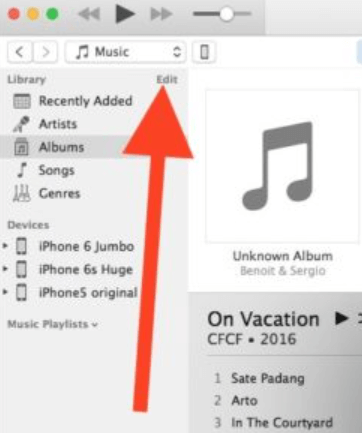
In order for us to easily find iTunes library locations, there are paths that we must visit. Through the use of these paths, you can be able to access all the iTunes music and songs on your file system. Let us go check the said paths below.
There are several paths to your iTunes Media folder depending on the version of Windows you have. Let us see them below.
\My Documents\My Music\iTunes\iTunes Media\Music\
\My Music\iTunes\
\Music\iTunes\iTunes Media\Music\
C:\Users\YOUR-USER-NAME\My Music\iTunes\
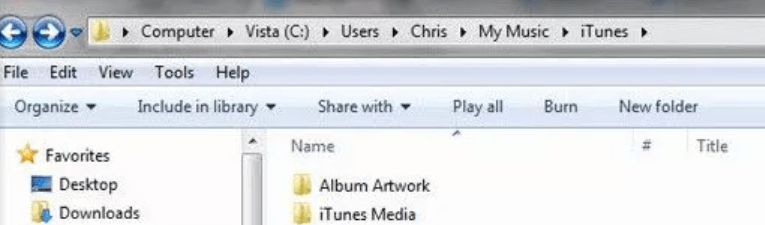
You also have to know that the directory path in Windows may slightly vary, you should remember that you should not worry to explore various My Music to iTunes directories and only stopping once you have found or located your songs.
You also have to put in mind that the mentioned directories contain all the locally stored music, movies, and media, but they are not where you can see the iTunes backup of iOS devices.
Let us now proceed to the exciting part! In this part of the article, we are going to tell you how you can easily manage and access your songs on your devices. In this way, you do not have to repeatedly look for ways how to find iTunes library location, you can set your own! To start, the thing that we have to do is to transfer the files to a computer and there create a folder where you can access them freely.
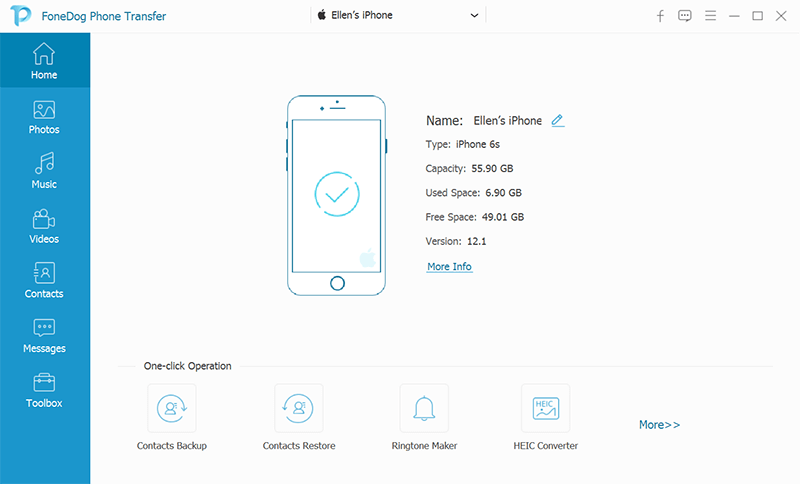
We are going to tell you about a tool that will definitely change your way of transferring your files. Begin transferring your files across your devices with the FoneDog Phone Transfer tool. It is one of the most reliable tools that can help you efficiently export your files while making sure that no quality of files will be compromised.
Aside from the most notable feature of transferring your files, the FoneDog Phone Transfer tool can also be used in so many things. For example, this tool can help you transfer your music playlists from iTunes to iPhone!
Phone Transfer
Transfer files among iOS, Android and Windows PC.
Transfer and backup text messages, contacts, photos, video, music on computer easily.
Fully compatible with the latest iOS and Android.
Free Download

You can also access the FoneDog Phone Transfer tool on your Mac and Windows computers, and it is also supported by a lot of brands of devices such as iPhone, iPad, iPod, HTC, Google, Samsung, Huawei, LG, and a lot more. Let us check the steps on how to transfer our files easily.
And there you have it! Once you have transferred all your files, you can now make your own folder, and store it in any known location based on your preferences. In this way, you can easily find any song that you wanted to play anytime or anywhere you are.
People Also Read5 Easy Ways to Transfer MP4 to iPad/iPhone without iTunesA Quick Guide On How To Transfer iPod Playlist To iTunes
It can really be hard to find iTunes library location especially if you have just switched from an Android device to an iPhone. It will also be hard, if you just had a few interactions using the Apple Music app, on the other hand, articles like this one are a huge help.
We hope that you have learned a lot of things when it comes to how to find your iTunes library location without stressing yourself too much. We have provided guides that are easy to follow in case you are lost in the process.
Also, the emergence of tools like the FoneDog Phone Transfer tool has made it easier for us to deal with dilemmas like this one. This tool can give us a variety of options that we can try to do while being flexible with all other features that it has. It will surely make sure that we can save a lot of time looking for the location of the iTunes library.
Leave a Comment
Comment

Tech Website Writing /Content Optimization
Singing, smiling, surprising every day!
So as a technical writer, it is my duty to gather effective and reliable solutions to answer questions on how to deal with the issues they are having with their devices.
Phone Transfer
Transfer data from iPhone, Android, iOS, and Computer to Anywhere without any loss with FoneDog Phone Transfer. Such as photo, messages, contacts, music, etc.
Free DownloadHot Articles
 /
/
INTERESTINGDULL
/
SIMPLEDIFFICULT
Thank you! Here' re your choices:
Excellent
Rating: 4.7 / 5 (based on 87 ratings)
