FoneDog Screen Recorder
FoneDog Screen Recorder
Special Offer
Special Offer


By Vernon Roderick, Last updated: August 23, 2021
Many people complain about the demanding process of creating playlists. You have to find specific music here and there just so you can add it to the playlist. You may have a playlist in your iTunes already, but it’s not exactly easy to just move that playlist. There are also cases where people encounter issues when doing so.
This article will help you learn how to transfer playlist from iTunes to iPhone through five methods. Let’s start with what you need to do before anything else.
Part 1. Preparing to Transfer Playlist from iTunes to iPhonePart 2. Alternative Method to Transfer Playlist from iTunes to iPhone
As I’ve said before, most of the users that try to transfer playlists from iTunes to iPhone often encounter issues. This is mainly because they haven’t finished the preparations.
You see, without doing certain steps, you won’t be able to transfer playlists from your iTunes to any device for that matter. You’ll often encounter error messages, or the process won’t work at all. Follow these steps to avoid issues like those:
Once you’ve done all these, the five methods that we will be discussing from here on should go smoothly, unless some other issue occurs. Either way, let us head to our first method.
This method involves syncing your music files from your iTunes to another device, in this case, your iPhone.Here's another example. You can refer to the guide of transmission between iTunes and Android. Since we will be syncing the music, it’s not necessary to be done regularly as it is a one-time process. Here’s how you can do it:
Note: Check “Entire music library” to include all the files in the library. Check “Selected artists, albums, genres, and playlists” to select certain music from the library at the bottom.
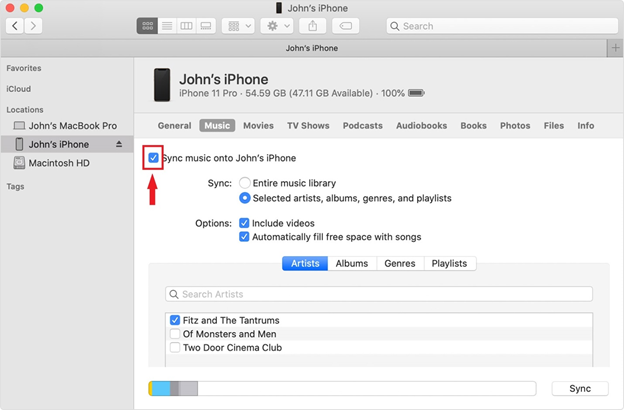
With this, you will be able to transfer playlist from iTunes to iPhone. This will allow iTunes to constantly transfer all the music added to it, as well as the existing ones, into the connected device.
The advantage of this is that once you’ve set it all up, all you have to do is connect your iPhone every now and then and all the music will be transferred.
If you’re the type to worry about transferring the wrong music, then perhaps it would be better to avoid one-time methods, which is precisely what we’ll be talking about.
Our second entry involves using the famous “drag and drop” method that is used by many people. It is where you drag the file from one location and drop it into where you’d want it to be. Since we are using iTunes, the steps are a bit different:
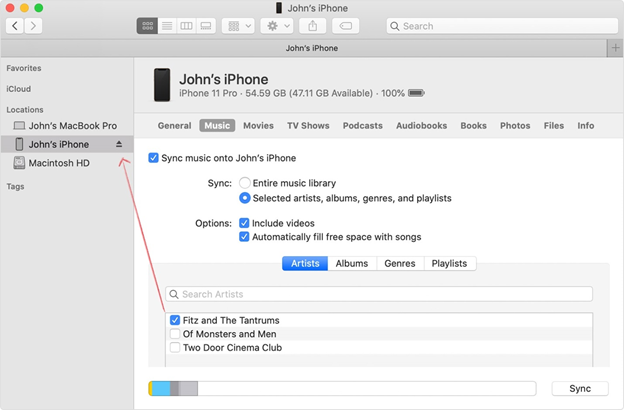
It’s very straightforward so it’s one of the most commonly used tactics by most beginners. However, since it’s not a one-time process, you’d have to do this every time you want to transfer playlist from iTunes to iPhone.
On the other hand, it is not suitable for transferring a bulk of playlists all at once. Still, this method usually doesn’t show any issues so it should be good enough for most situations.
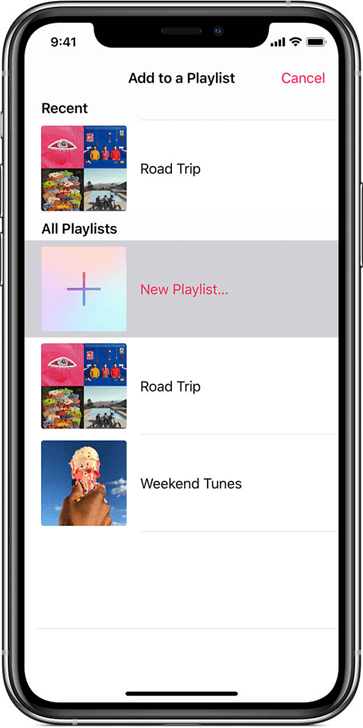
Although I said that the drag and drop are the simplest, it’s definitely not the only way to transfer playlist from iTunes to iPhone. There are tons of features that you’ll find in the app, and one of them happens to be the Add To… button built for transferring music. Here’s how you can use this feature:
Note: This will prompt iTunes to enter a mode where the window is split into two, the left being the files that you can transfer, and the right being the area where you can transfer files to.
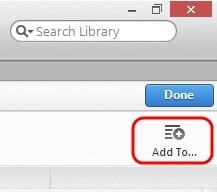
Compared to the “drag and drop” method, this is very similar. However, the difference lies between the conveniences of this method, as it allows you to easily transfer playlists from iTunes to iPhone in bulk.
Our fourth entry has something to do with iTunes, but it’s not exactly going to use iTunes directly. In other words, we are not going to need to open iTunes, but we need it installed in our device for this method to work.
It involves making use of another tool. It can be the Mail app, Messages app, or anything else, as long as it is able to transfer playlist from iTunes to iPhone. Here’s how it works:
Note: Some playlists, when created, also creates a file that contains all the songs included in that playlist.
Most of the time, the process will go smoothly as long as you follow the instructions. However, that’s not always the case. For that reason, we have another way to transfer playlist from iTunes to iPhone that can compensate for the failure of sharing playlists.
Perhaps the most proper way to transfer playlist from iTunes to iPhoneis by exporting/importing your music library. After all, it was built solely for transferring groups of files, which seems to be the perfect description of playlists.
Exporting the library means extracting all the files from a selected section into one file. Fortunately, you can do it to a playlist so that only the music is included. Follow these steps to export/import your library:
Note: This will create an XML file that will contain the playlist of your selection, which you can then transfer to other devices.
With this, you will be able to successfully transfer playlist from iTunes to iPhone without much effort. Since it’s the official way to transfer playlists, it shouldn’t be too bother for you since there will be few to no issues involved.
While it may be more than enough to have five methods at your disposal, it doesn’t hurt to have one more. With that said, if you think you will find it hard to transfer playlist from iTunes to iPhone with these methods, I recommend FoneDog Phone Transfer.You can also use it to simply transmit music.
FoneDog Phone Transfer is a tool that specializes in transferring all kinds of files, be it individual songs or playlists. Additionally, it supports the transfer of files between all kinds of devices such as Mac, PC, Android, and iOS. Simply put, it is the best tool to help you achieve your goal.
Phone Transfer
Transfer files among iOS, Android and Windows PC.
Transfer and backup text messages, contacts, photos, video, music on computer easily.
Fully compatible with iOS 13 and Android 9.0.
Free Download

Creating playlists is certainly not easy, but the same can be said with transferring them. However, now that you’ve read this article, you should now have an idea of how to transfer playlist from iTunes to iPhone.
With all things said, you shouldn’t be too complacent. There are times when simply transferring files leads to disasters and in the worst case, data loss. As such, I suggest that you be careful when following these methods.
People Also ReadHow to Transfer Ringtones from iPhone to iPhoneHow to Transfer Text Messages from iPhone to Computer for Free
Leave a Comment
Comment

Technical Expertise for PC/Website Optimization
One of my passion is to develop software of my own
I write articles to share knowledge about IT technology and some experience in developing my own software, and developing my own software is one of my passions for work.
Phone Transfer
Transfer data from iPhone, Android, iOS, and Computer to Anywhere without any loss with FoneDog Phone Transfer. Such as photo, messages, contacts, music, etc.
Free DownloadHot Articles
 /
/
INTERESTINGDULL
/
SIMPLEDIFFICULT
Thank you! Here' re your choices:
Excellent
Rating: 4.7 / 5 (based on 62 ratings)
