FoneDog Screen Recorder
FoneDog Screen Recorder
Special Offer
Special Offer


By Vernon Roderick, Last updated: September 29, 2019
Time and time again, we feel the need to transfer your files from one place to another. Whether you want to learn how to transfer files from Android to PC, iOS to Android, Mac to Android, and more.
Transferring files is a vital task for everyone involved with their gadgets. After all, we are in the data generation and files are the lifeline of many people. It can affect the outcome of an important event, whether it’s in your school, job, or with your relationships.
Every time, we see it as a tedious task and we keep on searching for a shortcut that seems to be non-existent. The good news is, there is a shortcut, but they tend to have extreme regulations. Every method to transfer files is limited, so there’s nothing unnatural with this.
With that said, this article will be tackling different methods to transfer files from Android to PC with its benefits, guide, and disadvantages.
But before that, let’s first learn more about the fundamentals of file transfer and why you’ll have to spend more time than you think to learn how to transfer files from Android to PC.
What You Need to Know About File TransferWay 1: How to Transfer Files from Android to PC (Recommended)Way 2: Transfer Files from Android to PC with a Google AccountWay 3: Transfer Files from Android to PC via BluetoothWay 4: Transfer Files from Android to PC with a USB CableWay 5: Transfer Files from Android to PC Using an SD CardThe Bottom Line
As you may already know, file transfer is what we call the copying or moving of files from one computer or another. By computer, we mean PC, desktops, mobile devices, and more.
File transfer can be done through different mediums. Some of the most popular ones are file transfer through the internet connection or a Local Area Network. The best thing about file transfer is that it can operate remotely or locally.
In addition to the different mediums, there are also different methods on how to transfer files. This can depend on your device as well as with the type of file, be it a photo, video, documents, and more.
With that being said, there are methods that transfer files regardless of the file types. However, as we’ve said, it can also depend on your device.
Since some device isn’t compatible with the methods we’ll be discussing, it’s important to update your Android by following these steps:
If there are any available updates for your Android, it will send you a message prompting for an update. If there isn’t a message, you can assume that there are no updates available.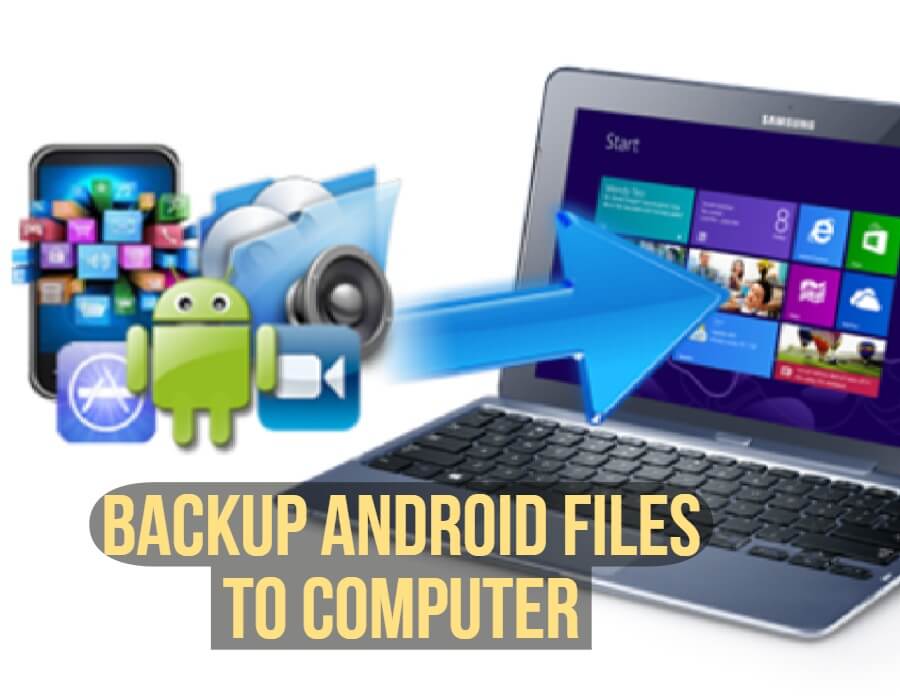
There are many ways to transfer files from Android to PC. However, some of them have limitations that will make things harder for you.
As such, there is an argument as to why it is important for specialized tools to exist if there are built-in features.
Now that you have a fair grasp of what FoneDog Phone Transfer is capable of, it might be time to actually learn how to transfer files from Android to PC using FoneDog Phone Transfer.
Before anything else, you should remember that there are limits to FoneDog Phone Transfer. Although it’s a great solution, you shouldn’t expect things to go about your way.
Either way, here’s a look at how you can transfer files from Android to PC using FoneDog Phone Transfer.
You can download FoneDog Phone Transfer by going to this link: https://www.fonedog.com/phone-transfer.
After downloading the file, install the program on the computer you want your files to be transferred. Once FoneDog Phone Transfer is installed on your computer, launch the software.
With a USB cable, connect your Android device to the PC with FoneDog Phone Transfer open. We recommend you use a Type-C USB cable to do this.
However, the software won’t be able to recognize and scan your Android device just yet. First, you’ll have to enable a feature available to all Android phones.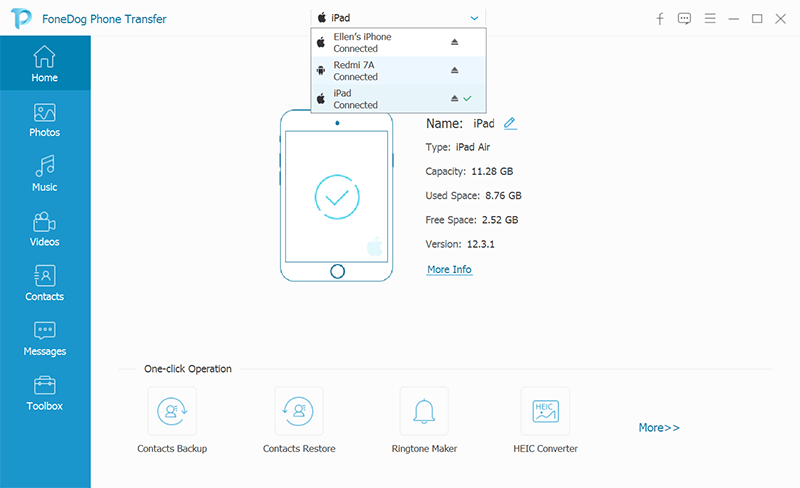
USB debugging is required to be enabled for any Android device to connect to another device through a USB cable.
To enable USB debugging, follow these steps carefully:
With USB debugging enabled, FoneDog Phone Transfer should be able to recognize your Android device.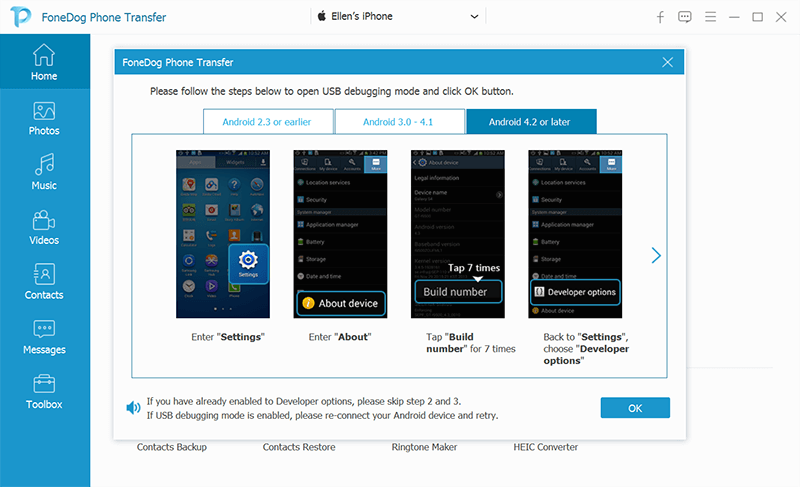
In the selection pane at the left side of the window, you can choose whether you want to transfer a photo, music, videos, contacts, or messages.
Click on one of these to get a list of files that belong to the file type. Then, you’ll get a list of files in the selection panel on the right side.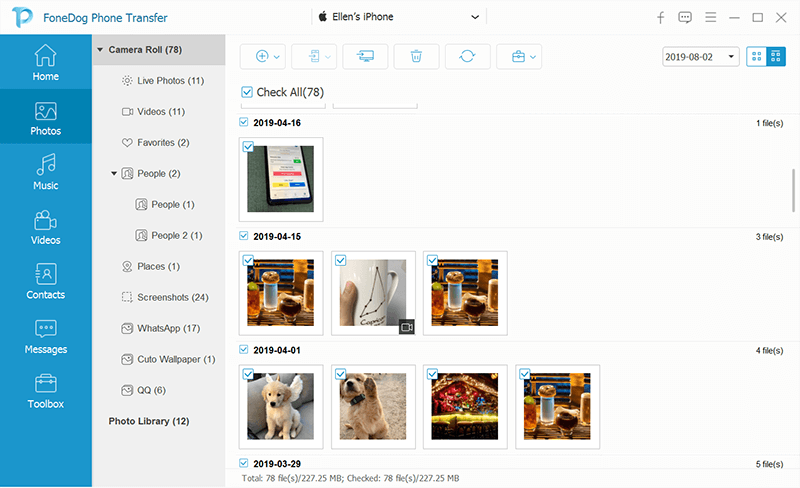
With the selection panel on the right side, you will see a list of files. From there, you can select the files you want to transfer.
You can do this by checking the checkboxes at the top-left corner of the file.
The Export to PC button can be found at the top of the selection pane where you selected the files to transfer.
This is the third button from the left. By clicking on this, you will start the file transfer process. With that, you no longer have to do anything other than wait for it to complete.
At this point, you now know how to transfer files from Android to PC using FoneDog Phone Transfer. However, for the sake of giving you more options, we’ll be talking about the alternative methods.
The Backup & Sync is a feature in Android phones that are accessible in the Google Photos app. Although there is a backup service in this feature, we’ll only be talking about the sync part.
Syncing is the process of copying everything that is done in one device by another. This means that if you have Backup & Sync on your Android and your computer, the files added to your phone will immediately be transferred to your PC.
The process is straightforward and all you have to do to transfer files from Android to PC is by turning on the Backup & Sync. Here’s how you can do this.
Once the feature is enabled on your Android, you should then be able to transfer files from Android to PC. Here is how you can access the files using your PC.
This process can be done to transfer files from Android to PC or from PC to Android. Either way, it’s an effective way to transfer files easily.
However, you will need an internet connection to make this possible. Since this is the case, we’ll be introducing yet another option that doesn’t need internet.
Bluetooth is a very popular feature on smartphones that are used for file transfer. It is a tool that has a short-range, yet is able to transfer information wirelessly.
The most important part is that it is available on Android smartphones as well as PCs, so this would be a great way to transfer files from Android to PC.
First things first, make sure that your PC has a built-in Bluetooth service. To make sure there is one, follow these steps:
If there is a built-in Bluetooth device, then follow these steps:
With this, you’ll be able to transfer individual files or even multiple files at the same time. The only downside is that it would take a while for it to transfer files from Android to PC.
With that said we’ll proceed to another option that doesn’t use internet connection and can transfer files from Android to PC quickly.
A USB cable is a piece of very handy equipment for Android users. Not only can it be used to charge your battery, but it can also be used to transfer files from Android to PC.
In addition, compared to other means, it can do the job faster and there are fewer steps to follow. Speaking of which, here are the steps you need to follow in order to transfer files from Android to PC using a USB cable:
At this point, you would already have a copy of the file from your Android in your PC. Now we go to our last option transfer files from Android to PC.
This is a less popular way to transfer files from Android to PC. Either way, it’s still a plausible option if the rest of the methods aren’t working for you.
An SD card is just like the USB cable and Bluetooth, an electronic accessory made for file transfer. But this time, it’s also for storage. Here you can store files on your Android in case your internal storage is already full.
Without further ado, here are the steps you need to follow to transfer files from Android to PC using an SD card.
If your file is already in the External Storage, then you can skip these steps and move on to the next steps:
By now, you should already know how to transfer files from Android to PC using SD cards. Although it can be costly, it is still a convenient accessory since it allows for transfer and storage.
At this point in this article, you already know five methods to transfer files from Android to PC. Sure, some are difficult to execute. Some will take hours to complete. And others are faulty, sometimes it works, sometimes it doesn’t.
However, they are still options that will help you fix your problem. With that being said, it’s important to understand that there is no one-size-fits-all method.
Each one of these works best in different situations. It’s only up to you how to figure out how to maximize these methods to transfer files from Android to PC.
Leave a Comment
Comment

Technical Expertise for PC/Website Optimization
One of my passion is to develop software of my own
I write articles to share knowledge about IT technology and some experience in developing my own software, and developing my own software is one of my passions for work.
Phone Transfer
Transfer data from iPhone, Android, iOS, and Computer to Anywhere without any loss with FoneDog Phone Transfer. Such as photo, messages, contacts, music, etc.
Free DownloadHot Articles
 /
/
INTERESTINGDULL
/
SIMPLEDIFFICULT
Thank you! Here' re your choices:
Excellent
Rating: 4.5 / 5 (based on 91 ratings)
