By Adela D. Louie, Last updated: April 19, 2024
Are you ready to preserve those unforgettable Apple TV experiences? In this comprehensive guide, we unveil the ultimate methods on how to record Apple TV with your favorite shows, games, and content on Apple TV effortlessly. Whether it's a jaw-dropping scene from a blockbuster movie or a triumphant gaming achievement, we've got you covered.
Discover step-by-step instructions, top-notch tools, and insider tips to ensure you never miss recording TV for must-watch moment again. Let's delve into the world of seamless Apple TV recording and empower you to save and relive your cherished entertainment experiences!
Part 1. Methods on How to Record Apple TV ContentPart 2. Best Way to Record Apple TV - FoneDog Screen RecorderConclusion
Part 1. Methods on How to Record Apple TV Content
The methods to record Apple TV content can vary depending on the device you're using. Here are the steps on how to record Apple TV content on different devices:
Method 1: Using Apple TV Built-in Features
Here are steps on how to screenshot and record on Apple TV (Apple TV HD or Apple TV 4K).
Steps for Screenshots:
-
- Begin by selecting the specific content on your Apple TV that you intend to capture.
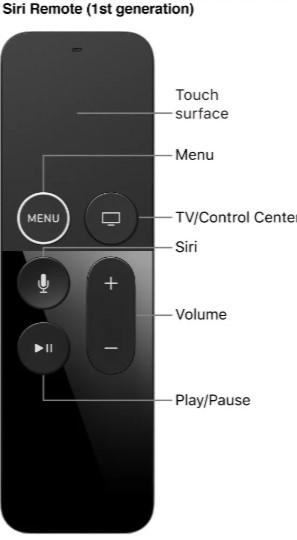
- While the chosen content is playing, grab your Siri Remote and locate the "TV/Home" button.
- Press and hold down the "TV/Home" button on your Siri Remote simultaneously with the "Play/Pause" button.
- Maintain both buttons pressed until you notice a visual cue, indicating that the screenshot has been successfully captured.
- Once the screenshot process is complete, the captured image will automatically be saved and stored within your Photos app, ready for viewing or further use.
-
Steps for Screen Recording:
- To begin, access the settings on your Apple TV by navigating through the menu options. Start by selecting "Settings" followed by "Control Center."
- Once inside the "Control Center" settings, look for the option to customize controls. If you do not find "Screen Recording" among the listed controls, add it by following the provided instructions.
- After customizing the controls and ensuring that "Screen Recording" is included, exit the settings menu.
- To initiate the screen recording process, access the Control Center on your Apple TV. Depending on the type of remote you're using, swipe downwards either from the top-right corner of the screen (for Siri Remote) or from the top edge of the screen (for Apple TV Remote).
- Within the Control Center interface, locate and tap on the designated "Record" button to trigger the recording functionality.
- Follow any on-screen prompts or instructions that appear to confirm and start the recording session.
- To conclude the recording, return to the Control Center and locate the "Stop" button. Tap on it to cease the recording process and save the captured content.
Method 2: Using External Devices
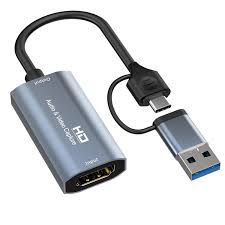
Option 1. HDMI Capture Card
Here is how to use HDMI Capture Card to record Apple TV.
Requirements: Apple TV, HDMI capture card, HDMI cables, computer/laptop, recording software.
-
- Begin by securing an HDMI cable that will serve as the connection between your Apple TV and the capture card. Take one end of the HDMI cable and plug it into the HDMI port located on your Apple TV device.
- Proceed by taking the opposite end of the HDMI cable and insert it into the corresponding HDMI input port on the capture card device.
- Subsequently, establish a connection between the capture card and your computer. This can be achieved by using a USB cable to link the capture card to an available USB port on your computer.
- Once the physical connections are in place, launch the recording software installed on your computer. This software should be capable of capturing video input from external devices.
- Within the recording software's interface, navigate to the settings or preferences related to video sources. Locate and select the capture card as the primary video source for recording purposes.
- Confirm the selection of the capture card as the designated video input source within the recording software.
- Finally, initiate the recording process using the controls provided in the software's interface. This action will commence the capture of content from your Apple TV through the connected capture card, effectively recording the desired video or visuals.
Option 2. Third-party Application
You can also use a third-party application to record Apple TV. Here is how:
Requirements: Apple TV, computer/laptop, third-party recording software installed (e.g., OBS Studio, Elgato Game Capture, etc.).
-
- Commence by initiating the installation process of the recording software onto your computer system. Follow the provided installation instructions meticulously to ensure a successful setup.
- Next, procure suitable and compatible cables, such as an HDMI cable, to establish a physical connection between your Apple TV device and your computer.
- Connect one end of the compatible cable, like the HDMI cable, to the appropriate port on your Apple TV device.
- Connect the opposite end of the cable to the corresponding input port on your computer, facilitating a direct linkage between your Apple TV and the computer.
- Launch the previously installed recording software on your computer. The software should offer functionalities to capture and record video input from external sources.
- Within the interface of the recording software, navigate to the settings or options dedicated to selecting the video source. Choose and designate your Apple TV as the primary video source to be recorded.
- Once the Apple TV is selected as the video input source, configure the recording settings according to your preferences. Adjust settings such as recording quality, desired video format, and designate a specific destination or folder for storing the recorded content.
- After ensuring that the preferences are set to your desired specifications, initiate the recording process within the software's interface. Utilize the controls provided by the software to commence the recording session, capturing the content streamed from your Apple TV onto your computer.
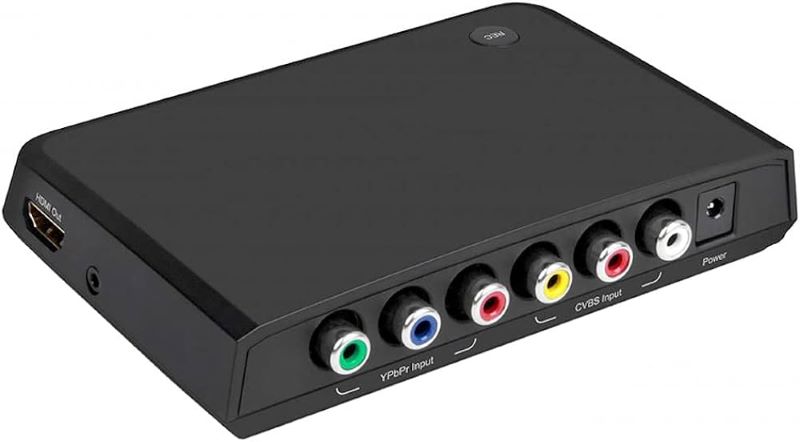
Option 3. DVR (Digital Video Recorder)
Requirements: DVR device compatible with Apple TV.
-
- Set up the DVR (Digital Video Recorder) device in accordance with the provided instructions that accompany the device.
- Establish a physical connection between your Apple TV and the DVR device. This connection allows the transmission of the audio and video signals from your Apple TV to the DVR for recording purposes.
- Utilizing appropriate cables or connectors, link your Apple TV to the designated input ports on the DVR device, ensuring a secure and stable connection.
- Familiarize yourself with the user interface or instructions provided by the DVR device.
- Access the DVR's interface or menu system, following the instructions provided in its documentation or displayed on the screen.
- Navigate through the options or menus to access the functionalities related to scheduling or initiating recordings.
- Select the desired content or program that you intend to record. Follow the prompts or instructions displayed on the screen to schedule a recording session for the specified content.
- If immediate recording is preferred, choose the option to start the recording instantly.
- Ensure that the DVR is set up and functioning correctly to capture and save the designated content from your Apple TV as intended, based on the instructions provided with the DVR device.
If you want to record TV shows without DVR, try the above methods or the best method below.
Part 2. Best Way to Record Apple TV - FoneDog Screen Recorder
FoneDog Screen Recorder is a versatile and efficient software tool designed to capture screen activities, including those on Apple TV, providing users with a seamless way to record their favorite content from the Apple TV device. It offers a user-friendly interface and various features that make it a recommended choice for recording Apple TV content. FoneDog Screen Recorder stands out as an excellent solution for capturing Apple TV screen activities due to its:
- Versatility: It supports recording from different devices, including Apple TV, making it an ideal choice for users looking to capture their favorite shows, movies, gameplay, or presentations.
- Ease of Use: With an intuitive interface, it simplifies the recording process, allowing users to start and stop recordings effortlessly.
- Customization Options: Users can adjust settings such as video quality, audio input, and output formats, ensuring that the recorded content meets their preferences and requirements.
- Reliability: It offers stable performance and high-quality output, ensuring a smooth and consistent recording experience.
Steps to Record Apple TV via FoneDog Screen Recorder:
 Free Download
For Windows
Free Download
For Windows
 Free Download
For normal Macs
Free Download
For M1, M2, M3
Free Download
For normal Macs
Free Download
For M1, M2, M3
- Visit the official FoneDog website or the trusted software download platform. Download and install the FoneDog Screen Recorder software on your computer.
- Using an HDMI cable, connect your Apple TV to your computer. Open the software on your computer.
- Choose the recording mode from the options available (e.g., Full Screen, Custom, etc.).
- Configure settings such as audio source, video quality, file format, and destination folder according to your preferences.
- Ensure your Apple TV is displaying the content you wish to record. Click on the "Start Recording" button within the interface to initiate the recording process.
- Once you've captured the desired content, click the "Stop" button to end the recording. The recorded video will be saved to the designated folder on your computer.
- Review the recorded video. Edit the video if needed using compatible video editing software.The recorded video is now available for playback, sharing, or any other intended use.

People Also Read2024 Guide: How Do I Record on Spectrum without DVR?[2024] How to Record Shows on YouTube TV - Easy Steps
Conclusion
In conclusion, recording on Apple TV offers various methods, including built-in features, external devices, and software. Ensure legal compliance, adequate storage, and quality settings for successful recording. Future advancements may bring AI-driven, streamlined recording tools, enhancing efficiency and expanding compatibility with evolving media platforms. That's all! Happy Reading!


 /
/
