FoneDog Screen Recorder
FoneDog Screen Recorder
Special Offer
Special Offer


By Vernon Roderick, Last updated: September 26, 2017
Today we will learn how to fix iTunes Error 4013 (iPhone Error 4013) and iTunes Error 4014.in iPhone or iPad.
Most iPhone users today are now using the latest iOS 11 that offers many new features to make significant changes on how to further use an iOS device. However, there are still some people who encounter several issues brought by the iOS 11 upgrade, which hinder them from using their iPhones or iPads.
Among these issues are the occurrence of error 4013 and 4014. If you’re reading this, you must be one of those who is having trouble fixing these issues. Read through and perform our solutions below to finally fix such problems that are bugging you after upgrading to iOS 11.
Fix iTunes Error 4013 and iTunes Error 4014
Part 1: Reasons for iPhone Error 4013/4014 to Happen in iPhone/iPadPart 2: Common Solutions to Fix Error 4014 on iPhonePart 3: Fixing Error 4013/4014 using FoneDog toolkit – iOS System RecoveryPart 4. Video Guide: How to Resolve iPhone error 4013 or iTunes error 4014 in iPhone/iPad
The cause of both the error 4013 and 4014 errors are known to be difficult to identify, but many went looking into possible scenarios that might have contributed to such issues. Below are some of these cases where the said errors suddenly appear:
It’s possible that iPhone error 4013/4014 will appear when the iOS device’ Lightning port isn’t working properly and consistently.
The device’s hardware might be detecting a problem on this Qport, which in turn will give an alert to the user that there’s a problem with it through displaying the iPhone error 4013/4014.
It’s really difficult to know how these errors are related to the malfunctioning lighting port, but it’s indeed possible.
Using applications that rely heavily on stable Internet connection can bring out the errors 4013 and 4014 if you don’t have that kind of connection in the first place.
This scenario is also very likely to happen when you’re trying to get a recent iOS update but you’re having poor network connection – resulting in an iTunes error 4013/4014 that indicates a problem has occurred with your device.
One or both errors may also be encountered during an iOS update when the iOS device being upgraded is running low in memory.
Though low storage space seems to be far from being a cause to the error 4013/4014, it won’t hurt trimming down this factor – remove all unused files and applications from your iOS device before upgrading it to a certain iOS update.
Both errors don’t only appear in iOS devices but also in the iTunes application, which can happen due to incorrect installation and some misconfigurations done with it.
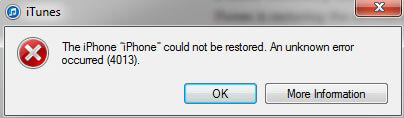
When you connect your iOS device to a computer where the iTunes app is installed, you can detect that there’s a problem when it pops out this message: “The iPhone “iPhone” could not be restored. An unknown error occurred (4013/4014).”
Fortunately, there are several ways you can do to fix the iPhone error 4013 or iTunes error 4014 on your iOS device. Follow through below to find the common solutions that can be performed in fixing the problem. See from each end which solutions will work for you:
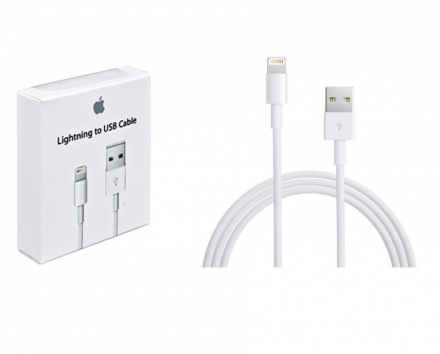
Sometimes, the iPhone error 4013 or iTunes error 4014 can be a hardware-related issue, especially when your iOS device has a faulty lightning port or you’ve been constantly using a low-quality USB connector (or one that’s already damaged).
If this is your case, the iPhone error 4013 or iTunes error 4014 can possibly be an alert to you that iTunes has trouble recognizing your device when you plug it in the computer.
Perform the following to find out if your device has problems with the lightning port:
The other side of the story is when it’s iTunes that can’t recognize your iOS device because of the way it was installed to your computer. You can determine if your iTunes is incorrectly installed or configured by doing the following:
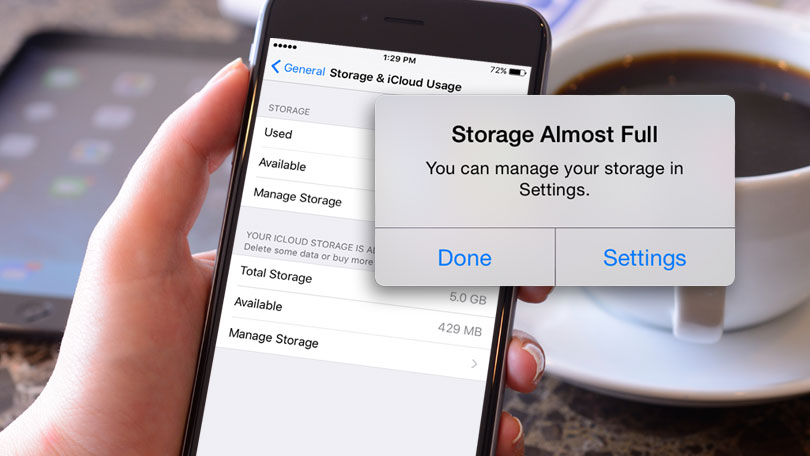
In the event that you stumble on the iPhone error 4013 or iTunes error 4014 while updating your iPhone or iPad’s iOS version, chances are you might not have enough storage space for the upcoming update.
Review all the files and applications installed on your device and determine which ones are not being used anymore.
Delete those files and uninstall those apps to free up sufficient space to accommodate the iOS update. But before doing any of these clean-up procedures, make sure to have a backup of them first.
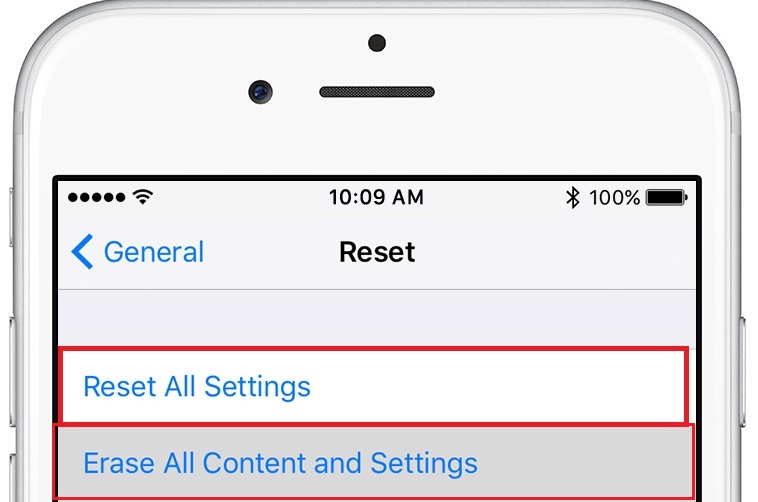
It’s also possible that the error 4013 or error 4014 is caused by some settings on your iOS device that might have already been outdated, misconfigured or incorrect during their initial setups.
Such error may be eliminated by doing a reset on all the settings from your iOS device; however, this procedure will erase all your files and data. Perform a backup of your device first before doing the reset, which can be done from Settings > General > Reset > Reset All Settings.
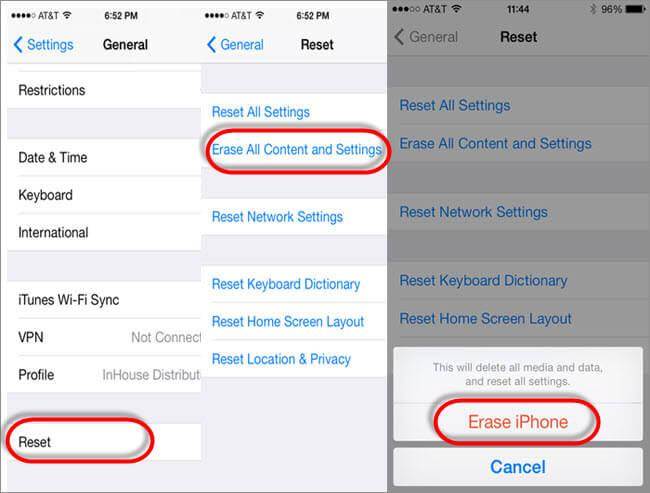
Similarly with resetting all settings on your device, you can also do a factory reset to completely start anew in using your iPhone or iPad. To do these, perform the following:
The Device Firmware Upgrade mode or DFU is a state of an iOS device wherein it makes it restorable regardless of what software conditions the device is currently at.
Entering DFU mode is usually performed when there are iOS issues being encountered, like the errors 4013 and 4014.
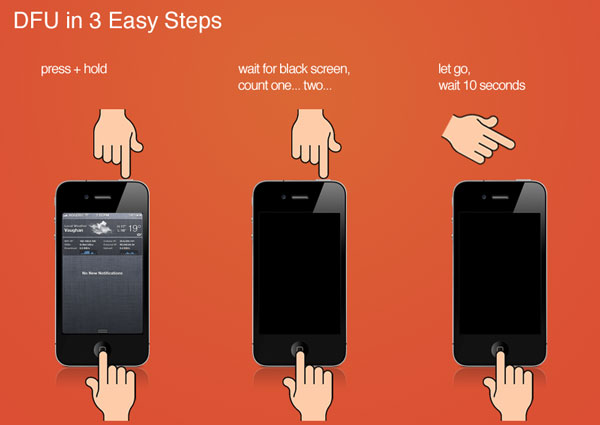
Enabling DFU mode on your iPhone or iPad can help you in restoring your phone back to its brand new state, but be aware that doing this will wipe out all its files, data, and settings.
To enter DFU mode and restore your device using iTunes, perform the following:
More DFU information you can see the articles:
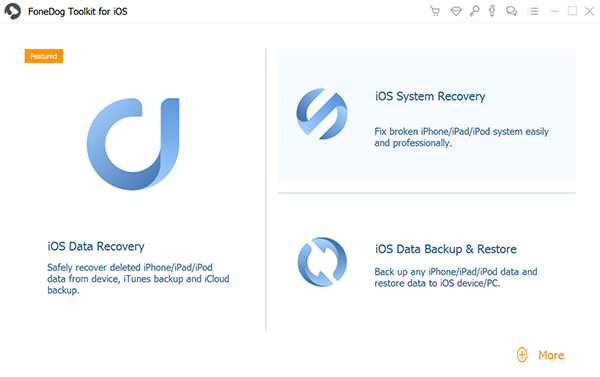
If none of the common solutions above worked, we introduce to you our FoneDog toolkit – iOS System Recovery. It’s a tool packed with comprehensive solutions covering different issues in iOS and Android devices.
For resolving the iPhone error 4013 or iTunes error 4014, you’ll need to install this program and use its module called the iOS System Recovery, which works deep down your iOS device’ software component and perform a system recovery. It can also be used to recover your photos, contacts, text messages.
Our FoneDog toolkit can be downloaded from our website. Get a copy and install it on your desktop computer or laptop. Click on the download button and free try it now!
To use our FoneDog toolkit to resolve the problem, follow the steps below:
The module of our FoneDog toolkit that you’ll need for fixing the error 4013/4014 is the System Recovery module. To locate this, find the menu tile that represents a gear icon with a wrench inside of it. You’ll be brought to the next page after clicking this menu.
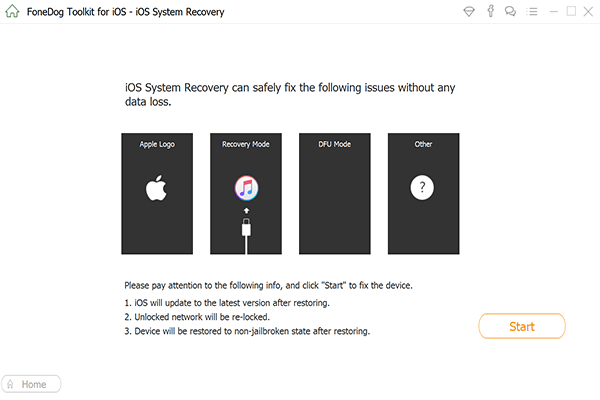
Before proceeding to FoneDog toolkit’s system recovery process, we ask you to take note of some important reminders listed below. Once noted, click the “Start” button to proceed to the next page:
1) Performing the system recovery through our FoneDog toolkit won’t erase all your iOS device’ files and data, but it’s still best to perform a backup of them first before proceeding to the next step.
2) Your iOS device will be set to “locked” if it’s currently unlocked.
3) Your iOS device will be set to “non-jailbroken” status if it’s currently jailbroken.
On step 2, we asked you to ensure that your iOS device is well recognized by our FoneDog toolkit, and that is because, in this step, we’ll now get the firmware package that is most suitable to be installed on your iOS device.
The current page you’re seeing from our FoneDog toolkit has dropdown fields with preset values that represent your iOS device’ specifications, and by ensuring that step 2 has been completed, FoneDog toolkit will automatically assign such specs to these fields and will be used for locating the correct firmware.
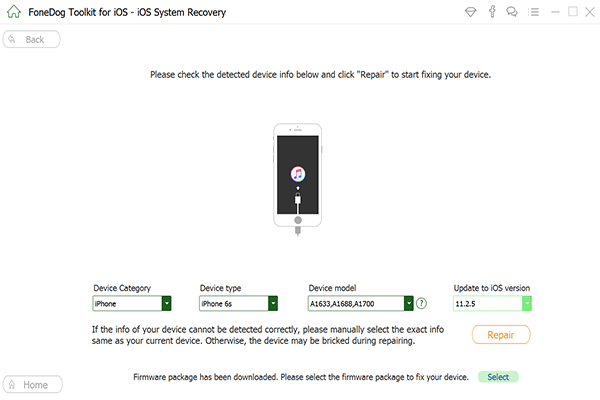
Proceed in getting the firmware by clicking the “Repair” button. This will require you to wait for a couple of minutes until the firmware has been downloaded.
Aside from this, there’s also an alternative way to get the most appropriate firmware package for your device. You can actually download the firmware on your own using the browser of your choice.
And when you already have a copy of it, click the “Select” button to command FoneDog toolkit to use that firmware package in the recovery process.
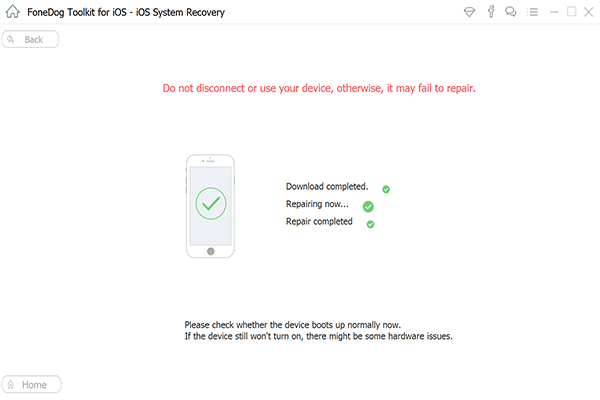
After getting the right firmware package for your iOS device, the system recovery process will immediately begin.
Our FoneDog toolkit will work on this step by applying the firmware package to your iOS device and give it a new iOS system.
You’ll also need to wait for a few minutes until this procedure gets done. Also, your iOS device will automatically restart after the recovery is finished.

Now that your iOS device is already up and running, you can now try performing some essential tasks on it that were previously producing the reported iPhone error 4013 or iTunes error 4014. One thing you can do is to update it to the latest iOS version.
The iTunes error 4013 and error 4014 are both tricky issues on every iOS device. It can be very upsetting to encounter such issues especially when you’re trying to upgrade your iPhone or iPad to the latest version.
After performing the common solutions above or by using our FoneDog toolkit, we hope that you won’t encounter these errors again as you try upgrading to the latest iOS 11 version or when performing crucial tasks on your device.
Leave a Comment
Comment

Technical Expertise for PC/Website Optimization
One of my passion is to develop software of my own
I write articles to share knowledge about IT technology and some experience in developing my own software, and developing my own software is one of my passions for work.
iOS System Recovery
Repair various iOS system errors back to normal status.
Free Download Free DownloadHot Articles
 /
/
INTERESTINGDULL
/
SIMPLEDIFFICULT
Thank you! Here' re your choices:
Excellent
Rating: 4.5 / 5 (based on 94 ratings)
