FoneDog Screen Recorder
FoneDog Screen Recorder
Special Offer
Special Offer


By Vernon Roderick, Last updated: April 23, 2021
An iPod is an iOS device produced by Apple. It is a portable media player having the same operating system as iPhone and iPad. iPod touch is the lightest and thinnest iOS device. With iPod, you can play music, games, and videos, communicate through messages and browse on the web. You can also transfer files to iPod from other iOS devices. The guidelines are presented in this article providing the different ways on how to transfer music to iPod. A highly recommended tool called FoneDog Phone Transfer is also tackled in this tutorial guide which can help you do file transfer in a convenient manner and secure data.
Part 1. The Best Software to Transfer Music to iPodPart 2. How to Transfer Music to iPod With USB ConnectionPart 3. How to Transfer Music to iPod over Wi-Fi ConnectionPart 4. How to Transfer Music to iPod Using AirDropPart 5. How to Transfer Files from Mac to iPod Using iCloudPart 6. In Summary
When you need to transfer music to iPod, there is a better way to do it. Introducing FoneDog Phone Transfer program which allows you to transfer and manage files between various devices with different systems such as iOS, Android, Windows, and Mac with a few clicks. You can transfer many types of files such as music, videos, images, contacts, and many more. FoneDog Phone Transfer assures you that your data is safe and you can easily switch files between devices. For example, you can transfer iPhone files to mac for free, etc.
The tool works in both Mac and Windows OS. You can download a free trial version on its website and a 30-day money-back guarantee is offered for the software purchase.
Phone Transfer
Transfer files among iOS, Android and Windows PC.
Transfer and backup text messages, contacts, photos, video, music on computer easily.
Fully compatible with iOS 13 and Android 9.0.
Free Download

Here are the steps on how to use FoneDog Phone Transfer:
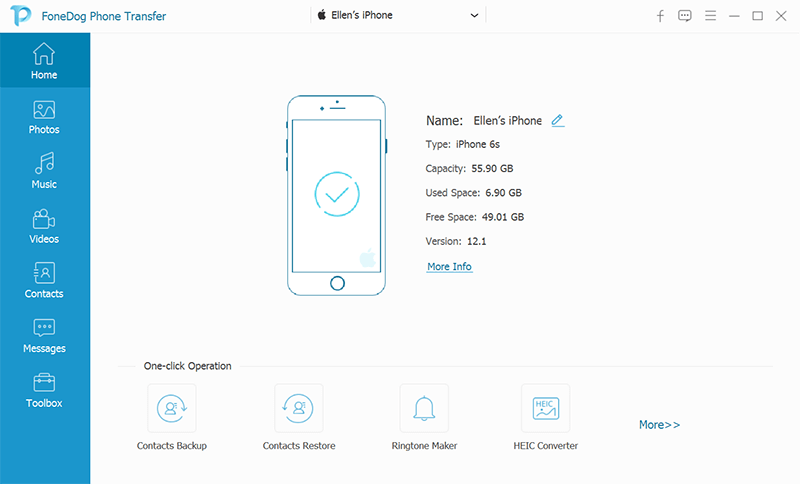
Launch the FoneDog Phone Transfer app on your Windows or Mac PC when you are done downloading and installing it. Open the app via the desktop shortcut icon, pinned icon on the taskbar, or from the Start menu programs. Next, plug in your iPod touch to the PC.
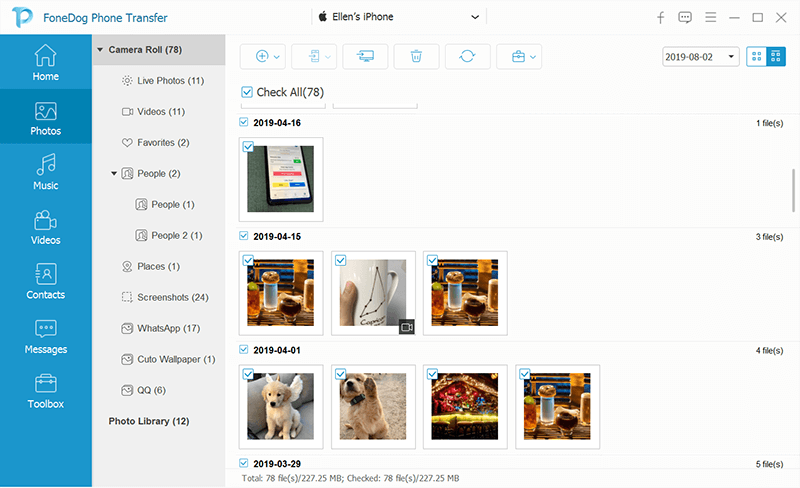
On the left sidebar of the window, click the types of file that you want to transfer such as Music. Next, select the location or category of the files. Each file can be previewed to check its contents before the transfer is started.
Alt: Select and Preview Files
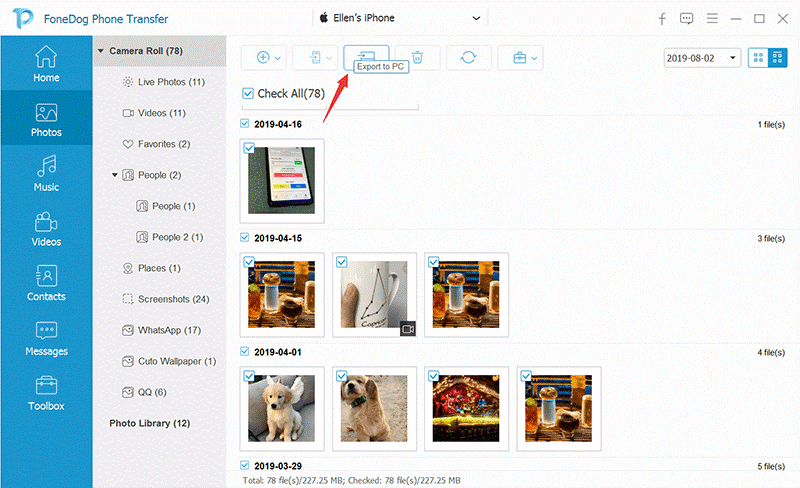
Once decided, select the music files that you want to transfer to your iPod touch. Click on Export to Device to start with the file transfer. Wait until the process is done. File transfer can be done between iOS, Android, or computer devices.
This section provides the detailed steps to guide you on how to transfer music to iPod via iTunes File Sharing apps or Finder through the use of a USB connection. Make sure that the iTunes app is in the most recent version. Your iPod device must work with File Sharing and must also be in the latest iOS version.
Step 01: On your PC, launch the iTunes application.
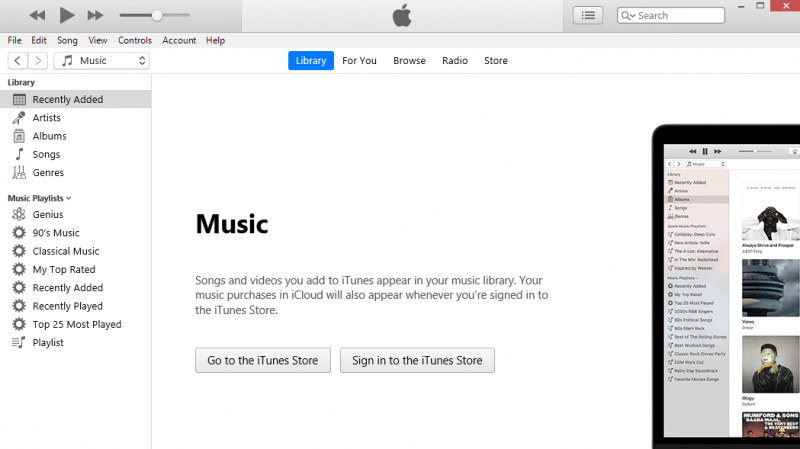
Step 02: iTunes will check for the most recent updates of the application. It will prompt you to install the latest version. Follow the instructions on the screen until the installation is done.
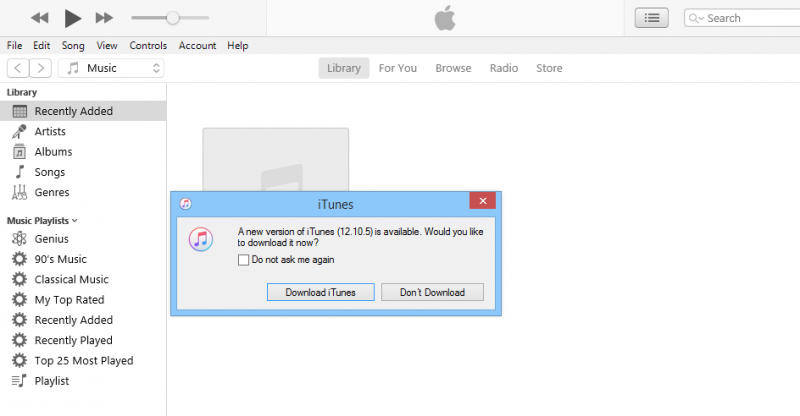
Step 03: If there is no message that pops up, go to the iTunes menu in Mac and select Check for Updates.
In Windows, go to the Help menu and select Check for Updates.
Transfer music to iPod using iTunes file sharing feature. If the File Sharing option is not available on the left sidebar, it means that your iPod has no file-sharing apps.
Step 01: Launch the iTunes application on your PC.
Step 02: Plug in your iPod device to your PC with the use of a USB cable connection.
Step 03: Tap on “Trust this computer” on your iPod device when prompted.
Step 04: When iTunes recognizes your iPod and the device connects successfully, click on the iPod Device button found on the upper left corner of the window.
Step 05: On the left sidebar, click on File Sharing.
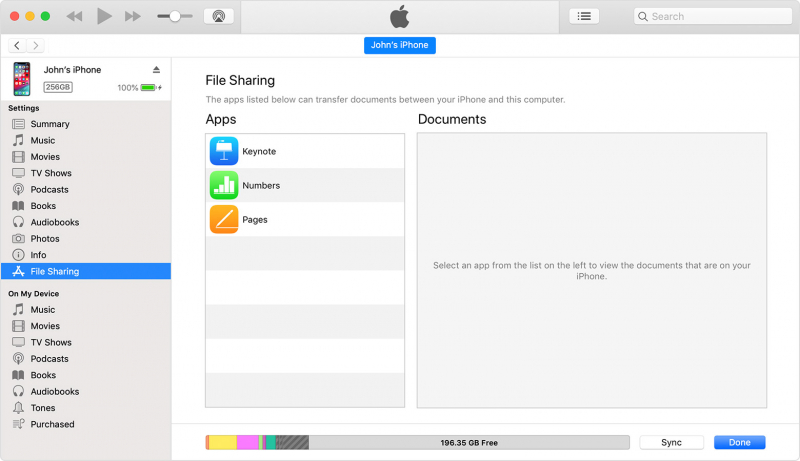
Step 06: On the right section, select the file-sharing app on your device to transfer music to iPod.
Step 07: On the Documents list, click on the Add button.
Another way to transfer music to iPod is to drag and drop the music files from your PC drive to the Documents list and copy them to iPod.
Step 08: Select the music files that you want to transfer to iPod.
Step 09: Click on the Add button.
Step 10: Next, click Sync.
Step 11: A progress bar appears about the status of file sharing. Wait until the file transfer is done and ensure there is no disruption during the process.
Step 01: Plug in your iPod device to your PC using a USB cable or a Wi-Fi connection.
Step 02: Open Finder.
Step 03: Under Locations, select your iPod device.
Step 04: On the top bar, click on the Files button which will return the file-sharing apps on your device.
Step 05: Choose the music files that you want to transfer to iPod and drag the file from the Finder window to the app.
Step 06: Click on the arrow beside the app name to show the files that have been transferred.
Step 01: Open the iTunes application on your PC.
Step 02: Plug in your iPod device to your PC using the USB cable connection.
Step 03: Tap on “Trust this computer” on your device when prompted.
Step 04: When iTunes recognizes your iPod and the device connects successfully, click on the iPod Device button found on the upper left corner of the window.
Step 02: In iTunes, click on the File menu.
Step 03: Click Add File to Library to let you browse on the files that let you transfer music to iPod and add them to the iTunes Music Library.

Step 03: On the left sidebar, click iPod under Devices.
To unhide the left sidebar in iTunes, click on the View menu and click Show Sidebar.
Step 04: When iTunes recognizes your iPod and the device connects successfully, click on the iPod Device button found on the upper left corner of the window.
Step 05: Still on the left sidebar, click Music under Settings to open the Music library.
Step 06: On the right section, tick the Sync Music box.
Step 07: Click on the Apply button located at the lower part of the window.
Step 08: Launch File Explorer in Windows or Finder in Mac.
Step 09: Go to the location where your music files to be transferred are stored.
Step 10: Select the music files that you want to transfer to your iPod.
Step 11: Drag and drop the files to the Music Library in iTunes to transfer music to iPod.
Step 12: A progress bar will appear showing the status of the file transfer to the iPod. Wait until the process is complete making sure that a stable connection is established between your iPod and PC.
Step 13: When the file transfer is finished, exit from iTunes. Unplug your iPod device from the PC and check your iPod that the music files are transferred successfully.
This section provides step-by-step instructions that will teach you how to transfer music to iPod over a Wi-Fi connection using iTunes. Make sure that the iTunes app is in the most recent version.
Step 01: Plug in your iPod device to your PC using a USB connection cable.
Step 02: Launch the iTunes application on your PC.
Step 03: On the left sidebar, click iPod under Devices.
Step 04: When iTunes recognizes your iPod and the device connects successfully, click on the iPod Device button found on the upper left corner of the window.
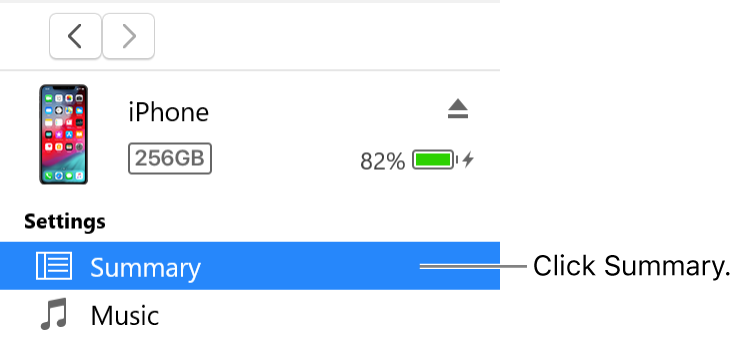
Step 05: Still on the left sidebar, click on the Summary tab and scroll down to Options.
Step 06: Tick the Sync with this iPod over the Wi-Fi box.
Step 07: Click the Apply button located on the lower part of the window.
Step 08: Unplug your iPod from the PC.
Step 01: On your iPod, tap on Settings to set the Wi-Fi connection to be the same as your PC.
Step 02: Tap on General.
Step 03: Tap on iTunes Wi-Fi Sync.
Step 04: Tap on Sync.
When you connect your iPod to a charger, the file-syncing will automatically start. Another way to start syncing it via iTunes:
Step 01: Plug in your iPod device to your PC using a USB connection cable.
Step 02: Launch the iTunes application on your PC.
Step 03: On the left sidebar, click iPod under Devices.
Step 04: When iTunes recognizes your iPod and the device connects successfully, click on the iPod Device button found on the upper left corner of the window.
Step 05: Still on the left sidebar, click on the Summary tab
Step 06: Go to the location where your music files to be transferred are stored.
Step 07: Select the music files that you want to transfer to your iPod.
Step 08: Drag and drop the files to the Music Library in iTunes to transfer music to iPod.
Step 09: A progress bar will appear showing the status of the file transfer to the iPod. Wait until the process is complete making sure that a stable connection is established between your iPod and PC.
Step 10: When the file transfer is finished, exit from iTunes. Unplug your iPod device from the PC and check your iPod that the music files are transferred successfully.
--OR—
Add music manually in iTunes:
Step 01: In iTunes, select Music from the options.
Step 02: Click on the Library tab.
Step 03: On the left sidebar, select Downloaded in your iTunes Music Library.
Step 04: Right-click on the downloaded items and select Add to Device.
Step 05: Select your iPod device.
This section will teach you how to use an iOS feature called AirDrop that allows you to quickly send a few files wirelessly from your Mac PC or iOS device to a nearby iPod or another iOS device. It can transfer music to iPod one by one.
Step 01: On your iPod touch, go to Settings.
Step 02: Tap on General.
Step 03: Tap on AirDrop.
Step 04: Choose the option: Contacts Only which only your contacts can see your device.
Step 05: When you cannot change the option, go back to Settings.
Step 06: Tap on Content & Privacy Restrictions.
Step 07: Tap on Allowed Apps and ensure that AirDrop is enabled.
Step 01: Go to Finder in Mac.
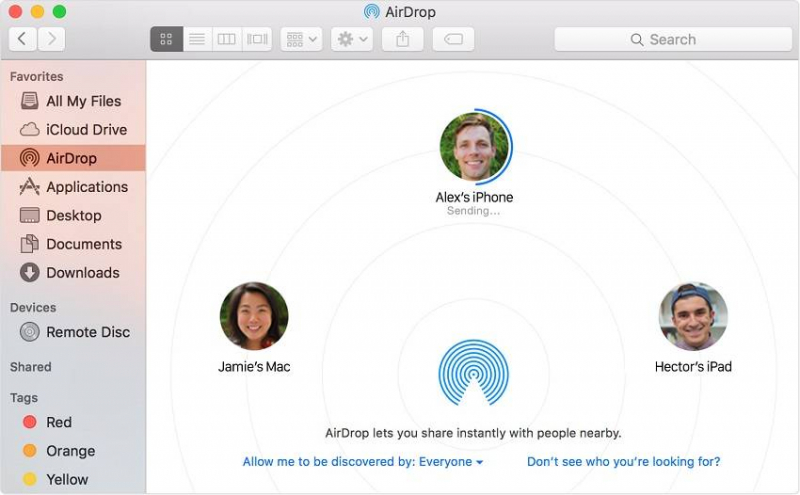
Step 02: On the left sidebar or Go menu, select AirDrop.
Step 03: The AirDrop users nearby are shown. Drag and drop the files that you want to send to the AirDrop user which is your iPod device.
Step 04: Your iPod device will receive a notification message of an AirDrop request. Tap on Accept to begin the file transfer and save the file to the Downloads folder.
-OR-
Step 01: Open the music file that you want to transfer.
Step 02: On the AirDrop app, click the Share button or control-click on the file in Finder and click Share from the shortcut menu.
Step 03: Select AirDrop from the sharing options that are shown.
Step 04: Select your iPod touch as the recipient of the transferred file.
Step 05: Your iPod device will receive a notification message of an AirDrop request. Tap on Accept to begin the file transfer and save the file to the Downloads folder.
You can also transfer music to iPod using iCloud. Make sure that you have an account in iCloud that is enabled on your iPod device.
Step 01: Open the web browser on your Mac PC and go to iCloud.com
Step 02: Sign in to iCloud with your Apple ID and password.
Step 03: Select iCloud Drive.
Step 04: On the top menu, click on the Upload icon.
Step 05: The Finder window appears. Select the file that you want to upload to iCloud.
Step 06: Click Open and the files will be uploaded to iCloud.
Step 07: On your iPod device, open the Files app.
Step 08: Tap on the Browse tab.
Step 09: Tap on the iCloud Drive under Locations.
Step 10: Tap on the Select on the top right corner.
Step 11: Select the file that you want to transfer to iPod.
Step 12: Tap on the Move button.
Step 13: Tap on the On My iPod button.
Step 14: Select the folder where you will save the music files.
Step 15: Tap on the Move button. The selected file will be moved to your iPod folder.
People Also ReadTransfer Music from Your Computer to Your iPhoneHow to Transfer Music from iPod to Computer Free
An iPod is another iOS device that is the lightest and portable media player that you can use to play videos, music, and games. You can also transfer music to iPod using the different methods that are presented in this article. FoneDog Phone Transfer is also a recommended tool that you can use to easily and conveniently transfer music to iPod without the hassle. The software is available for both Mac and Windows OS. Your data is also safe and secured with this tool so you don’t have to worry when you need to do a file transfer.
Leave a Comment
Comment

Technical Expertise for PC/Website Optimization
One of my passion is to develop software of my own
I write articles to share knowledge about IT technology and some experience in developing my own software, and developing my own software is one of my passions for work.
Phone Transfer
Transfer data from iPhone, Android, iOS, and Computer to Anywhere without any loss with FoneDog Phone Transfer. Such as photo, messages, contacts, music, etc.
Free DownloadHot Articles
 /
/
INTERESTINGDULL
/
SIMPLEDIFFICULT
Thank you! Here' re your choices:
Excellent
Rating: 4.7 / 5 (based on 66 ratings)