FoneDog Screen Recorder
FoneDog Screen Recorder
Special Offer
Special Offer


By Vernon Roderick, Last updated: March 4, 2021
Photos are meant to be shown off to your friends and family. It’s one of the perks of taking pictures, after all. However, you can’t exactly do that if it’s stuck on your Mac iPad, on the other hand, are the best gadget to show off your photos.
This article was designed to help you with that aspect, as I show you six different ways to transfer photos from Mac to iPad. Here's another example of the opposite, which is transferring images from iPad to Mac. Let’s start with a method of file transfer that perhaps most of us are aware of though not exactly proficient with.
Part 1. Transfer Photos from Mac to iPad through iTunesPart 2. Transfer Photos from Mac to iPad through iCloud DrivePart 3. Transfer Photos from Mac to iPad through iCloud PhotosPart 4. Transfer Photos from Mac to iPad using My Photo StreamPart 5. Transfer Photos from Mac to iPad via AirDropPart 6. Transfer Photos from Mac to iPad with A CablePart 7. Transfer Photos from Mac to iPad With A Software
As I’ve said before, you may have seen this method a lot of time, especially with a lot of articles by me. This is mostly because iTunes is one of the best tools that you can use for pretty much every task on your Mac.
iTunes is a media player, library, radio, management app, call it what you will. It has a lot of functions that many users tend to confuse with what it really is. In our case, the only thing you need to know is that you can transfer photos from Mac to iPad using iTunes.
There isn’t much to worry about when using iTunes. You don’t have to install an app for it. You don’t need to subscribe to a service. The only requirements for this method are the following:
Now that you know what is needed, how exactly can you transfer photos from Mac to iPad using iTunes? Follow these steps if you want to know-how:
Note:If a USB cable is not accessible, you can use a Wi-Fi connection to establish a connection between the two.
Note: This will prompt the connected iOS device to import the photos from the iTunes library into the Photos app.

Once you’ve done this, you no longer have to do it every time you need to transfer photos from Mac to iPad. In other words, it’s a one-time process. What’s more, it can be done with just these easy steps. This is the main reason why iTunes is one of the best ways to manage your files. However, it’s not the only noteworthy tool out there.
Another tool that can be considered as a relative of iTunes is iCloud. You can think of iCloud as a free cloud storage service offered by Apple. In this method though, we will be focusing on iCloud Drive, a component of iCloud.
iCloud Drive is a feature that allows users to share their files across platforms. In other words, it can be used to transfer photos from Mac to iPad.
There are some things that you have to secure first before you can use this method, though it’s not much. It should be possible for you to at least have the following things:
As long as you have an iPad and Mac with compatible versions and an internet connection, it should be possible. Thus, I suggest updating them regularly.
Unlike with iTunes, there will be a lot of things you have to do in this method. However, do not be worried because it will also be a one-time process. Here are the steps you’d need to follow:
Note: This will prompt iCloud to enable the sharing of files through iCloud Drive, and it will include photos.
Note: The Files app is a default app on iOS devices where you can find files and folders on your iPhone, and in special cases, it may contain folders from Apple services.
Now that you have finished setting it up, you can find any new photo on your Mac in the Files app. It’s great and all, but it’s not as if it was made specifically for transferring photos. If that’s what you prefer, then I’ve got you covered.
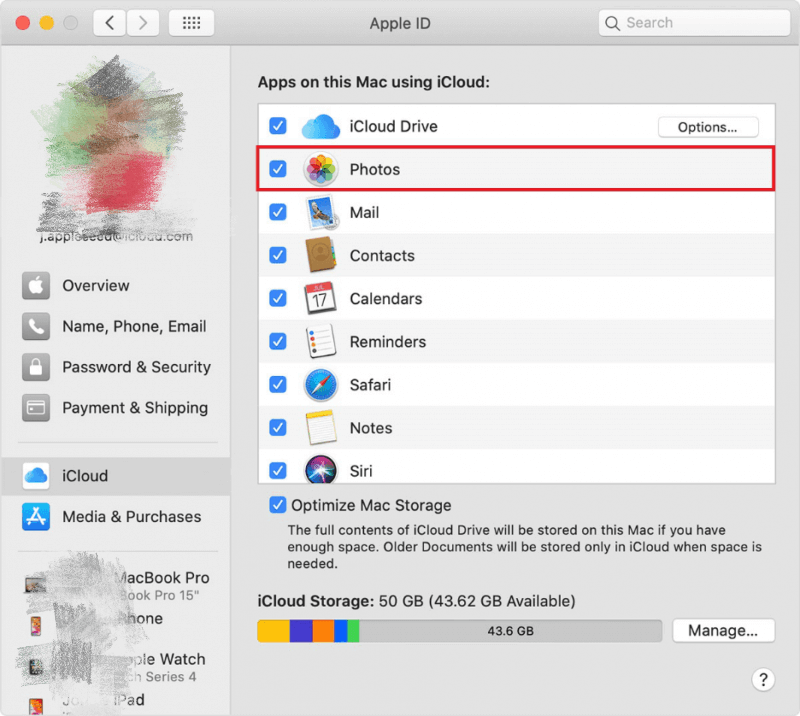
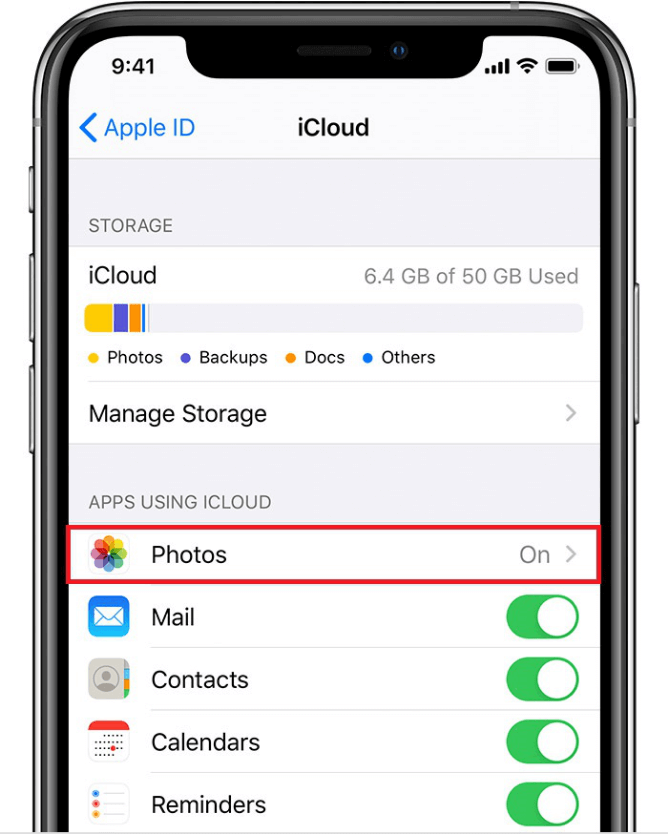
Another component of iCloud is iCloud Photos. The difference between iCloud Drive and iCloud Photos is that it actually specializes in managing photos.
With that being said, you’ll find that there are features designed to help you transfer photos from Mac to iPad. What’s more, it can store up to 5 GB worth of photos. Now the reason I separated Drive and Photos is that the requirements and steps different.
iCloud Photos was released a bit later than iCloud Drive. As such, iCloud Photos require later versions of iOS and Mac than with iCloud Drive:
That’s pretty much all the things you need to have in order to transfer photos from Mac to iPad using iCloud Photos. You may also opt for a monthly subscription to increase the 5GB storage limit if you have money to spare.
The steps are very similar to what you follow when using iCloud Drive. Thus, you shouldn’t be having trouble with following these steps:
As you can see, it’s not that different from when you used iCloud Drive. For better or for worse, iCloud Photos isn’t actually the only component of iCloud that specializes in photos.
My Photo Stream is very similar to iCloud Photos since they both specialize in managing photos. However, the way they do it is a bit different. While iCloud Photos has a 5GB size limit, My Photo Stream can only manage the recent photos, particularly the last 1,000 photos. Additionally, these photos only last 30 days.
In other words, My Photo Stream has more limitations than iCloud Photos, but it is capable of helping you transfer photos from Mac to iPad nonetheless.
As usual, there are requirements to using My Photo Stream. Here’s a look at those requirements:
In addition to these, your Apple ID should also be one that wasn’t created just recently. This is because there are cases where My Photo Stream doesn’t work if the Apple account is new.
As I have said before, My Photo Stream is not that different from iCloud Photos. Follow these steps if you think you are ready to transfer photos from Mac to iPad:
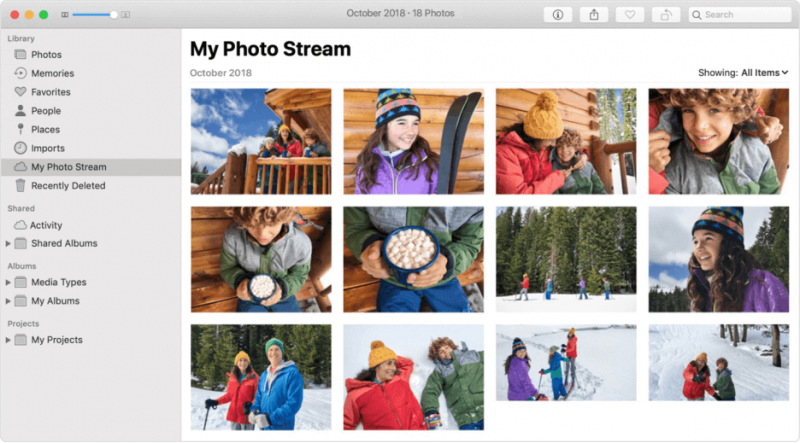
You can now see the photos that were once only accessible to your Mac on your iPad. Just like our previous methods, this is a one-time process.
While the three previous methods don’t require you to do it regularly, you need an internet connection. If you don’t have this necessity, then perhaps the next entries would be more suitable for your situation.
Unlike the previous methods that I have discussed, this one won’t be a one-time process. Simply put, you will have to do it every time you need to transfer photos from Mac to iPad. The advantage of this, however, is that you won’t be needing an internet connection.
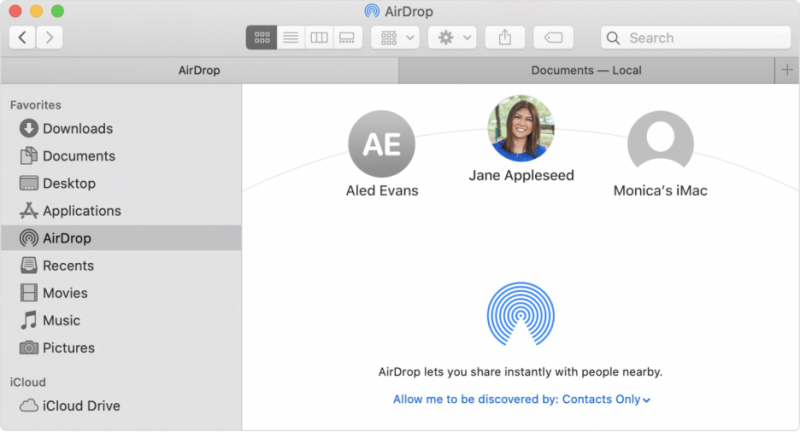
This method involves using AirDrop, the Apple counterpart of Bluetooth. Since it makes use of a local area network, there’s no need to connect to the internet, though you may use WiFi with or without internet.
Although it’s a bit different than the previous methods, it still requires you to secure something, and those requirements include the following:
In addition to these, the two devices should also have WiFi, but it doesn’t have to have an internet subscription. Also, make sure the two devices are less than 30 meters away from each other.
Since it is not a one-time process, you will need to do the same steps over and over again every time you want to transfer photos from Mac to iPad. As such, make sure you remember the following steps:
Although it requires you to follow the steps repeatedly, it has the pro of being quicker owing to the fact that you don’t need an internet connection. In other words, the speed of photo transfer does not rely on your signal strength.
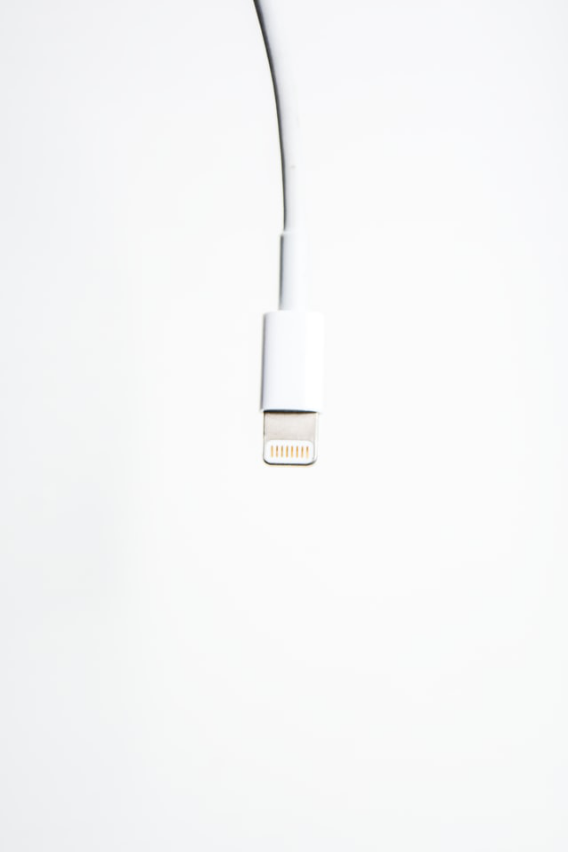
Another method that does not require an internet connection and is not a one-time process is the use of a cable. This is perhaps the quickest method since it connects the Mac and iPad directly to each other.
Unlike AirDrop though, it doesn’t need to create a local area network. It also doesn’t make use of any features on your iPad or Mac.
Using a cable to transfer files has been the most commonly used method for many years, though it’s becoming less and less prevalent nowadays.
This is because even if the requirement is only a USB-C cable, it is a bit hard to come by. It may be due to the price of a cable, or the availability of this product. Either way, a USB-C cable is the only thing you’ll need.
Since it is very simple, there’s really no need to explain the process of transferring through a USB cable. You simply have to connect the two devices just like what you did before when using iTunes.
Once that’s done, just drag the photos from your Mac to the internal storage of the iPad. With that, you can now transfer photos from Mac to iPad easily.
Although the six previously mentioned methods to transfer photos from Mac to iPad are great options, it’s not perfect. You may encounter issues depending on what state your iPad or your Mac is currently in.
Thus, I suggest having a contingency, which should be a third-party tool that specializes in file transfer. With that being said, I recommend FoneDog Phone Transfer.
FoneDog Phone Transfer is a tool that specializes in transferring files from one device to another. It supports the latest versions of iOS and Mac. Plus, you can transfer photos through the tool. For example, you can finish the transmission between iPhone and PC by referring to this article. This is the main reason why it can be considered the best tool for the job.
Phone Transfer
Transfer files among iOS, Android and Windows PC.
Transfer and backup text messages, contacts, photos, video, music on computer easily.
Fully compatible with iOS 13 and Android 9.0.
Free Download

People Also ReadHow You Can Transfer iPhone Photos to Flash Drive How to Transfer Photos from Camera to iPhone
There are many things that you can do on your Mac. However, there are some things that are better handled in other gadgets, such as your iPad.
That’s precisely why it is crucial to know how to transfer photos from Mac to iPad. That way, you can still view your photos and even show them to your family and friends outside your house away from your Mac.
Leave a Comment
Comment

Technical Expertise for PC/Website Optimization
One of my passion is to develop software of my own
I write articles to share knowledge about IT technology and some experience in developing my own software, and developing my own software is one of my passions for work.
Phone Transfer
Transfer data from iPhone, Android, iOS, and Computer to Anywhere without any loss with FoneDog Phone Transfer. Such as photo, messages, contacts, music, etc.
Free DownloadHot Articles
 /
/
INTERESTINGDULL
/
SIMPLEDIFFICULT
Thank you! Here' re your choices:
Excellent
Rating: 4.7 / 5 (based on 78 ratings)
