
By Adela D. Louie, Last updated: May 31, 2021
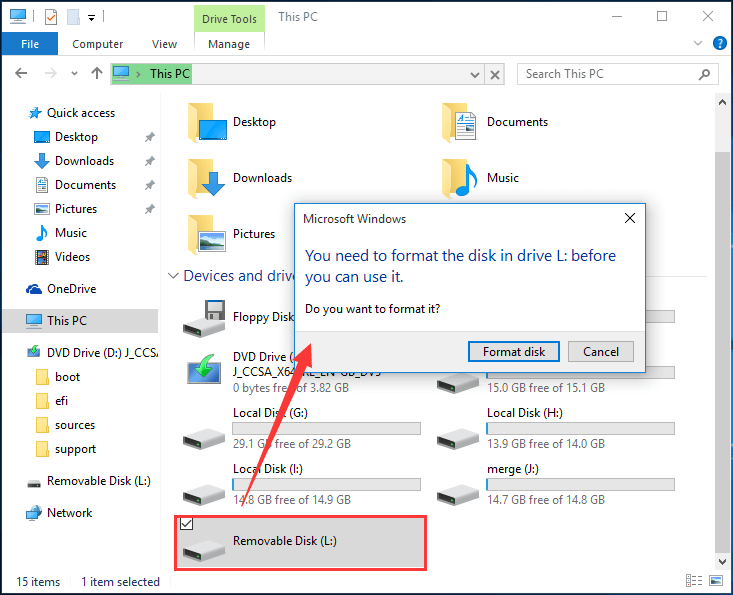
There are times that you might have trouble formatting your SD card, your external hard drive, or your USB drive. And one of the most common errors that you will get the “Windows was unable to complete the format” error message. And because of this, you might freak out.
Well, worry no more because, in this article, we are going to show you ways on how you can fix the error message that Windows was unable to complete the format when you are trying to format any of your external media drive using your computer.
In addition to encountering windows that can't complete the format, do you also encounter any formatting problems, such as sd cards unable to format?
Part 1. How to Get Rid of Error Message “Windows was Unable to Complete the Format”Part 2. What to Do with the Lost Files After FormattingPart 3. Conclusion
Here are two ways on how to fix the error message “Windows was unable to complete the format”.
When you experience getting the error message that says Windows was unable to complete the format, the first thing that you should do to try to fix it is by using your Disk Management tool that you have on your computer. And in order for you to do this, here is a quick step-by-step method that you can follow.
Now, on your computer, go ahead and right-click on the My Computer option.
And from there, simply go ahead and click on the Manage option for you to select it.
Then on the next page, go ahead and simply click on the Disk Management tool.
Then after that, go ahead and click on the USB drive, SD card, or external hard drive that you would like to format.
Then after that, simply right-click on the Format option. And in case you see any partition on your drive, then go ahead and delete them.

Another way that could help you in fixing this type of error is by using your Command Prompt. And to know more about how to do this here is a step-by-step instruction that you should follow.
Step 1: Go ahead and launch the Command Prompt on your computer.
Step 2: And then, from the Command Prompt screen, go ahead and enter this command: format C: /fs: NTFS. In this command, the C represents the format drive and then choosing the NTFS as your file system. You can change these two commands depending on the format drive that you want and the file system. An example of this is if your format drive is P and your file system is FAT32 then you can do the command: format P: /fs: FAT32.
From the above, we have learned how to get rid of the error message "Windows was Unable to Complete the Format”, then we will learn how to deal with lost files after formatting.
Now, as everyone knows, when you format your drive, this means that you are going to lose all of the files that you have in it. So in case that you have formatted your drive and were not able to get a backup of your important file, then you can use a third-party tool for you to recover that file.
And when it comes to recovering lost files on your computer or external media device, the FoneDog Data Recovery is the best solution that you can have.
The FoneDog Data Recovery has the power to recover any deleted files such as your photos, emails, documents, videos, and so much more. It can recover deleted or lost files from your Windows computer which includes its recycle bin, from your Mac, from a memory card, hard drive, or flash drive.
The FoneDog Data Recovery is very safe to use so you do not have to worry about overwriting any other data that you have on your computer. Also, it comes with a user-friendly interface that will allow you to easily use it. And to know more about how you can use the FoneDog Data Recover, here is a quick tutorial that you can follow.
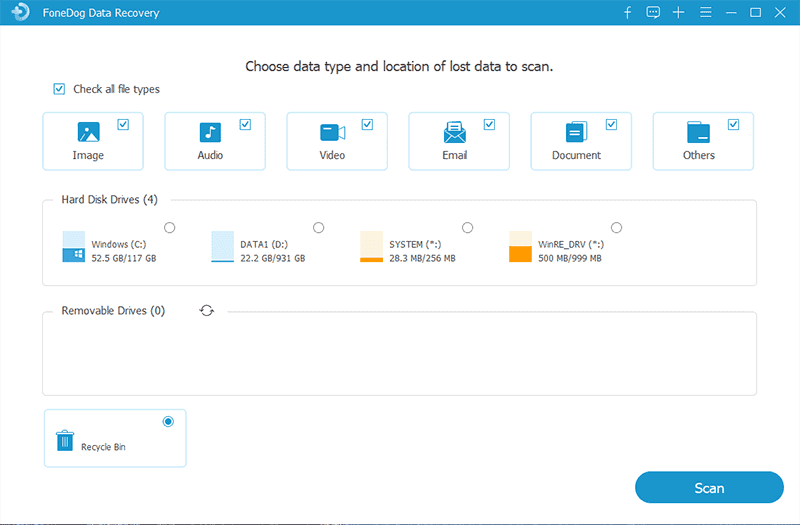
After you have installed and downloaded the Data Recovery tool by FoneDog to your computer, then go ahead and open it up. On the main page of this tool, you will be able to see the types of files that it can support to recover. From there, go ahead and choose the file type that you want.
Also, you can see there different drives that you have on your computer. From there, simply choose the file that you have just fixed and formatted. Here, you also have to make sure that the connection between your drive and your computer is secured and stable to prevent any interruptions.

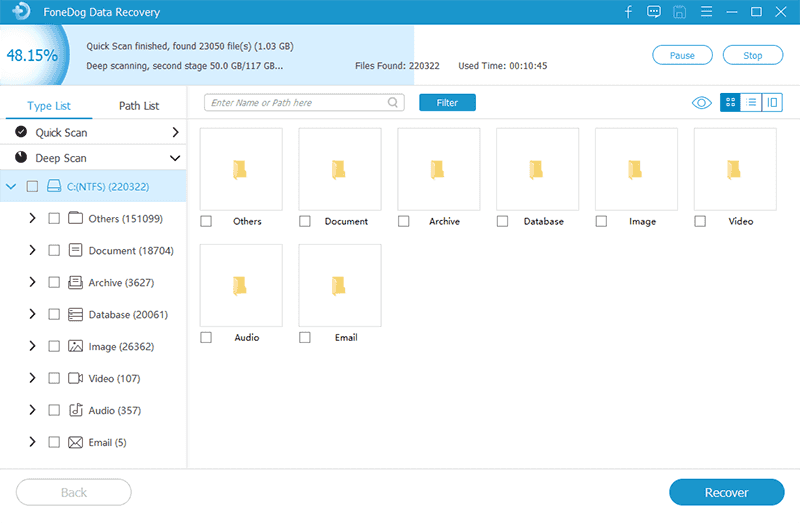
After choosing both necessary options, the next thing that you should do is scan your device. Here, all you need to do is to click on the Scan button. Then, you will have two options on how you want to scan your device. The first one is the Quick Scan option which will only take a couple of seconds. And the other one is the Deep Scan option which will take a longer time to scan your device so have to wait patiently.

Then, once that the scanning method is complete, the FoneDog Data Recover will then show you all of the results. From here now, you can click on the files to preview them. And at the same time, you can choose the files that you would want to recover. You can also use the search bar to look for your files easier and faster.
And once that you are satisfied with all of the files that you have chosen, then you may now proceed and click on the Recover button just below your window screen. From here on, the FoneDog Data Recovery will then start to recover those files that you have selected earlier.

People Also ReadA Detailed Guide on How to Recover Formatted Hard DrivesHow to Recover Deleted Files Using CMD
Getting error messages on our computer can really be annoying. That is why you have to look for ways on how you can fix it as soon as possible. And when it comes to getting the error message Windows was unable to complete the format, then the solutions above will definitely help you.
Leave a Comment
Comment
Data Recovery
FoneDog Data Recovery recovers the deleted photos, videos, audios, emails, and more from your Windows, Mac, hard drive, memory card, flash drive, etc.
Free Download Free DownloadHot Articles
/
INTERESTINGDULL
/
SIMPLEDIFFICULT
Thank you! Here' re your choices:
Excellent
Rating: 4.7 / 5 (based on 74 ratings)