FoneDog Screen Recorder
FoneDog Screen Recorder
Special Offer
Special Offer


By Adela D. Louie, Last updated: January 19, 2024
Have you ever tried transferring playlists from iPhone to iTunes because you want to keep enjoying listening to music anytime you want? Do you want to know the best way on transferring the playlist from iPhone to iTunes? If your answer is yes to all these questions, then this is definitely for you.
Part 1. Basic Way on Transferring Playlists from iPhone to iTunesPart 2. The Best Software on Transferring Playlists from iPhone to iTunesPart 3. Conclusion
If you want to add some of your playlists from your iTunes to your iPhone or iPhone to your iTunes, the most basic way that you can do this is by using the iTunes program itself. And aside from the fact that you can add your own playlist or your music to it, you can also add your images, contacts, emails, and other files that you can add to your iTunes or to your iPhone device.
And in order for you to do this, here are the simple steps that you will be needing to follow.
First is that you have to connect your iPhone device to your computer or to your Mac using the USB cable of your device. After that, simply launch your iTunes program on your PC. Then from the iTunes program, you will be able to see your iPhone icon at the upper left side of your iTunes program. Also, you will be able to see your playlist on the left side of the program as well.
Then after that, go ahead and drag your mouse to the sidebar of the iTunes program and then select Music. After that, go ahead and click on the Sync Music option then choose the playlist, albums, genre, and artist.
Then after that, going to the Playlist part, go ahead and click on the Apply button for you to be able to sync the playlist that you have chosen to your iPhone device.
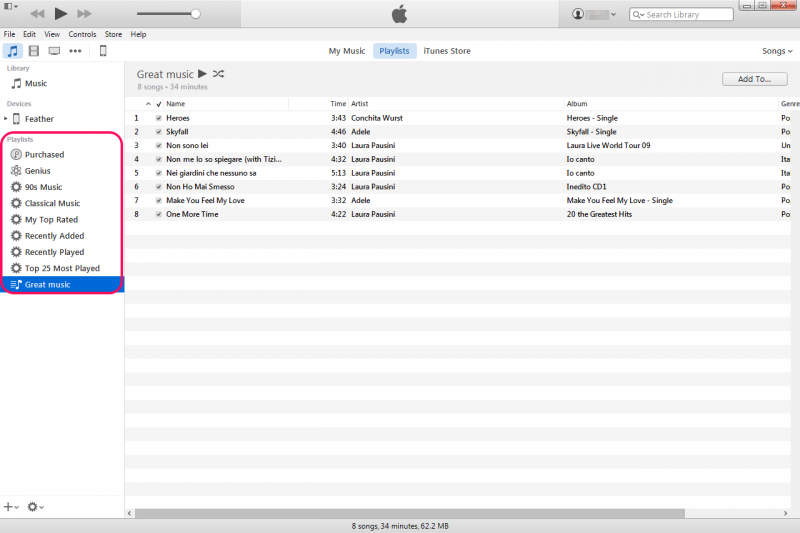
Once done, go ahead and click On this iPhone option located at the upper part of your screen for you to check out the playlist that you have added to your iPhone device.
NOTE: In this method, you have to make sure that the songs you are going to transfer are already in the converted playlist on your iTunes program. This way, you can add the whole item on the playlist to your iPhone device. And if you are going to notice, the transferring process can take some time and that is only normal. This also happens if you have some files that are currently managed by your iTunes program. So with that, you have to patiently wait for the program to finish the whole process.
Aside from using your iTunes program, there is also another way of transferring playlists from iPhone to iTunes the easy way. And that is by using the best phone transfer application that is recommended by many people and that is the FoneDog Phone Transfer.
The FoneDog Phone Transfer can have your playlist moved from your iPhone device to your iTunes program. And aside from that, you can also have any of your data be transferred among your Android device, iOS device, and your computer. You can also transfer and at the same time backup your data such as your images, videos, contacts, messages, and of course, your music without worrying about losing your other important data.
And now, for you to know how transferring playlists from iPhone to iTunes is done using the FoneDog Phone Transfer, here is a quick process that you can refer to.
Phone Transfer
Transfer files among iOS, Android and Windows PC.
Transfer and backup text messages, contacts, photos, video, music on computer easily.
Fully compatible with iOS 17 and Android 14.
Free Download

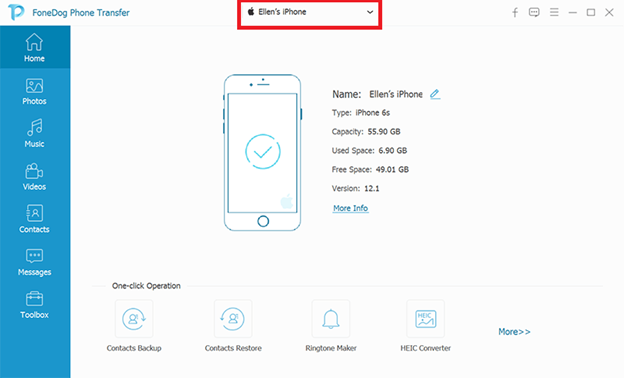
Download and install the FoneDog Phone Transfer to your computer for free. And after that, go ahead and launch it on your computer. And once that the program is launched, simply connect your iPhone device to your computer using your working USB cable. Then the FoneDog Phone Transfer will have your iPhone device detected.
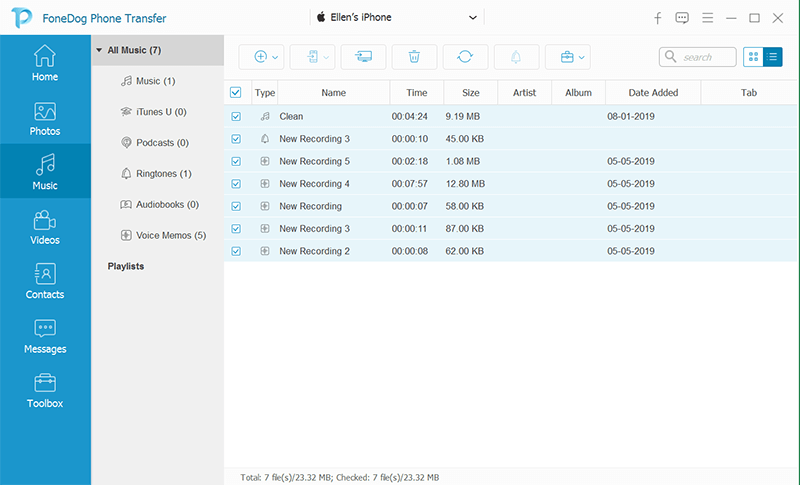
Then from the left side of the page, you can choose the type of data that you would like to transfer from your iPhone device to your iTunes. In this case, since we are dealing with your playlist, that means that you have chosen the Music data type. And here, all the items that you have under the Music category will be shown on the right side of your screen. It also includes the size, time, and other details about the items.
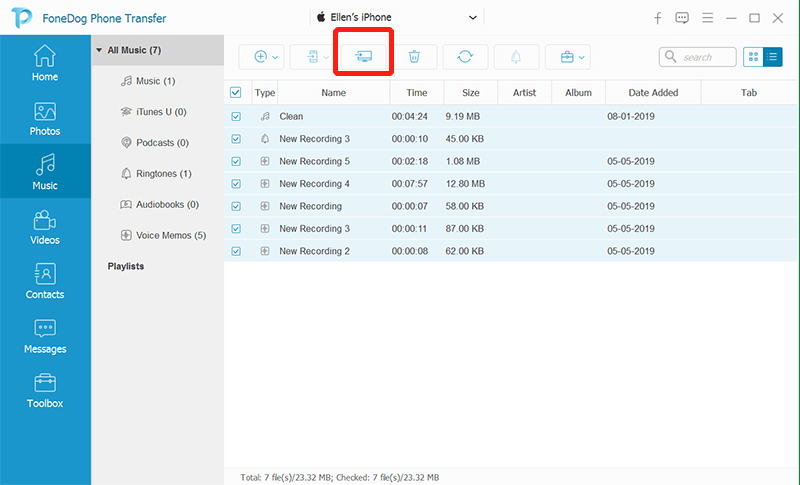
And after choosing the Music category, go ahead and choose the Music items that you want to add to your iTunes playlist from your iPhone device. And once that you have chosen the Music items, you can now go ahead and click on the Export to PC option. Here, once that you click this option, the process of transferring your music to your iTunes will start.
And once that you have transferred your music or playlist to your computer, then you can now go ahead and have it added to your iTunes program. This way, you can rename your playlist to what you would like.
People Also ReadHow to Transfer Music from Computer to iPhoneHow to Transfer Music from iTunes to iPhone
Transferring Playlists from iPhone to iTunes is not that complicated. All you need to have is the right knowledge on how you can do that. And when it comes to the process of doing this, there are only two best ways to do this. And that is either by using your iTunes program itself or by using the Phone Transfer by FoneDog.
Though if you want many conveniences, then we would highly recommend you to use the FoneDog Phone Transfer as this is the easiest way for you to transfer any data among any of your devices such as your Android device, iOS device, and your Mac or Windows PC as well.
Leave a Comment
Comment

Tech Website Writing /Content Optimization
Singing, smiling, surprising every day!
So as a technical writer, it is my duty to gather effective and reliable solutions to answer questions on how to deal with the issues they are having with their devices.
Phone Transfer
Transfer data from iPhone, Android, iOS, and Computer to Anywhere without any loss with FoneDog Phone Transfer. Such as photo, messages, contacts, music, etc.
Free DownloadHot Articles
 /
/
INTERESTINGDULL
/
SIMPLEDIFFICULT
Thank you! Here' re your choices:
Excellent
Rating: 4.5 / 5 (based on 102 ratings)
