FoneDog Screen Recorder
FoneDog Screen Recorder
Special Offer
Special Offer


By Vernon Roderick, Last updated: January 5, 2023
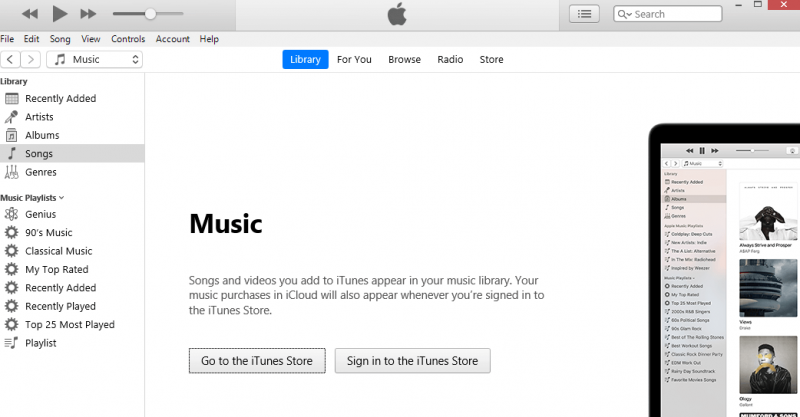
When you have a lot of files on your device, you’re bound to end up thinking of how to transfer iTunes library to new computer. After all, files from your iTunes library can take up a considerable area of your storage space.
It can be composed of multiple TV shows, countless albums, or even a few movies that are massive in disk size. Either way, it’s only a matter of time for you to require file transfer. Fortunately, there are many ways to do this.
This article will show you five of the most effective ways to transfer iTunes library to new computer. Let’s first discuss what to do before we start with our methods.
Part 1. Consolidate iTunes LibraryPart 2. Transfer iTunes Library to New Computer through External DrivePart 3. Transfer iTunes Library to New Computer via NetworkPart 4. Transfer iTunes Library to New Computer using a SoftwarePart 5. Transfer iTunes Library to New Computer using iTunes FeaturePart 6. Transfer iTunes Library to New Computer using Migration Assistant
As you may already know, there are going to be iTunes files that are not located on any of your iTunes folders. It cannot be avoided. As such, we will need to consolidate our iTunes library so that files from the outside will automatically be moved to the iTunes folders.
This, too, is required of us if we’re going to transfer the iTunes library to a new computer. With that said, here are the steps to consolidate your files into the iTunes library:
Whenever the Consolidate files option is enabled, all the files that were once outsides the iTunes media folder would automatically be put inside.
While it may not be directly tied to learning how to transfer the iTunes library to a new computer, it saves us time since it basically puts everything that we need in one place. Once that’s done, you are now ready to proceed to the actual ways to transfer iTunes library to new computer. Now let’s start with our first entry.
Our first method is very simple as it only involves making use of an external hard drive in order to transfer the iTunes library to a new computer. It is deemed simple and easy for many reasons, but perhaps the main reason is that you don’t have to make use of any tool for it to work.
The only thing you will need for this one is an external hard drive, of course, and a USB cable that is compatible with the old and new computer as well as the hard drive.
Once you’ve acquired all of these things, you are now ready to transfer iTunes library to new computer. The first phase involves creating a backup of the iTunes library.
Now that you’ve created a backup, it is time to transfer the iTunes library to a new computer using that backup. You will need a different set of steps for that.
This will automatically import all the files from the said library into the iTunes app from your new computer. Once you do this, you would have already learned how to transfer iTunes library to new computer.
The only downside to this is that you will have to make sure that you have an extra external drive lying around somewhere, otherwise, there’s no point in this method. In such a case, we have another method for you.
We all know that in order to transfer iTunes library to new computer, you will have to make sure that the previous computer is required to be turned on. Now, what if you don’t have to turn on your computer to transfer files?
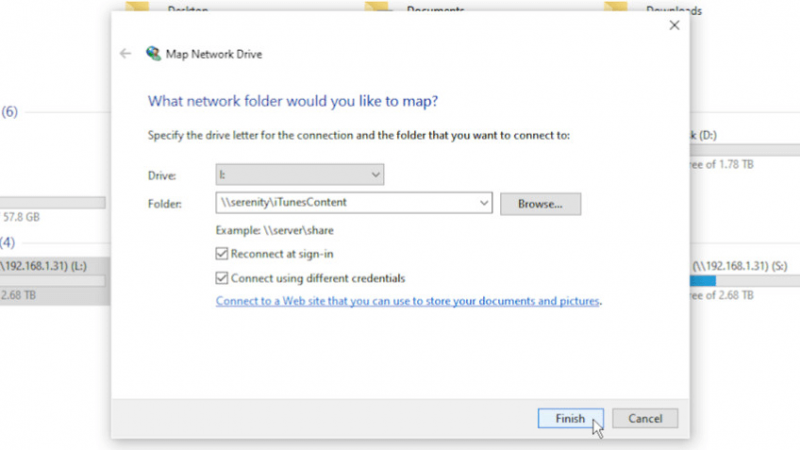
Fortunately, there is a method to do this, and it involves creating a Network Drive. This Network Drive will house the whole iTunes library.
By doing this, you will be able to transfer the iTunes library to a new computerregardless of which computer you use and if it is turned on or off. Since it is available for both Windows and Mac users, let’s start with how to do it on Windows PC first:
On Windows 10, go to the Computer tab at the top of the window. Now click on Map network drive from the resulting menu.
Now that you know this, learning how to transfer the iTunes library to a new computerusing the same concept on Mac would be easier. Just follow these steps:
Once you do all these, regardless of whether you use Windows or macOS, you will see the network drive on your desktop. To transfer iTunes library to new computer, you just have to head there using your new computer and copy the iTunes folder.
While the advantage of this is that you can access the files anytime, there is a downside. The main disadvantage is that you will need to set up a network for this to work.
We know more than anyone else that the two previous methods that we discussed are somewhat complicated. It’s only natural that you won’t be able to follow them as precisely as we expect.
Fortunately, there are other ways to transfer the iTunes library to a new computer. And perhaps the simplest way to do so is by making use of the software. Not only is it simple, but it would also be very quick to do.
The only downside is that you will need to take a risk of downloading software. Either way, it should be worth a shot considering how effective it can be. It basically works like this:
This should give you the highest chance of success to transfer iTunes library to a new computer. On the other hand, it has the highest risk. If you’re not exactly fond of taking risks, then we have more methods in store for you.
If you’re tired of making use of third-party apps, then perhaps the most suitable way to transfer the iTunes library to a new computerfor you is to use iTunes’ own features.
Thus, for this method, we will be creating a backup of the whole iTunes library with the Back Up to Disc feature of iTunes. To do this, you will have to ensure that you have multiple blank disks which you’ll use as the portable disc. Here’s how you can do this:
The main downside of this method is that it would require you to have lots of CDs since an iTunes library typically consists of lots of data that can measure up to 15 GB in disk space.
Since one CD can take up at least 500 MB of space, you may be required to get at least 30 CDs. That would cost a bit much, so here we have yet another method to transfer the iTunes library to a new computer.
Our last entry involves the use of Migration Assistant, a utility in Mac that allows users to migrate from one computer to another, just like what the name implies.
Thus, it can be used to transfer the iTunes library to a new computer, and it also helps in many other things. This includes creating a backup, restoring from that backup, and most importantly, file transfer.
While Migration Assistant was originally a feature in Mac, it can also be used to transfer from Mac to a Windows PC, and vice versa. With that said, it’s not limited to macOS users.
The process of using Migration Assistant differs from one version to another, but it ultimately follows the same concept. You access Migration Assistant, create a copy of the whole operating system, transfer it to your new computer, and it’s all done.
What you need to know is that you might need to create a backup of your files first. After all, if you make a mistake, there’s a chance that all the files will get lost, though it is easy to recover them after that.
People Also ReadResolve Photos Synced From iTunes Will Be RemovedHow to Transfer MP3 to iPhone
At this point, you now have five different methods to transfer iTunes library to new computer. This should be enough for you to not struggle with transferring your iTunes library. And if you have another question about iTunes' transmission, likes transfer iTunes to your Android, transfer music from iTunes to iPhone, and so on. you can refer to the provided article.
Additionally, although these are all great methods, you can’t avoid waiting for a long time, since it will most likely take time, especially if your iTunes library is filled with files. Either way, hopefully, this article helped you to better manage your files on iTunes.
Leave a Comment
Comment

Technical Expertise for PC/Website Optimization
One of my passion is to develop software of my own
I write articles to share knowledge about IT technology and some experience in developing my own software, and developing my own software is one of my passions for work.
Phone Transfer
Transfer data from iPhone, Android, iOS, and Computer to Anywhere without any loss with FoneDog Phone Transfer. Such as photo, messages, contacts, music, etc.
Free DownloadHot Articles
 /
/
INTERESTINGDULL
/
SIMPLEDIFFICULT
Thank you! Here' re your choices:
Excellent
Rating: 4.7 / 5 (based on 104 ratings)
