FoneDog Screen Recorder
FoneDog Screen Recorder
Special Offer
Special Offer


By Nathan E. Malpass, Last updated: October 24, 2018
Let’s face it, we all encountered errors here and there with our Apple devices. While Apple is a reputable company, if not one of the most well-known electronics manufacturers out there, their products also suffer from the occasional error. It is a fact, that any device is prone to problems either via hardware malfunctions, software issues or consumer misuse - this is established. Yet it is also a fact that to counteract these problems, technical support companies and teams exist to help you pull through. This is also why we at FoneDog exist - to bring you the support and information you need to combat any errors that may occur.
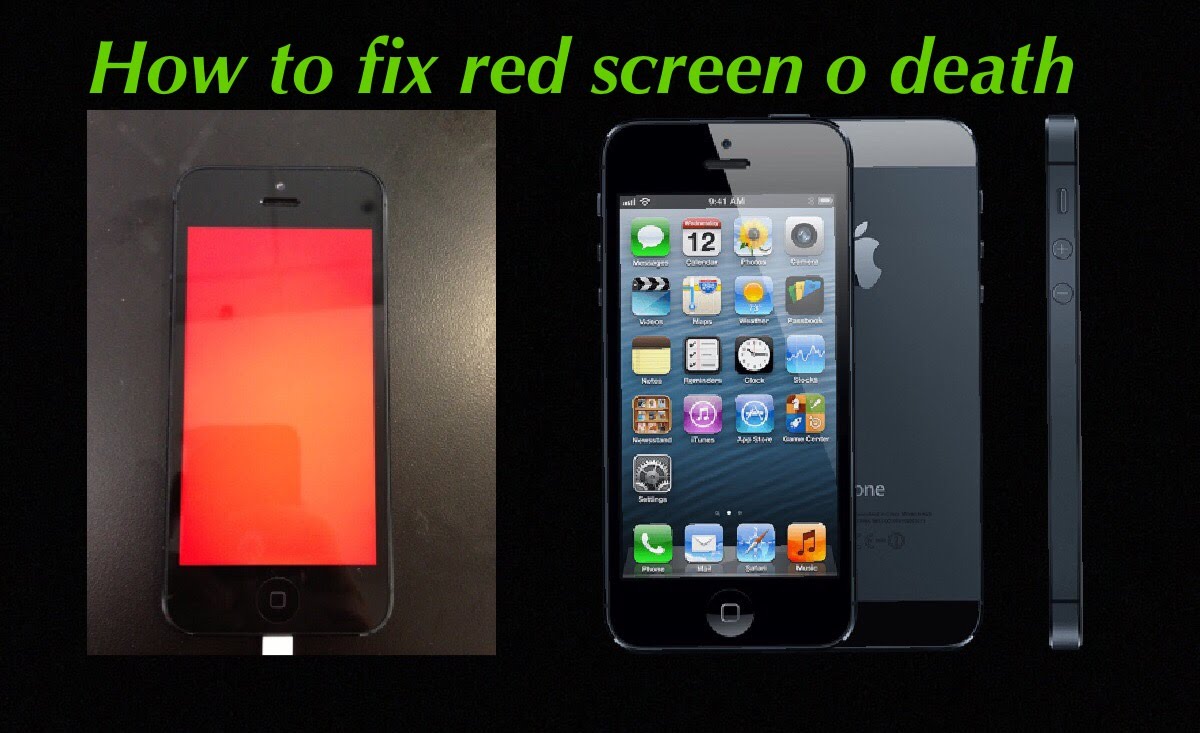
Today we will be looking at a fairly common and dreaded error to happen to the iPhone, the red screen error or also infamously known as the Red Screen of Death. Indeed the name itself sounds menacing, but we will prove that it is all bark than bite. In order to find out its true nature, let us first start you off with information on what the error curtails to. Getting to know what we are dealing with makes fixing the problem that much more easier - so let’s get right into it!
Part 1. What is the Red Screen of Death and What Caused itPart 2. Common Methods for Fixing the Red Screen of DeathPart 3. Method of Entering DFU Mode (Hard Difficulty) and How to Exit DFU ModePart 4. The Easiest, Most Efficient, and Time-saving Solution: Using FoneDog - iOS System RecoveryPart 5. Video Guide: How to Fix the Red Screen Death Issue of iPhone?Part 6. Conclusion and Recommendations
What is the Red Screen of Death?
As previously mentioned, this red screen issue has been generously dubbed as the Red Screen of Death - and perhaps for a good reason. Much like the Blue Screen of Death that may appear on computers, both incite panic as if something grave had happened. Fortunately, the truth is the total opposite for the iPhone compared to the computer since it is an easy to fix the situation - most of the time.
Red Screen of Death is a common issue that happens quite often among iOS device users. It could occur either a few months in or new out of the box from purchase. What happens is quite obvious, the screen turns completely red and is then followed by random reboots.
What Caused the Red Screen to Occur?
So now that we know about the error, what exactly caused it to even occur? The answer is found in several instances which we will enumerate here. Note that it could be due to either a software or hardware issue.
Fix Red Screen Death Issue of iPhone
Now that we know the most important points of the issue and why it appears, the only thing left is to fix it. Take note that any of these methods are a possible fix, but in case one did not work, do not give up as there are more available. Towards the end, we will present our in-house fix which, if needed, will save you a headache and time. So, with our newly acquired knowledge, let us now move forward to eradicating this Red Screen of Death forever shall we?
Method 1: Hard Resetting Your iPhone (Easy Difficulty)
First, we will start you off with a fairly easy to do method which may be all that is ever needed. This is basically the need to hard reset your iPhone. To do this, follow these instructions.
For iPhone Version 6 and Older:
For iPhone Version 7 and 7 Plus:
Method 2: Removing and Reinserting the SIM Tray (Easy Difficulty)
This method here is testing if the Red Screen of Death is connected with a hardware issue. Sometimes a fix like this is all that is required and if it is, then you are quite fortunate. Without further ado, this is what you should do.
Hopefully, if you were one of the fortunate ones, this would have solved everything and you can continue using your iPhone with peace of mind.
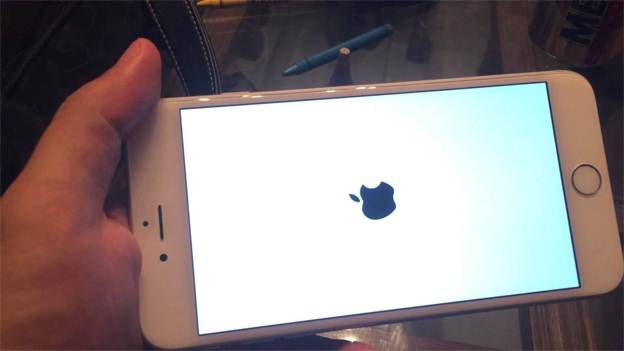
Whether you have just upgraded to the latest iOS 10 version or you’re just using your iPhone during a normal day, the blue screen issue can still come as a surprise and can block you from totally using your mobile device. Also called as the “Blue Screen of Death”.
See More-- Fix Blue Screen Of Death
Method 3: Entering DFU Mode (Hard Difficulty) and How to Exit DFU Mode
For this second to the last method, we will go into the deepest parts of our iOS device - DFU Mode. This is considered the most difficult method since it requires good timing as well as preparation. If you would rather not bother with the long procedure, you are welcome to skip. If you are confident, then you allow us to guide you through the process.
Preparation
How to Enter DFU Mode (iPhone 6, iPod or iPad)
An additional indicator is that you have received a message via iTunes on your computer saying that you have entered ‘Recovery Mode’. Since the screen is black, this is actually DFU Mode.
How to Enter DFU Mode (iPhone 7, iPhone 7 Plus)
Tips1:If you are not able to enter DFU Mode for the first time, do not worry, keep trying!Tips2:
Once You Are In DFU Mode
Now that you are in DFU Mode, all that is left to do is go to your iTunes and select ‘Restore iPhone’. Allow the process to complete and the iOS device should be properly working now.
Alternative Method to Enter DFU Mode (All iOS devices)
Sometimes an alternative method is needed since the buttons may be damaged or in this case, we cannot see the screen due to it being red. If the above has not worked, we will provide the alternative method here.Please follow these steps.
Allow the process to run. The result will be a black screen on your iOS device. You have now successfully entered the DFU Mode!
People Also ReadDFU Mode: The Basics and its FunctionsComplete Guide: How to Fix iPhone Stuck in Recovery Mode
*Note that firmware can vary between iOS devices so download the one appropriate to what you have and the desired version (if you are downgrading or staying updated). Take note that the file extension is (.ipsw).*Note that this would be a good time to back up your files with the iTunes interface open.
How to Exit DFU Mode
In contrast to getting into the DFU Mode, exiting is quite easy.
All you need to do is to first disconnect your iOS device then press and hold down the Power Button and Home Button for 10 seconds.
Alternatively, for the iPhone 7 and iPhone 7 Plus it would be the Volume Down button instead of the Home Button. The same thing applies for an iOS device which entered DFU Mode through the alternative method.
The Apple logo should appear as an indicator that it is booting up again and successfully exiting out of DFU Mode.
Hopefully, the time it took was worth it as you device should be now ready to go. However, if you still would not bother using this method, our final method is the best we have available. It is fast, easy and meticulous in getting all errors and problems fixed - perfect for those on the go!
This is where FoneDog - iOS System Recovery becomes a total no-brainer to use. It is important to also take notice that this method will NOT meddle with your data. A great advantage!Here are the steps for getting your iPhone out of the Red Screen of Death and back into working condition:
Download, install and launch FoneDog - iOS System Recovery. Once you have launched the program, verify that our easy-to-use interface is visible on your screen.
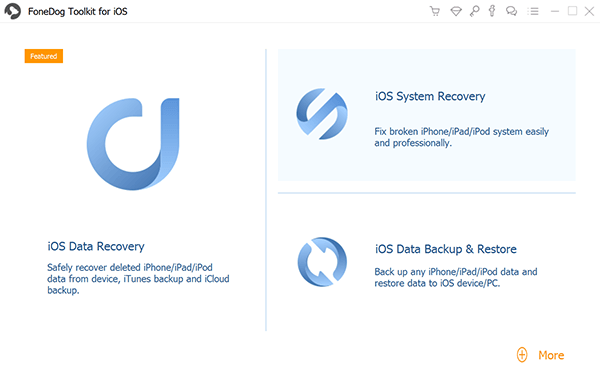
Download FoneDog Toolkit-Step1
Plug in your iOS device to the computer via USB cable. Confirm that FoneDog toolkit was able to detect your device and choose iOS System Recovery and click ‘Start’.
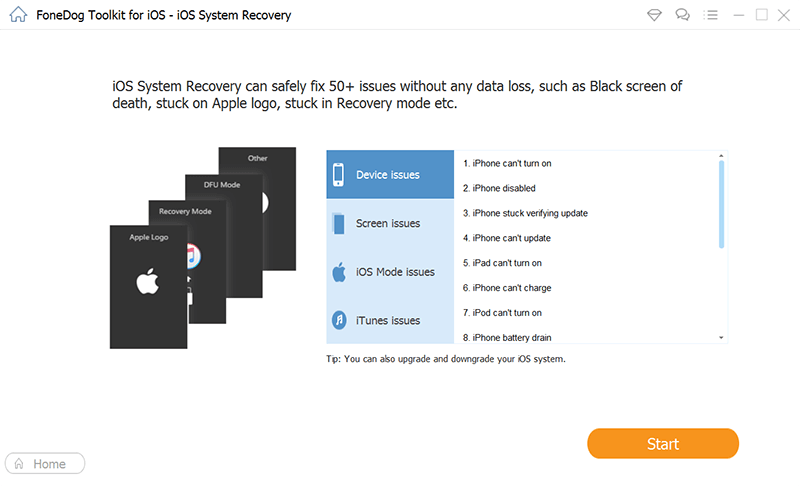
Connect Computer-Step2
Your iOS device will once again be automatically detected. Its firmware can be updated by clicking on ‘Download’
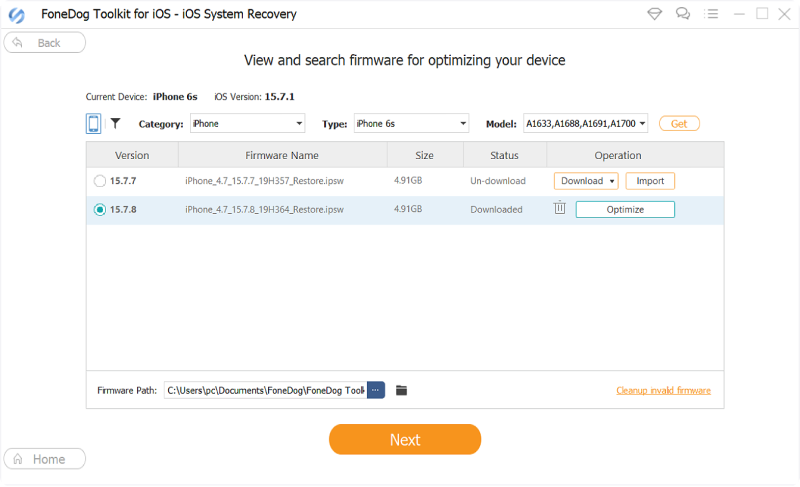
Download Firmware Package-Step3
Recovery will begin immediately. As you may have noticed, your iPhone has begun working as it should be and free from the bright red color. Allow FoneDog - iOS System Recovery to finish the process.
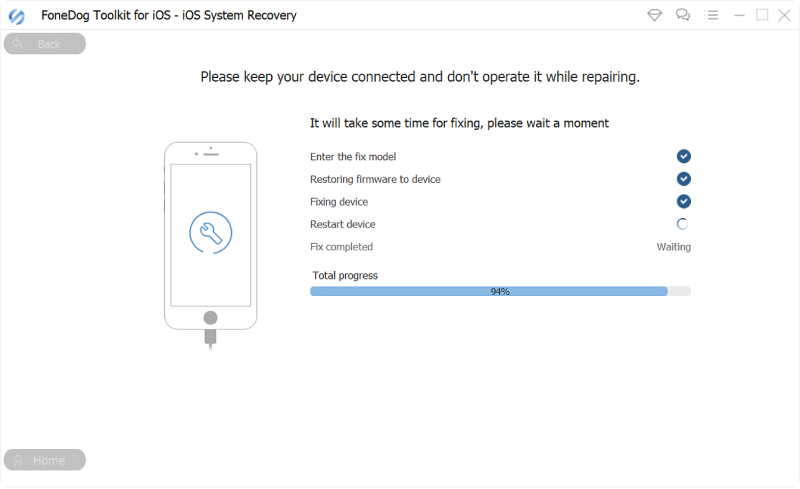
Repairing the Red Screen Death Issue -Step4
Finished! You are now ready to use your iOS device like normal.As you can see, with FoneDog all the work is done for you. You would not need to go through the long processes anymore.
It does everything from a complete system recovery to getting your precious data back to fixing those annoying restarts and errors. All you need is a computer or a laptop. We also made it easier than previous versions to get everything done faster! FoneDog iOS System Recovery is the best choice for you to fix the red screen death of iPhone issue.
Related Tutorial:
How to Fix White Screen of Death on iPhone Devices
Reasons for Black Screen of Death and How to Fix it
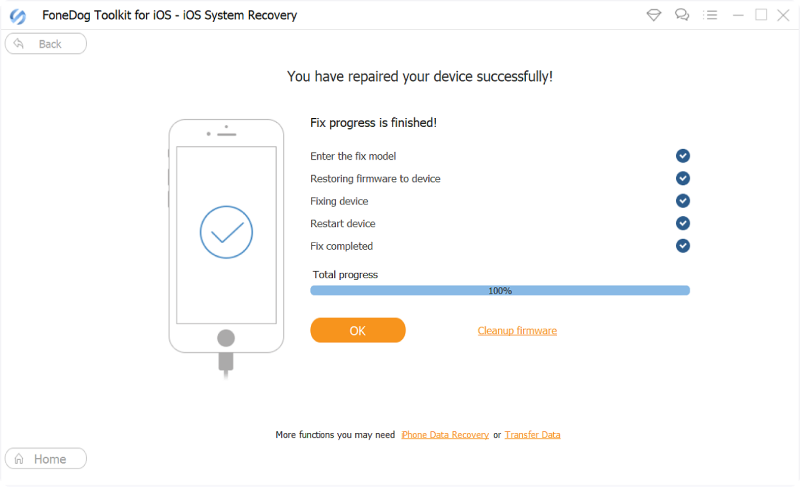
Finished Repairing the Issue of Red Screen-Step5
Now that you have experienced using the in-house FoneDog - iOS System Recovery software, you may have thought that things could never be that easy. Well, it actually is! And this goes for every aspect of every software we have available for you.
As stated before, if you have forgotten to backup your data via iTunes or even iCloud then you do not have to worry! FoneDog provides another solution just for that case in which we can recover all lost data through the simple application called FoneDog - iOS Data Recovery.
Yes, we do have everything you need to ensure your iOS device is always performing at its peak and keeping your data to yourself. With this said about the data, be informed that you would not have to ever visit a cell phone repair shop ever again, especially if you are looking for a cheap alternative other than Apple.
Your data would be at risk, but using this program solves all of that hassle and security threats. Remember that all of our products follow the same scheme, they are easy to use and numerous in providing any kind of fix or repair possible. One can fathom at all the possibilities and support received when using any FoneDog product. With that said, we encourage you to use our product.
You can start with a trial period to check and fix your immediate errors to see how effective our software is. You will also see why it is loved by all of our customers due to its easy-to-use user interface and functions. So why don’t you give us a try today, we promise that you won’t regret it!
Leave a Comment
Comment

iPhone/Android Devices’ Maintenance Expert
Staying home, listening to music, writing tech articles
Many people asked me to repair their mobile phones so I have a lot of experience in mobile phone repair, and I know a lot about Android or Apple phones.
iOS System Recovery
Repair various iOS system errors back to normal status.
Free Download Free DownloadHot Articles
 /
/
INTERESTINGDULL
/
SIMPLEDIFFICULT
Thank you! Here' re your choices:
Excellent
Rating: 4.5 / 5 (based on 71 ratings)
