FoneDog Screen Recorder
FoneDog Screen Recorder
Special Offer
Special Offer


By Nathan E. Malpass, Last updated: January 5, 2018
“My friends keep telling me to back up my Android phone, but I don’t understand what the fuss is about. Why is it important and how does Android backup and restore work anyway?
TIPS:
Part 1. What Is Android Backup and RestorePart 2. How to Back Up and Restore Data with FoneDog Android ToolkitPart 3. How to Backup Existing and Deleted DataPart 4. Video Guide: How Does Android Backup and Restore Work on Your AndroidPart 5. Conclusion
Backups are simply put copies of your device’s data. Built-in programs and third-party apps and computer software can create them. These programs normally access a device’s internal memory, SD card, and SIM card to back up data. They have their own limitations though. One example is the supported file type. An app like SMS Backup+ can only back up messages and does not cover media files. On the other hand, a software like FoneDog Toolkit can do both.
Automatic backups can be made according to a set schedule or frequency. You can do manual backups too. Files can be saved on the device, SD card, email, cloud, and the computer. Some backup program allows you to upload to different destinations. Others only do local backups, where the backup file is saved in the device.
Once a backup is performed, you can restore it anytime. Restoring backups involves extracting data from the backup to save them back to your device. This process is manually initiated. It is usually done after a complete or partial data loss. Note that backing up and restoring must both be done using the same program.
Android phones have an in-built service called Android Backup Service. It backs up selected data automatically if syncing is enabled. Your photos and contacts are part of what Google covers. However, your messages and call logs are not. The backups are saved to Google Drive. This method presents a big setback though. To restore your backup on Google, you need to perform a factory reset. This will delete all data on your phone. You face a serious risk of losing some of your files.
Although backups can give you peace of mind, what is important is to choose a reliable mode to backup and restore data. That is to ensure that your files stay intact and secure.
In this article, we’ll show you 2 safe ways to do it. The first way is to create a backup of your existing files. The second way is to export all of your files, both existing and deleted, to your PC.
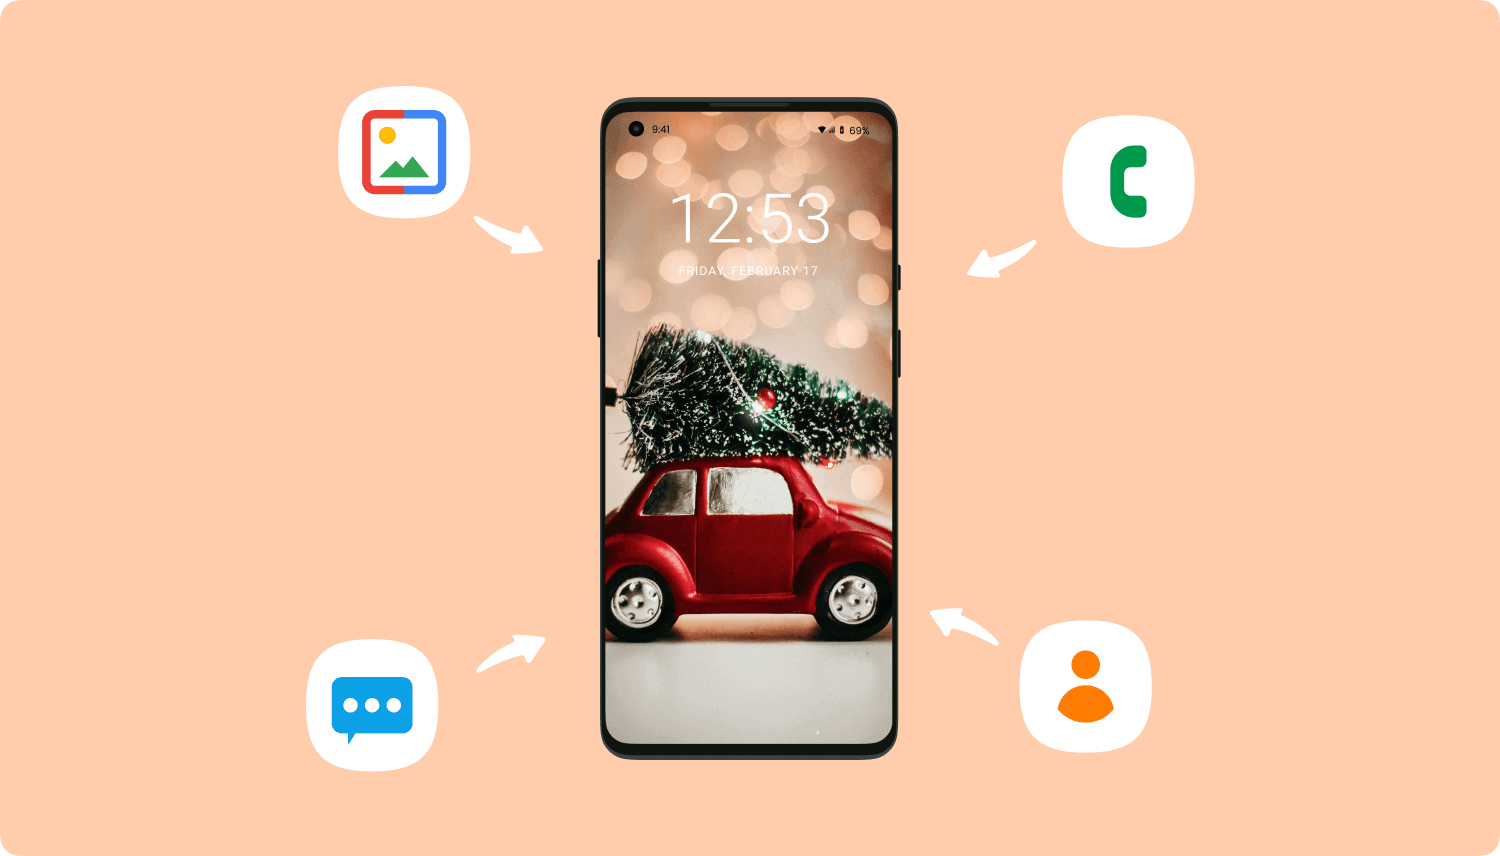
If taking the leap of faith when it comes to your data isn’t for you, FoneDog Android Toolkit is the way to go. With its Android Data Backup and Restore tool, you can back up a wide range of data and restore them without the risk of losing your valuable files. You can back up contacts, messages, call logs, images, videos, audio, and documents.
Download FoneDog Android Toolkit now to start backing up. Refer to our guide to know how Android backup and retrieve works. Be reminded that you cannot disconnect your phone from the computer while the software is performing its backup and restore function.
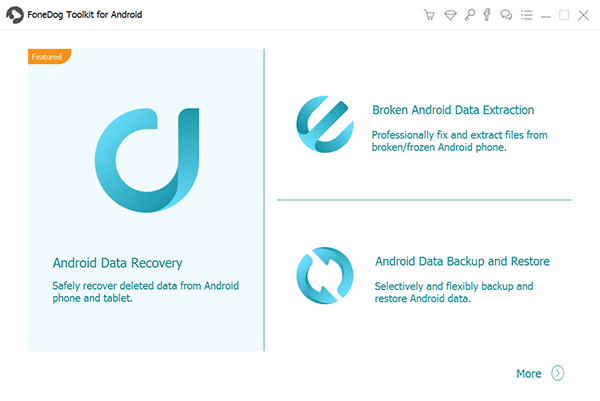
Run the software after successfully installing it. Select Android Data Backup and Restore from the available options.
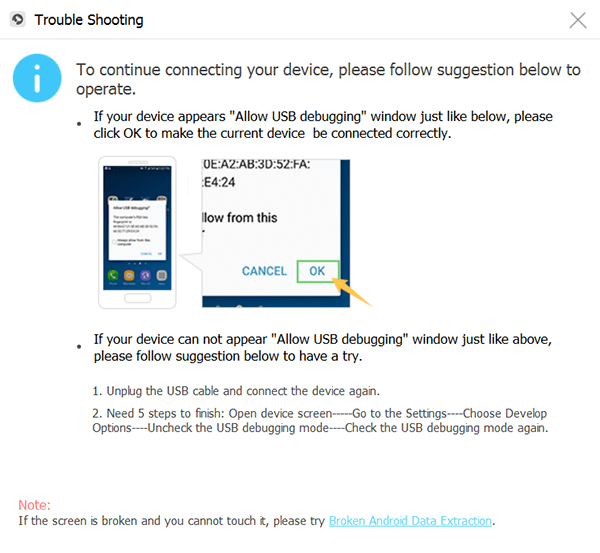
Connect your Android device to the computer. If you see a message on your device asking you to allow USB debugging, tap OK. If you don’t, follow the on-screen instructions to manually enable USB debugging.
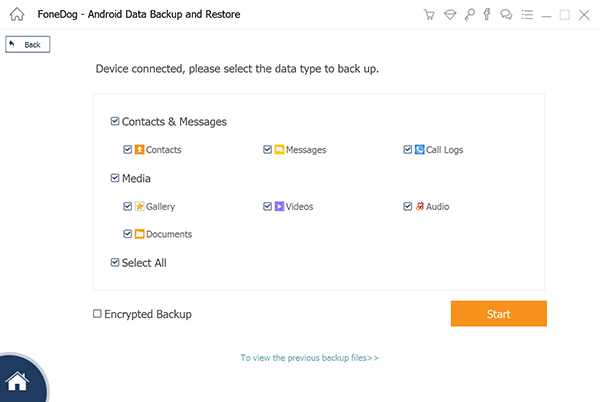
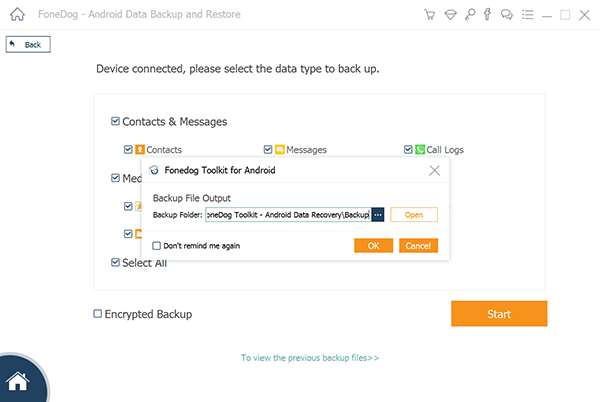
Click Device Data Backup. You will be directed to a window with a list of file types. The software will ask you to select which data you wish to back up. Tick the box of those items. You can also tick Encrypted Backup to secure your backup. Hit Start to proceed.
The backup process may take several minutes depending on file size. The software will notify you once the backup is finished. Simply click OK.
If you’re looking to restore your backup file, proceed to Step 4 of this guide.
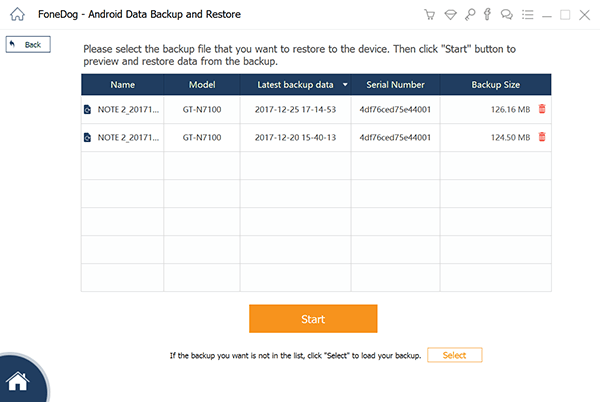
With the software still running, head to Android Data Backup and Restore and click Device Data Restore.
You will be provided with a list of existing backup files. The latest one will be shown first. Choose one and press Start.
Select the file types that you want to restore. Do so by ticking the box of the applicable items. When you’re done, press Recover and then OK to proceed.
It may take a while to restore your backup, but remember that your files are worth the wait.
If you have several files that you lost to a bad system crash or SD card corruption, don’t worry. You can still recover them and create a backup of those files. By using FoneDog Android Toolkit, you can retrieve deleted data without trouble. You can then export them to your computer. That way, you have a copy that you can always turn to if you need those files.
Download the software and wait for complete installation. From the presented tools, select Android Data Recovery.Connect your smartphone or tablet to your PC with a USB cable.
To allow the software to scan your device for files, you must enable USB debugging. If you see a prompt on your device asking you to allow USB debugging, tap OK. If not, refer to below instructions.
Android 4.2 or higher
Android 3.0 to 4.1
Go to Settings > Developer options > USB debugging
Android 2.3 or lower
Go to Settings > Applications > Development > USB debugging
After doing the above steps, tap OK on your device and click OK on the software.
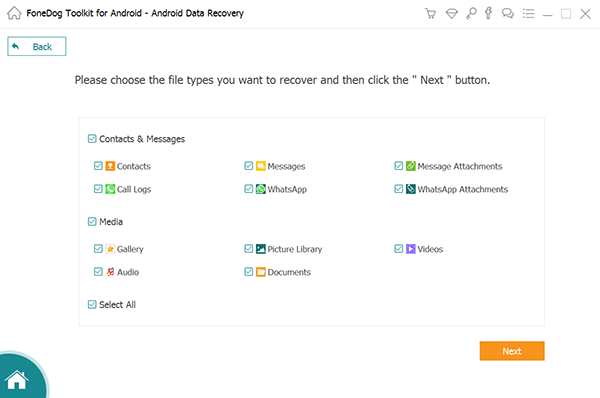
The software will direct you to a window showing all supported file types. By default, all types are selected. However, you may untick some so the software will scan only those that you need. When you’re satisfied, hit Next.
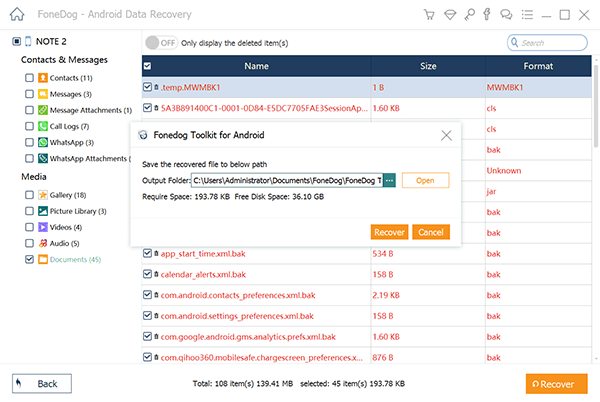
The interface will show all detected files. On the left, you will see different file categories. Click on them one by one. Review each type’s contents and select the files that you want to export.
When you’re finished choosing your files, hit Recover. Wait for the software to export your files. Once done, you can view them. You can also manually transfer the files to your device.
Now that you know how Android backup and restore work, you can start protecting your files. You can rely on FoneDog Android Toolkit to finish the job. With backups in place, data loss will no longer be a major concern to you. You can also use your backup or exported files to easily transfer data to a new phone.
The software is compatible with thousands of Android devices. Plus, you can enjoy its features for 30 days at no cost. You simply have no excuse to not back up your data!
Leave a Comment
Comment

iPhone/Android Devices’ Maintenance Expert
Staying home, listening to music, writing tech articles
Many people asked me to repair their mobile phones so I have a lot of experience in mobile phone repair, and I know a lot about Android or Apple phones.
Android Data Backup & Restore
Back up your Android data and selectively restore to Android
Free Download Free DownloadHot Articles
 /
/
INTERESTINGDULL
/
SIMPLEDIFFICULT
Thank you! Here' re your choices:
Excellent
Rating: 4.7 / 5 (based on 87 ratings)
